
Desserts
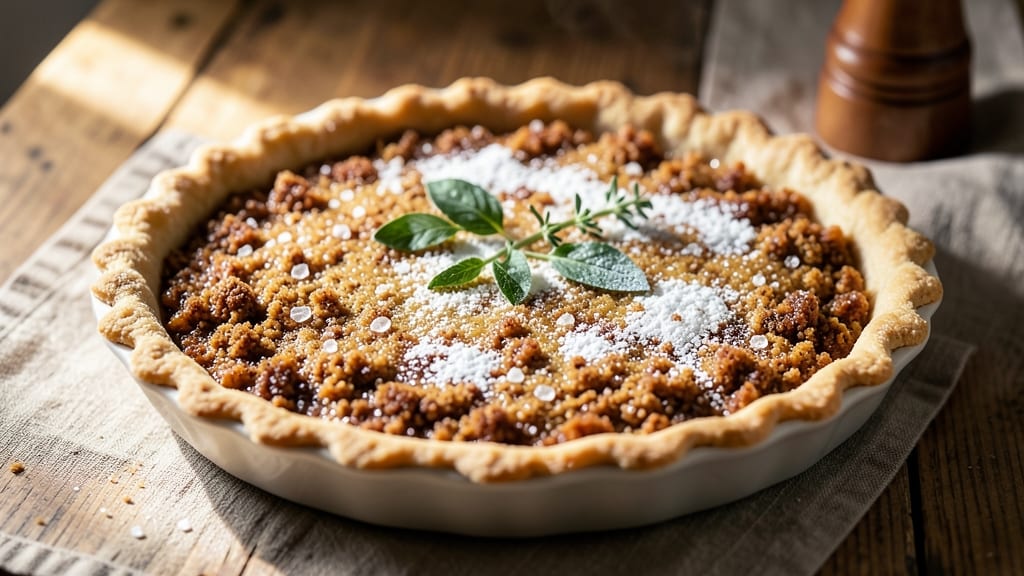
This 9-inch graham cracker pie crust recipe delivers the perfect crispy base for both baked pies and no-bake desserts—no one will guess it's this simple.
The secret lies in the right balance of graham cracker crumbs, melted butter, and a touch of sugar to create that signature buttery crunch without turning soggy.
I developed this version after years of testing, and it never fails to impress, whether you're making a classic fruit pie or a creamy cheesecake.
The beauty of this crust is its versatility—it works equally well for baked pies (like apple or pecan) and no-bake desserts (like cheesecake or key lime pie). The key is pressing the mixture evenly into the pan and chilling it thoroughly before baking or filling.
This ensures a sturdy, crisp foundation that holds up to any filling without crumbling. No special equipment is needed, just a few pantry staples and a little patience.
What sets this recipe apart is the crispy-yet-tender texture that comes from using a mix of graham cracker crumbs and a light dusting of powdered sugar. The result is a base that's sturdy enough to support heavy fillings but still melts in your mouth with every bite.
Whether you're a seasoned baker or just starting out, this crust is foolproof and delivers professional-quality results every time.
Once you try this perfectly crispy graham cracker crust, you'll never go back to store-bought versions. It's the ideal foundation for any dessert, and the best part?
It takes less than 15 minutes to prepare. Let's get started on creating the ultimate dessert base that will elevate every pie you bake.
Ingredients for 9 inch graham cracker pie crust
Six simple ingredients transform into the crispy-yet-tender crust you'll crave for every pie.
| Ingredient | Amount | Notes |
|---|---|---|
| Graham Cracker Crumbs 🍪 | 1 ½ cups | Finely crushed, no large pieces |
| Unsalted Butter 🧈 | ½ cup | Melted and cooled slightly |
| Granulated Sugar 🍚 | ¼ cup | Lightly packed |
| Powdered Sugar 🍚 | 2 tbsp | For crispy texture |
| Vanilla Extract 🌿 | 1 tsp | Pure, high-quality preferred |
| Pinch of Salt 🧂 | ⅛ tsp | Enhances flavor |
Graham cracker crumbs are the star here—Honey Maid or Keebler are my go-tos, but any quality brand works. If you're using whole graham crackers, pulse them 3-4 times in a food processor (no need to over-blend). The butter needs to be melted but not hot—just warm enough to coat the crumbs. I always grab unsalted butter from Trader Joe's for this recipe, but any brand works. Pro tip: Chill your butter before measuring to avoid over-melting when it hits the warm crumbs.
No vanilla extract? Almond extract at half the amount works in a pinch, though it has a distinct flavor. Running short on powdered sugar? Granulated sugar works too, but the texture won't be quite as crisp. The salt is non-negotiable—it balances the sweetness and enhances the buttery flavor. If you're making this for a no-bake dessert, add 1 tbsp of cornstarch to the mix for extra stability. For baked pies, skip it—the butter and sugar combo creates enough structure. And if your crumbs seem too dry, add 1 tsp of lemon juice to help bind everything together.
This crust keeps beautifully—press it into a 9-inch pie pan, wrap tightly with plastic, and refrigerate for up to 5 days. For no-bake desserts, chill for at least 2 hours before adding fillings. If baking, pre-bake for 8-10 minutes at 350°F to set the crust before adding fillings. Leftovers? Freeze for up to 3 months—just thaw in the fridge before using. Trust me, a batch of this crust lasts less than a week in my house once people taste it!
Why You'll Love This Recipe
- No-Fuss Assembly: I swear by this crust for lazy nights—just mix, press, chill. No rolling pins, no fussing with dough. The graham crumbs and melted butter cling together like magic, and the sugar adds that perfect sweet crunch without extra work.
- Buttery Vanilla Crunch: That first bite? Warm, buttery graham crackers with a whisper of vanilla—it’s like dessert hugs your teeth. The powdered sugar dusting seals the deal, making it taste like a bakery’s secret crust, not some sad store-bought shortcut.
- Pie Base for Anything: Need a crust for cheesecake? Key lime pie? S’mores dip? This one’s my go-to. It holds up to creamy fillings, stays crispy even when chilled, and won’t turn into a soggy mess like some recipes I’ve tried.
- Budget-Friendly Pantry Staple: Honestly, you’re probably already stocked. Graham crackers, butter, sugar—no specialty ingredients, just real food. I’ve made this for potlucks, last-minute desserts, and even as a snack for my kids’ school lunches. Zero waste, all flavor.
Step-by-step instructions for a crispy graham cracker pie crust
Here's how to create a buttery, ultra-crispy base that'll make any dessert shine.
Crush the Graham Crackers to Perfect Consistency
Place the 1.5 cups graham cracker crumbs in a food processor or heavy-duty plastic bag. If using a food processor, pulse until you achieve a fine, sand-like texture with no large pieces remaining. For the bag method, seal tightly and use a rolling pin to crush until uniformly fine.
I can't stress enough how important this step is for that signature crispy texture. Any large pieces will stay soft and chewy, ruining the perfect crunch. Run your fingers through the crumbs—if you feel any gritty bits, pulse them again. This ensures every bite delivers that satisfying snap you crave.
Melt and Cool the Butter
Melt the 0.5 cup unsalted butter in a microwave-safe bowl using 30-second intervals, stirring between each, until completely liquid. Let it cool for 5-7 minutes until it reaches a warm-but-not-hot temperature—you should be able to touch it comfortably without burning your fingers.
The cooling step is crucial here. Too-hot butter will melt the sugars immediately, creating a gummy mess instead of that perfect crispy crust. If you're impatient, place the bowl in an ice bath for 2-3 minutes to speed up the cooling process while maintaining control over the temperature.
Mix All Ingredients Until Uniform
In a large mixing bowl, combine the cooled butter with the 0.25 cup granulated sugar, 2 tbsp powdered sugar, 1 tsp vanilla extract, and 0.125 tsp salt. Mix with a wooden spoon until the sugars are mostly dissolved and the mixture looks moist but not wet.
Now gradually add the graham cracker crumbs, mixing gently with your hands or a spoon. You're looking for a texture that holds together when pressed but doesn't crumble apart. If it feels too dry, add 1-2 teaspoons of cold water—just enough to help it bind. The mixture should resemble wet sand that sticks together when you squeeze it.
Press Into the Pie Dish for Perfect Shape
Transfer the mixture to a 9-inch pie dish and press firmly and evenly into the bottom and about 1 inch up the sides, using your fingers or the bottom of a measuring cup. Press down with steady pressure—this creates a tight, compact base that won't crumble during baking.
Here's the pro tip: Chill the pie dish in the freezer for 10-15 minutes before pressing. The cold surface helps the mixture firm up faster, making it easier to create that clean edge. Once pressed, use a sharp knife to trim any uneven edges. The crust should be about ¼-inch thick for optimal crispiness.
Bake Until Golden and Crispy
Preheat your oven to 350°F. Bake the crust for 10-12 minutes until the edges are golden brown and the center feels firm to the touch. Watch closely after 8 minutes—the crust can go from perfect to overdone in seconds.
For that extra-crispy finish, I like to increase the oven temperature to 375°F for the final 2 minutes of baking. This hot blast creates that beautiful caramelized color and texture. Let the crust cool completely before adding your filling—this prevents sogginess and ensures that perfect crispy texture in every bite.
Pro Tips For Making 9 Inch Graham Cracker Pie Crust
- Melt Butter Slowly: I learned this the hard way—dumping cold butter into the crumbs makes a greasy mess that won’t bind. Instead, melt the butter just until it’s liquid (about 30 seconds in the microwave, stirring halfway), then let it cool for 30 seconds before mixing. Warm butter coats the crumbs evenly without turning them into a paste.
- Pulse Crumbs Twice: Skip the food processor if you’re in a hurry, but if you’re using it, pulse the graham crumbs two separate times—first for 3-4 seconds to break them down, then another 2-3 seconds to ensure even texture. Over-processing turns them into dust, which makes the crust crumble instead of hold together.
- Press Firmly, Then Freeze: Don’t just tap the crust into the pan—press it hard with a measuring cup or glass, especially around the edges. After pressing, pop the whole pie plate in the freezer for 10 minutes. This prevents the crust from expanding when you add the filling, which is why so many homemade versions end up looking like they’ve been attacked by ants.
- Use Powdered Sugar Last: The powdered sugar in this recipe isn’t just for sweetness—it’s the glue. Mix it after you’ve combined the crumbs, melted butter, and vanilla, then pulse it in just until it disappears. Adding it early makes the mixture clump, and you’ll end up with dry spots in your crust.
Dietary considerations for this recipe
Gluten-Free Adaptation
For a gluten-free version, replace the graham cracker crumbs with 1.5 cups gluten-free digestive biscuits (like Schar or Annie's) or gluten-free graham crackers (check Trader Joe's or King Arthur brands).
Crush them exactly the same way—pulse in a food processor until fine. The texture stays crispy, but watch for slight variations in flavor. 🌱
If you can't find gluten-free graham crackers, try crushed gluten-free shortbread cookies with an extra 1 tbsp cornstarch to help bind the mixture. This keeps the crust sturdy for no-bake desserts like cheesecake. Always check labels for hidden gluten!
Dairy-Free Version
Swap the butter for ½ cup melted coconut oil or vegan butter (like Miyoko's or Earth Balance). The coconut oil adds a subtle tropical note that pairs well with fruit pies, while vegan butter keeps the classic flavor.
Chill the coconut oil slightly before mixing to prevent melting the sugars too quickly. ❄️
For extra richness, add 1 tbsp dairy-free cream cheese (like Kite Hill) to the mixture. This helps mimic the buttery texture without lactose. Just mix it in with the wet ingredients before combining with the crumbs. The crust will still be crispy but with a smoother mouthfeel.
Nut-Free Considerations
Standard graham crackers are nut-free, but always double-check the packaging—Honey Maid and Keebler are typically safe, but cross-contamination can occur. For added safety, make your own graham cracker crumbs using a nut-free graham cracker recipe (like King Arthur Flour's simple version). 🧂
If you're avoiding all potential allergens, use gluten-free oat crumbs (blend ½ cup rolled oats into a fine powder) mixed with 1 tsp xanthan gum to help bind the crust. This works surprisingly well for both baked and no-bake desserts, though the texture will be slightly denser.
Low-Sugar Options
Reduce the granulated sugar to 2 tbsp and the powdered sugar to 1 tbsp, then add 1 tsp monk fruit sweetener or erythritol to maintain sweetness without excess sugar.
The crust will still hold together but with a slightly less crisp edge. For baked pies, this works beautifully with tart fillings like berry compotes. 🍓
If you're watching carbs, skip the sugar entirely and use 1 tsp vanilla bean paste (instead of extract) for flavor. The crust will be more savory, so it pairs well with savory-sweet fillings like caramelized apples with cinnamon. Trust me, it’s still delicious!
Nutrition facts
Frequently asked questions about graham cracker pie crust
Can I make this crust without a food processor?
Use a heavy-duty plastic bag and rolling pin—place the graham crackers in the bag, seal tightly, and crush with the rolling pin until you get fine crumbs. For extra efficiency, freeze the crackers first—they'll shatter more easily. This method works just as well for achieving that perfect texture!
How do I prevent my crust from getting soggy?
Always pre-bake the crust for 10-12 minutes at 350°F before adding fillings, especially for baked pies. For no-bake desserts, chill the crust for at least 2 hours before adding fillings like cheesecake. The cold helps set the butter and prevents moisture from seeping in. Pro tip: Add a thin layer of jam or applesauce between crust and filling as a moisture barrier!
Can I use this crust for savory dishes?
While traditionally sweet, you can adapt this crust for savory applications! Skip the vanilla and sugar, and add 1 tsp garlic powder or ½ tsp smoked paprika to the crumbs. It works beautifully with spinach and cheese fillings or as a base for mini quiches. The buttery flavor still shines through!
What's the best way to store leftover crust?
Wrap the pressed crust tightly in plastic wrap and refrigerate for up to 5 days. For longer storage, freeze the crust (unbaked) for up to 3 months. Thaw in the fridge overnight before using. Pre-baked crusts can be reheated in the oven for 5 minutes at 350°F to restore crispiness.
Why did my crust crack during baking?
Cracking usually happens when the crust isn't pressed evenly or the oven temperature fluctuates. Press the mixture firmly into the pan and chill it for 15 minutes before baking. Also, avoid opening the oven door during baking—this causes temperature drops that lead to cracks. For extra stability, add 1 tbsp cornstarch to the dry ingredients!