
Desserts
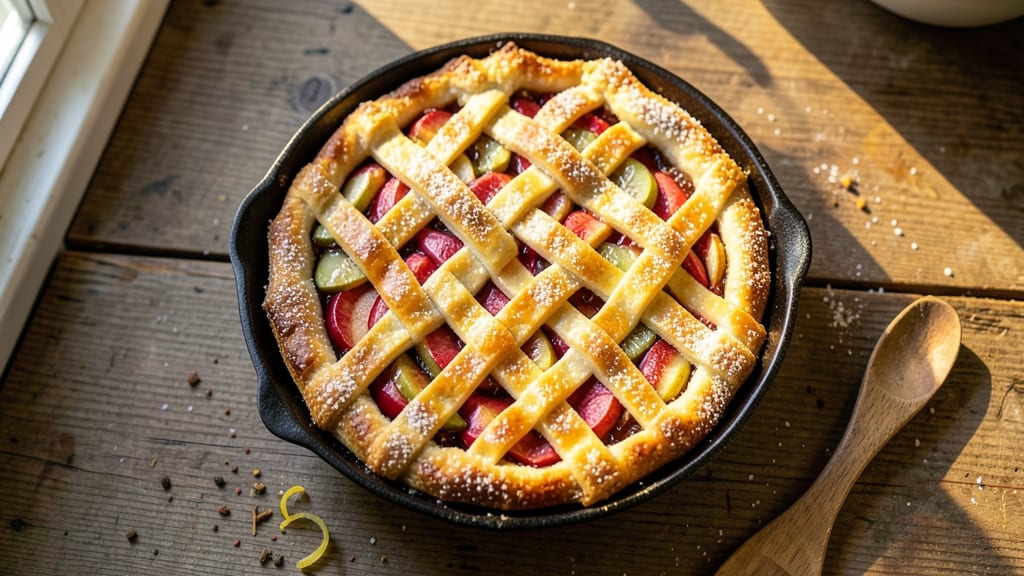
This 9.5-inch apple pie recipe delivers the perfect balance of flaky, golden crust and spiced apple filling that tastes like autumn in every bite.
The secret lies in a simple yet foolproof pie dough that stays tender while baking, and a filling that caramelizes just enough to create that signature lattice effect. I've perfected this recipe over years of baking, ensuring the crust never gets soggy and the apples stay tender yet flavorful.
The crust uses a classic all-butter shortcrust that's rolled out to the perfect thickness—thin enough to crisp beautifully, but thick enough to hold its shape.
For the filling, a mix of tart and sweet apples (like Granny Smith and Honeycrisp) creates depth of flavor, while cinnamon, nutmeg, and a touch of lemon juice brighten every slice.
The key is baking at the right temperature to ensure the crust browns evenly while the filling thickens just enough to set.
What you'll end up with is a pie that looks like it came straight from a bakery—golden, bubbling edges, a lattice crust that's crisp but not brittle, and filling that's perfectly spiced without being overpowering.
The aroma alone will have everyone gathering around your kitchen, and the first bite delivers that perfect combination of flaky, buttery crust and warm, spiced apple.
This recipe scales perfectly for holidays or family gatherings, and leftovers reheat beautifully. Whether you're baking for a special occasion or just craving a classic dessert, this apple pie delivers restaurant-quality results with a homemade touch. Let's get started!
Ingredients for 9.5 inch apple pie
Golden crust, spiced filling—just 13 ingredients for an autumn masterpiece.
| Ingredient | Amount | Notes |
|---|---|---|
| All-Purpose Flour 🌾 | 3 ½ cups | Sifted for light texture |
| Unsalted Butter 🧈 | 1 ¼ cups | Cold, cubed for flaky crust |
| Granny Smith Apples 🍎 | 4 medium | Peeled, cored, sliced thin |
| Honeycrisp Apples 🍎 | 4 medium | Peeled, cored, sliced thin |
| Granulated Sugar 🍚 | 1 ¼ cups | For filling sweetness |
| Light Brown Sugar 🍚 | ¼ cup | Packed, for caramelization |
| Ground Cinnamon 🍃 | 2 tbsp | Freshly ground preferred |
| Ground Nutmeg 🌿 | ½ tsp | Freshly grated for warmth |
| Lemon Juice 🍋 | 2 tbsp | Freshly squeezed |
| Salt 🧂 | 1 tsp | Fine sea salt preferred |
| Ice Water 💧 | ½ cup | For pie dough elasticity |
| Vanilla Extract 🌸 | 1 tsp | Pure vanilla preferred |
| Cornstarch 🌾 | 2 tbsp | For filling thickness |
The butter is non-negotiable here—Plugrá or Land O'Lakes unsalted work best. Grab it cold from the fridge, cut into cubes, and handle it as little as possible to keep that flaky magic. For apples, local orchards or Trader Joe's have the freshest, but grocery store Honeycrisp and Granny Smith are fine if they're firm and shiny. Avoid anything bruised or mealy—those apples turn mushy. I always buy a few extra just in case, and the peeling takes about 10 minutes if you're doing it by hand (or skip it for rustic texture).
No vanilla extract? Vanilla sugar or a pinch of cinnamon adds depth. Short on cornstarch? Extra flour at half the amount works in a pinch, but it won't thicken as beautifully. The spices are where the magic happens—Penzeys or McCormick for the best quality. If you're feeling fancy, toast your cinnamon and nutmeg in a dry pan for 30 seconds to deepen the flavor. The lemon juice can be bottled, but fresh is brighter—use Meyer lemons if you've got them. For the lattice, I use a knife to cut the strips, but a pizza cutter works too if you're in a hurry.
This pie reheats beautifully—just 10 minutes at 350°F with a splash of water in the pan. Keeps 3-4 days in the fridge, 3 months frozen. I always make two pies for gatherings—one for the day, one for leftovers. Store the extra wrapped tightly in foil to keep it fresh. The crust stays crisp for about 2 days if you're serving it cold, but it's best enjoyed warm with a scoop of vanilla ice cream.
Why You'll Love This Recipe
- No-Roll Crust Hack: I swear by this trick—just mix cold butter into flour until it crumbles like magic. No chilling, no stress, and the flaky layers still happen. (Yes, even on a Tuesday night.)
- Tart-Sweet Magic: Granny Smiths hold their shape while Honeycrisp melts into buttery bliss—that balance is everything. A sprinkle of sugar on top caramelizes into the crispy edges I can’t resist.
- Weekend or Weeknight: Same perfect pie whether you bake it for brunch or pack slices for lunch. The 9.5-inch size fits one pan, feeds 6-8, and reheats beautifully. (My go-to for potlucks and lazy Sundays.)
- Budget-Friendly Luxury: Butter and apples stretch further than you’d think—this recipe costs me half what store-bought pies do. Plus, leftovers? Warm them with vanilla ice cream, and suddenly you’ve got dessert for days.
Step-by-step instructions for 9.5-Inch apple pie
Here's how to build a pie with a flaky crust and filling so spiced it'll have everyone asking for seconds.
Make the Perfect Pie Crust
In a large bowl, combine the 3.5 cups all-purpose flour and 1 tsp salt. Cut in the 1.25 cups cold, cubed unsalted butter using a pastry cutter or your fingers until the mixture resembles coarse crumbs with pea-sized butter pieces. This texture is crucial—it ensures flaky layers when baked.
Drizzle in the 0.5 cup ice water gradually while stirring with a fork. The dough will come together when you can form a shaggy mass. Shape it into a disk, wrap in plastic, and chill for at least 1 hour. Real talk: don't skip this—cold dough prevents shrinking and makes rolling easier.
Prepare the Spiced Apple Filling
Peel, core, and slice the 4 Granny Smith apples and 4 Honeycrisp apples into ¼-inch thick slices. Toss them immediately with 2 tbsp lemon juice to prevent browning. In a large bowl, combine the sliced apples with 1.25 cups granulated sugar, 0.25 cup packed light brown sugar, 2 tbsp ground cinnamon, 0.5 tsp ground nutmeg, and 1 tsp vanilla extract. Mix gently but thoroughly—this ensures even distribution of spices throughout the filling.
Let the mixture sit for 15 minutes while you roll out the crust. This resting time allows the apples to release some juices, which helps create a thicker, less watery filling when baked. You'll see the slices soften slightly and the sugars begin to caramelize just a bit—this is your first taste of the magic to come.
Assemble the Pie
On a lightly floured surface, roll out half of the chilled pie dough to fit a 9.5-inch pie dish, leaving a ½-inch overhang on all sides. Gently transfer it to the dish and press it into the bottom and up the sides. Here's the thing—don't worry if it's not perfect. You'll trim the excess later, and the pie will still look beautiful.
Pour the apple filling into the crust, mounding it slightly in the center. Sprinkle the 2 tbsp cornstarch evenly over the top—this prevents the filling from becoming too runny during baking. Roll out the remaining dough and place it over the filling, sealing the edges by pinching them together with your fingers or a fork. Cut a few slits in the top crust for steam to escape.
Bake to Golden Perfection
Preheat your oven to 375°F. Place the pie on a baking sheet to catch any drips, then bake for 50-55 minutes. The crust should be deep golden brown with a few spots of light brown, and the filling should bubble gently through the slits in the top crust. I know it seems like a long time, but patience here ensures the filling cooks through without burning.
About 15 minutes before the pie is done, brush the top crust with a little applesauce or milk for extra shine. When the crust is golden and the filling is bubbling but not overflowing, remove the pie from the oven. Let it cool for at least 2 hours before slicing—this resting period allows the filling to set properly and makes for cleaner slices.
Pro Tips For Making 9.5 Inch Apple Pie
- CHILL THE CRUST: Use cold butter and ice water for the dough—this isn’t just a rule, it’s the reason your crust won’t turn into a greasy mess. I learned this the hard way after rolling out a warm dough and watching it shrink like a sad soufflé. Press the butter pieces into the flour with your fingertips, then add ice water one tablespoon at a time until it just holds together. No need to overwork it; this dough hates kindness.
- CUT APPLES SMALL: Skip the thick slices—this pie needs apples to soften fast but stay intact. Core and peel the Granny Smiths and Honeycrisps, then cut them into ¼-inch chunks (not wedges). Toss them in lemon juice immediately to stop browning, then sprinkle with a pinch of cinnamon before adding sugar. Thinner pieces cook evenly, and the acid keeps the filling from turning into apple mush.
- VENT THE CRUST: Poke holes in the bottom crust with a fork before adding filling—yes, even if it looks like overkill. This prevents steam from building up and turning your perfect lattice into a soggy pancake. After filling, brush the top crust with a thin layer of egg wash (1 egg + 1 tablespoon water), then sprinkle with coarse sugar. The vents let air escape, so the crust puffs instead of puffs then collapses.
- BAKE LOW AND SLOW: Your oven’s top rack is not your friend. Preheat to 375°F, then slide the pie onto the middle rack and reduce heat to 350°F for the first 20 minutes. This gives the bottom crust time to set without burning while the filling cooks through. After 20 minutes, bump it back to 375°F to brown the lattice. I used to rush this, and the crust always came out either pale or charred—neither is worth the effort.
Dietary considerations for this recipe
Gluten-Free Adaptation
For a gluten-free version, swap the all-purpose flour with a 1:1 gluten-free flour blend (like Bob’s Red Mill or King Arthur) and add ½ tsp xanthan gum to the dough.
Chill the dough 30 minutes extra—gluten-free crusts can be trickier to handle. Use a 9.5-inch gluten-free pie crust from the store as a shortcut if needed. 🌾
Dairy-Free Options
Replace the 1.25 cups unsalted butter in the crust with 1 cup dairy-free butter (like Miyoko’s or Earth Balance) or 1 cup coconut oil (solid). For the filling, use coconut milk (2 tbsp) instead of vanilla extract to add richness.
The crust may be slightly less flaky, but it’ll still hold up beautifully. 🧈
Lower Sugar Version
Reduce the 1.25 cups granulated sugar to 1 cup and add 1 tbsp monk fruit sweetener (or erythritol) for a 50% sugar reduction. Boost the cinnamon to 2.5 tbsp to enhance flavor. The filling will still caramelize—just watch it closely to avoid over-browning. 🍚
Nut-Free & Allergy-Friendly
This recipe is naturally nut-free, but double-check your ground cinnamon and nutmeg for cross-contamination warnings. Use certified gluten-free oats (if adding to the crust) and ensure your vanilla extract is processed in a nut-free facility. Always verify labels when dealing with allergies. 🌿
Vegan Twist
For a vegan crust, use vegan butter (like Earth Balance) and flax eggs (1 tbsp ground flaxseed + 3 tbsp water per egg). Replace honey in the filling with maple syrup (2 tbsp) and use coconut milk (2 tbsp) instead of vanilla.
The crust will be slightly denser but still delicious. 🌱
Keto-Friendly Adjustments
Skip the crust entirely and use a 9.5-inch almond flour crust (mix 2 cups almond flour, ¼ cup melted butter, and 1 egg). For the filling, reduce sugar to ¼ cup erythritol and add 1 tsp cinnamon for depth.
The texture will be more like a tart, but it’s a keto-friendly alternative. 💪
Nutrition facts
Frequently asked questions
Can I use a different size pie dish with this recipe?
This recipe is specifically designed for a 9.5-inch pie dish to achieve the perfect balance of crust and filling. For an 8-inch dish, reduce apples to 6 medium and adjust sugar to 1 cup total. For a 10-inch dish, increase apples to 6 medium and sugar to 1.5 cups total. Always maintain the same crust-to-filling ratio to prevent a soggy bottom.
How do I prevent a soggy bottom crust?
The secret is pre-baking the bottom crust for 10-12 minutes at 375°F before adding filling. For extra insurance, sprinkle 1 tbsp cornstarch or crushed cornflakes on the crust before filling. Chilling the pie for 30 minutes after assembly also helps set the filling before baking. A pie shield or baking dish underneath catches drips and keeps the crust crisp.
What's the best way to store leftover apple pie?
Store cooled pie in an airtight container at room temperature for up to 2 days. For longer storage, refrigerate for 3-4 days or freeze for 3 months. To reheat, cover with foil and warm at 350°F for 15-20 minutes. For microwave reheating, cover with a damp paper towel and heat for 20-30 seconds to maintain moisture.
Can I make this pie ahead of time?
Assemble the pie (unbaked) and refrigerate for up to 24 hours before baking. For the best results, bake it straight from the fridge—no need to bring to room temperature. The dough will be firmer, making it easier to handle. You can also blind-bake the crust up to 2 days ahead and store it wrapped in plastic at room temperature.
What if I don't have a pie dish?
Use a 9-inch deep-dish pie plate (reduce filling by 1 cup) or a 10-inch pie plate (increase filling by 1 cup). For a rustic look, try a cast iron skillet (preheat well) or even a baking dish lined with foil. Just remember: the 9.5-inch size gives the perfect proportion of crust to filling for that classic apple pie experience.