
Desserts
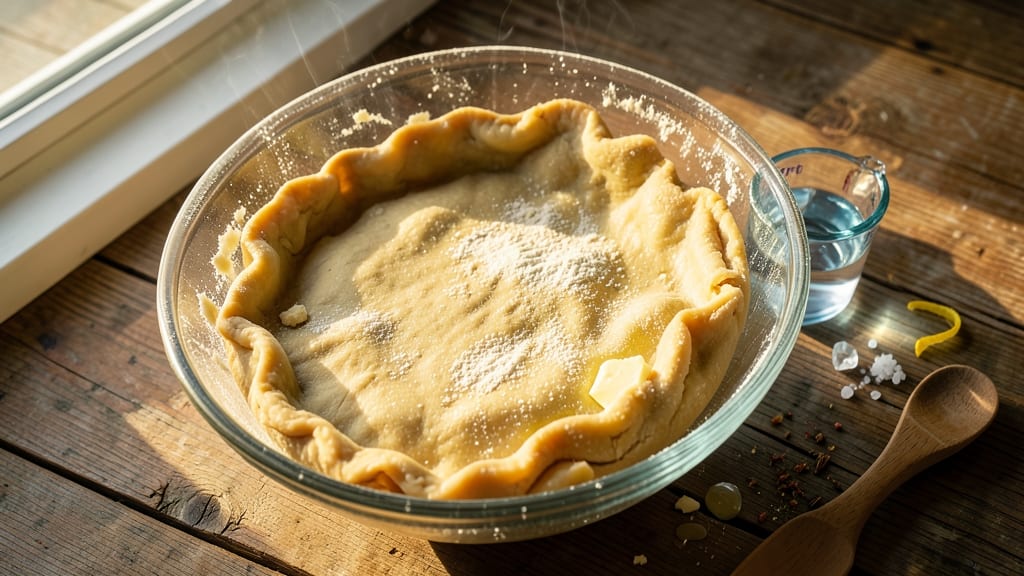
This all-purpose pie dough recipe delivers a foolproof, flaky crust that works for sweet pies, savory tarts, and everything in between—all in just 15 minutes of active time.
The secret lies in cold butter and proper handling, which transforms basic ingredients into a golden, tender crust that bakes up perfectly every time. Whether you're making a classic apple pie or a rich quiche, this versatile dough is your foundation for restaurant-quality results at home.
The recipe combines simple pantry staples—flour, butter, salt, and ice water—for a dough that's easy to work with yet impressive enough for special occasions. The key technique is keeping everything cold, which prevents the butter from melting too quickly and ensures those signature flaky layers.
Even beginners will achieve a crisp, sturdy crust with minimal effort, thanks to clear instructions and foolproof methods.
What makes this dough truly versatile is its adaptability to both sweet and savory applications. Use it for classic fruit pies, rich cheesecakes, or even savory galettes—each application benefits from the same reliable foundation.
The dough can be prepped ahead and stored for up to 3 days, or frozen for months, making it perfect for meal planning.
Once baked, the crust holds its shape beautifully while maintaining a tender crumb and crisp edges. Whether you're a seasoned baker or just starting out, this all-purpose pie dough will become your go-to recipe for any pie or tart you dream up. Ready to master the perfect crust?
Ingredients for all purpose pie dough
Seven simple ingredients transform into a restaurant-quality crust with proper technique.
| Ingredient | Amount | Notes |
|---|---|---|
| All-Purpose Flour 🌾 | 2 ½ cups | Spooned and leveled, not packed |
| Unsalted Butter 🧈 | 1 cup | Cold, cubed into 1/2-inch pieces |
| Ice Water 💧 | ⅓ cup | Freshly chilled, not tap water |
| Diamond Crystal Kosher Salt 🧂 | ½ tsp | Fine grain preferred |
| Granulated Sugar 🍚 | 2 tbsp | For slightly sweetened crust |
| White Vinegar 🍶 | 1 tsp | Enhances gluten development |
| Cornstarch 🌽 | 1 tbsp | Promotes crispness |
The butter is non-negotiable—use high-fat, unsalted European-style butter like Plugrá or Land O'Lakes Cultured Butter for optimal flakiness. Purchase it in small blocks rather than tubs to maintain cold temperatures longer. Whole Foods Market or specialty grocery stores often carry superior options, but any quality brand works if stored properly. Keep the butter cold by chilling it for 30 minutes before cubing—this prevents premature melting during mixing. The flour should be all-purpose, not self-rising, and stored in a cool, dry place to preserve freshness. Bob's Red Mill or King Arthur brands are reliable choices for consistent results.
No ice water? Freeze water in ice cube trays ahead of time for instant cubes. Substitute cold sparkling water in a pinch, though it may slightly alter texture. For a lower-fat crust, replace 2 tbsp butter with 2 tbsp vegetable shortening—though purists argue this sacrifices flavor. The vinegar can be swapped for lemon juice at the same quantity, though vinegar's acidity better develops gluten structure. If you lack cornstarch, extra flour works, though the crust may be slightly less crisp. For a gluten-free version, use a 1:1 gluten-free flour blend and reduce ice water by 1 tbsp to prevent stickiness.
The dough must stay cold—wrap tightly in plastic wrap and refrigerate for at least 2 hours before rolling. For longer storage, divide into two disks, wrap individually in parchment paper, then plastic wrap, and freeze for up to 3 months. Thaw overnight in the fridge before using. When ready to roll, work on a lightly floured surface with chilled rolling pins to maintain temperature. The dough can be pre-rolled and stored between parchment-lined plates in the fridge for up to 24 hours before baking, making it ideal for meal prep.
Why You'll Love This Recipe
- No-Fuss Foundation: I swear by this dough—just flour, cold butter, ice water, and a pinch of salt. No food processor, no stress, just a fork and a bowl. My hands get floury, but the result? Crisp, buttery layers that taste like I spent hours (when really, it’s 15 minutes).
- Buttery Magic: That cold butter cut into the flour? It’s the secret. The sugar just barely sweetens the edges, but the salt keeps it balanced—like a hug for your taste buds. Honestly, I’ve tried fancier doughs, but this one always wins.
- Endless Possibilities: Need a pie for Thanksgiving? A quiche for Tuesday? This dough handles it all—sweet, savory, even a rustic tart. I’ve used leftovers for hand pies, pot pies, and even a makeshift pizza crust. (Yes, even on a Tuesday night.)
- Budget-Proof Perfection: Flour, butter, salt—these are pantry staples that won’t break the bank. A single batch stretches for multiple pies, and the leftovers freeze like a dream. Between us, I’ve fed a crowd for less than $10 using this dough. Solid. Reliable. My secret weapon.
Step-by-step instructions for all-purpose pie dough
This method delivers a perfectly balanced crust every time—flaky layers with just enough structure.
Combine Dry Ingredients
In a large mixing bowl, whisk together the 2.5 cups All-Purpose Flour, 1 tbsp Cornstarch, 0.5 tsp Diamond Crystal Kosher Salt, and 2 tbsp Granulated Sugar. The cornstarch promotes crispness while the sugar adds subtle sweetness to the crust. Sift the ingredients lightly to aerate the flour and create a fine, even texture—this prevents dense patches in your final dough.
I like to use a whisk for this step because it breaks up any flour clumps and distributes the sugar evenly. The sugar isn't just for flavor; it also helps tenderize the crust slightly. Once combined, set the bowl aside—you want all ingredients at room temperature before proceeding.
Cut in the Cold Butter
Add the 1 cup Unsalted Butter, cut into ½-inch cubes, to the flour mixture. Using a pastry cutter or two forks, work the butter into the flour until you achieve pea-sized crumbs with minimal flour streaks remaining. This process is called "cutting in," and it's what creates those beautiful flaky layers in your crust.
Here's the key: keep everything cold. If your butter starts to soften too quickly, chill the bowl in the refrigerator for 5-10 minutes before continuing. You're aiming for a texture where the butter pieces are coated but still distinct—they'll melt during baking to create steam pockets that make the crust flaky. Don't overwork the dough at this stage; you'll develop too much gluten and lose that tender texture.
Add Wet Ingredients and Form the Dough
Create a well in the center of the dough mixture and add the 0.33 cup Ice Water, 1 tsp White Vinegar, and any accumulated flour from the bowl. The vinegar might seem unusual, but it enhances gluten development for a stronger crust. Using a silicone spatula or wooden spoon, gently mix the ingredients until the dough just comes together.
Be careful not to overmix—you're looking for a shaggy mass that holds when pressed, not a smooth dough. If the dough feels too dry, add 1 tsp more ice water at a time until it forms a cohesive ball. The ice water is crucial; it keeps the dough cold during mixing and prevents gluten from over-developing. Once combined, turn the dough out onto a lightly floured surface and shape it into a 1-inch thick disk. Wrap it tightly in plastic wrap and refrigerate for at least 1 hour—this resting period relaxes the gluten and makes rolling out much easier.
Roll and Use the Dough
Remove the chilled dough from the refrigerator and let it sit at room temperature for 5-10 minutes before rolling. This brief warm-up prevents cracking. On a lightly floured surface, roll the dough from the center outward, rotating it as you go, until it reaches your desired thickness—typically ⅛-inch for a pie crust. If the dough resists or cracks, let it rest another 10 minutes and try again.
Transfer the rolled dough to your pie dish, gently pressing it into the corners to create an even base. Trim any excess dough hanging over the edge. For extra crispness, I like to dock the crust with a fork—pricking it all over creates steam vents during baking that prevent puffing. Chill the crust in the pie dish for 20-30 minutes before adding your filling. This final chill ensures the crust maintains its shape during the baking process.
Pro Tips For Making All Purpose Pie Dough
- Cut Butter into Flakes: Cut your unsalted butter into small, pea-sized pieces before mixing—this ensures even distribution and prevents clumps that turn into greasy spots in your crust. I used to chop it roughly, and the dough would fight me during rolling.
- Use Ice Water Sparingly: Add ice water one tablespoon at a time until the dough just holds together—overdoing it makes the crust tough. I learned this the hard way when my first batch turned out chewy instead of flaky.
- Rest the Dough: Let the dough chill for at least 30 minutes before rolling—this relaxes the gluten and makes handling easier. Skipping this step leads to shrinking and cracking, and nobody wants a wonky pie crust.
- Work Fast with Cold Tools: Keep your rolling pin and bowl in the freezer for 10 minutes before shaping—cold tools prevent the butter from melting too soon. This trick guarantees a crispier crust without extra effort.
Best sauces and condiments for these flavors
Classic Apple Filling
This dough pairs perfectly with a homemade apple filling that balances sweetness and tartness. Use 4 cups peeled, sliced apples (a mix of Granny Smith and Honeycrisp works best), ½ cup brown sugar, 2 tbsp lemon juice, 1 tsp cinnamon, and ¼ tsp nutmeg.
Simmer the apples for 10 minutes until tender, then spread over the crust. The dough's subtle sweetness complements the apples beautifully, creating a classic combination. 🍏
Savory Herb Cheese Filling
For a savory twist, try a herb cheese filling using 1 cup shredded Gruyère, ½ cup heavy cream, 2 eggs, 1 tbsp fresh thyme, and ½ tsp black pepper.
Whisk everything together and pour into the pre-baked crust, then bake at 375°F for 25-30 minutes. This makes an elegant quiche or savory tart that’s perfect for brunch. The crust’s buttery flavor enhances the rich cheese without overpowering it.
Caramelized Onion Topping
Elevate your savory pies with caramelized onions—sauté 2 cups thinly sliced yellow onions in 2 tbsp butter over low heat for 30 minutes until deep golden brown. Spread them over a pre-baked crust, then top with 1 cup shredded mozzarella and ½ cup marinara sauce.
Bake at 375°F for 20 minutes for a gooey, flavorful galette. The dough’s crisp edges contrast perfectly with the creamy onions.
Sweetened Condiment Drizzle
After baking, drizzle your pie with honey or maple syrup for extra sweetness—about 2 tbsp of either works beautifully. For a tangy finish, brush the crust with 1 tbsp apricot jam mixed with 1 tsp water before serving.
These simple condiments add depth without complicating the recipe. The dough’s natural buttery flavor shines even brighter with these finishing touches. 🍯
Creamy Vanilla Pastry Cream
For a decadent dessert, pair the dough with vanilla pastry cream—whisk 1 cup milk, 3 tbsp cornstarch, 2 tbsp sugar, and 1 vanilla bean scraped until thickened.
Spread over the crust, then chill for 2 hours before slicing. The dough’s flaky texture contrasts deliciously with the silky custard, making it ideal for tarts or cheesecakes. 🍮
Nutrition facts
Frequently asked questions
Can I make this dough without a food processor?
Use two forks or your fingers to work the cold butter into the flour until you get pea-sized crumbs. The key is to keep everything cold and avoid overmixing. This method works just as well as a food processor for achieving that perfect flaky texture.
Why does my dough keep cracking when I roll it out?
Cracking usually happens when the dough isn't cold enough or has rested too long. Let it sit at room temperature for just 5-10 minutes before rolling, and work quickly on a lightly floured surface. If it cracks, let it rest another 10 minutes in the fridge to relax the gluten. Chilled rolling pins also help prevent sticking.
Can I use this dough for hand pies or turnovers?
Yes! This versatile dough works perfectly for hand pies and turnovers. After rolling, cut into circles or rectangles, fill with your favorite ingredients, fold, and seal the edges with a fork. Brush with egg wash for a golden finish. The dough's tenderness makes it ideal for handheld treats.
How do I prevent a soggy bottom in fruit pies?
Prevent soggy bottoms by pre-baking the crust for 10-12 minutes at 375°F before adding filling. For extra insurance, sprinkle 1 tbsp cornstarch or crushed cookies on the crust's base before filling. This creates a barrier that keeps the crust crisp.
What's the best way to reheat a pre-baked crust?
For pre-baked crusts, reheat at 350°F for 5-8 minutes to restore crispness. Place a baking sheet under the pie dish to catch any drips. If reheating a filled pie, cover loosely with foil and bake at 325°F for 15 minutes to warm through without drying.