
Desserts
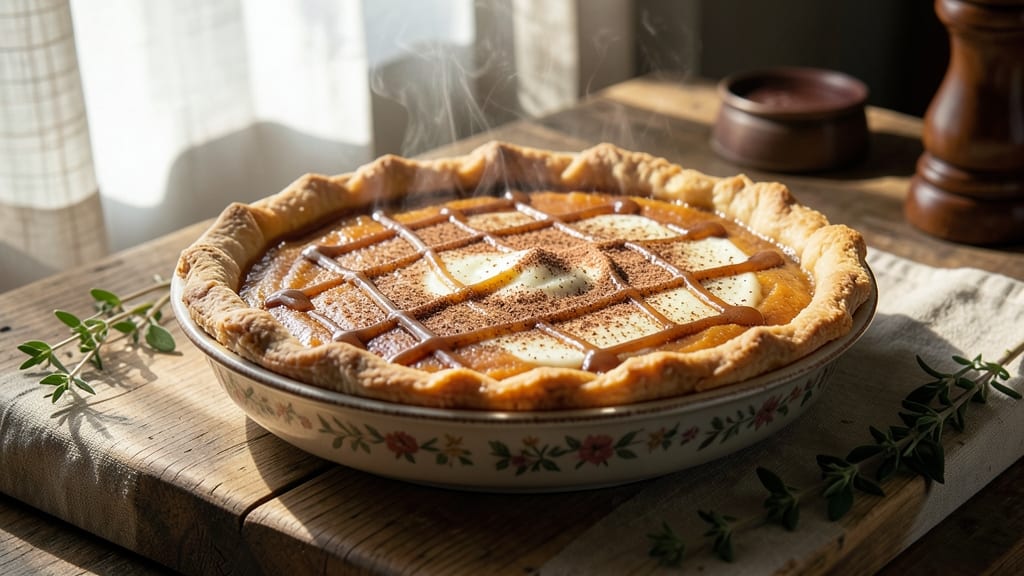
This allergen-free pumpkin pie recipe delivers all the cozy, spiced goodness of classic pumpkin pie—without eggs, dairy, nuts, or gluten. ✨ The secret lies in flax eggs for binding, coconut milk for richness, and a gluten-free crust that holds its shape beautifully.
I developed this recipe after years of baking for guests with dietary restrictions, and it’s now a staple at my holiday table.
The star of this pie is its warm, aromatic filling—sweet pumpkin purée blended with cinnamon, nutmeg, and ginger, then thickened with coconut milk and cornstarch for that perfect, silky texture. The crust, made with almond-free flour and coconut oil, stays crisp yet tender, ensuring every bite is satisfying.
What makes this recipe truly special is how it captures the essence of traditional pumpkin pie while being completely safe for those with common food allergies.
By the time it emerges from the oven, you’ll have a golden, fragrant pie with a velvety filling that’s neither too sweet nor too spicy—just right. The crust holds its edges, and the filling sets just enough to slice cleanly.
Serve it warm with a dollop of whipped coconut cream for a creamy, dairy-free finish that everyone at the table will love.
Perfect for holiday gatherings, potlucks, or a special dessert night, this pie proves that dietary restrictions don’t have to mean sacrificing flavor. The recipe scales easily, so you can make one for a small gathering or double it for a crowd. Let’s get baking!
Ingredients for allergen free pumpkin pie
Pumpkin purée, coconut milk, and flaxseed—your secret weapons for allergy-friendly pie perfection.
| Ingredient | Amount | Notes |
|---|---|---|
| Canned Pumpkin Purée 🎃 | 15 oz | Unsweetened, 100% pumpkin |
| Coconut Milk 🥥 | 1 cup | Full-fat for creaminess |
| Cornstarch 🌾 | 2 tbsp | For perfect thickening |
| Ground Flaxseed 🌿 | 3 tbsp | For flax eggs, ground fresh |
| Pure Maple Syrup 🍁 | ½ cup | For natural sweetness |
| Ground Cinnamon 🌶️ | 2 tsp | Freshly ground preferred |
| Ground Nutmeg 🌶️ | ½ tsp | Freshly grated nutmeg |
| Ground Ginger 🌶️ | 1 tsp | Freshly ground preferred |
| Salt 🧂 | ½ tsp | Sea salt preferred |
| Gluten-Free All-Purpose Flour 🌾 | 1 ½ cups | Fine blend, like Bob's Red Mill |
| Coconut Oil 🫒 | ½ cup | Solid, for crust |
| Ice Water 💧 | ¼ cup | For pie crust binding |
| Whipped Coconut Cream 🥥 | ½ cup | For garnish, optional |
The pumpkin purée is non-negotiable here—Libby’s 100% pumpkin is my go-to, but any unsweetened canned pumpkin works. Bob’s Red Mill gluten-free flour is a game-changer for the crust, but any 1:1 blend will do. For the flax eggs, grind the flaxseed fresh in a coffee grinder—pre-ground loses its binding power. Coconut milk? Full-fat canned coconut milk gives the richest texture, but light works in a pinch. The spices are where the magic happens—Penzeys or bulk bins for the freshest cinnamon and nutmeg, because pre-ground spices taste like dust.
No coconut milk? Cashew cream (blend soaked cashews + water) works beautifully—just add a pinch more cornstarch to compensate. Short on maple syrup? Agave nectar or date syrup are great swaps, though maple’s flavor is closest. The crust can be made ahead and chilled for up to 3 days, saving you last-minute stress. For the filling, if you’re worried about it being too thin, add an extra half-tsp of cornstarch. And if you’re feeling fancy, toast the gluten-free flour in the oven for 5 minutes before mixing—it adds a subtle nutty depth (though it’s not required).
The crust keeps best in the fridge for 2 days if you’re not baking it right away—just let it sit at room temp for 15 minutes before rolling. The filling can be made a day ahead and stored in the fridge; just reheat gently before pouring into the crust. Baked pie? Store it in an airtight container for 4-5 days or freeze for 3 months. The coconut cream garnish? Whip it up right before serving—it melts too fast to prep ahead. And if you’re making this for a crowd, double the recipe; the crust and filling scale perfectly.
Why You'll Love This Recipe
- No-Fuss Filling: I swear by canned pumpkin purée here—no peeling, no mashing, just scoop and go. The coconut milk thickens beautifully with cornstarch, so you’re not stuck with a runny mess or guessing ratios.
- Maple-Kissed Richness: That pure maple syrup? It’s the secret weapon—deep, caramel notes that cut through the spice without overpowering. Honestly, my pie tastes like autumn in a bowl, but with a creamy texture that’s actually smooth, not grainy.
- Dietary-Friendly Crowd-Pleaser: Between us, this recipe works for vegans, gluten-free folks, and anyone avoiding eggs or dairy. The flaxseed "egg" binds it perfectly, and the coconut milk adds that familiar pie richness—no one ever asks if it’s "special."
- Leftovers That Last: Make a double batch and freeze half. Thawed, it’s just as good—great for quick breakfasts (yes, really) or a last-minute dessert. I keep a jar in my freezer for lazy mornings, and it’s still creamy, not sad.
Step-by-step instructions for allergen-free pumpkin pie
Here's how to create a creamy, spiced pumpkin pie that's safe for all dietary needs.
👨🍳 Step 1: Make the Flax Eggs and Mix Wet Ingredients
In a small bowl, whisk together the 3 tbsp ground flaxseed and 0.25 cup ice water. Let it sit for 5 minutes while you prep the rest—this creates your flax eggs, a perfect egg substitute. You'll see it thicken into a gel-like consistency, similar to raw egg whites.
In a large mixing bowl, combine the 15 oz canned pumpkin purée, 1 cup coconut milk, 0.5 cup pure maple syrup, and the flax egg mixture. Whisk until smooth—no lumps allowed. This is your pie filling base, and getting it perfectly blended ensures a silky texture later.
🍳 Step 2: Whisk in Dry Ingredients for Perfect Thickening
In a separate bowl, sift together the 1.5 cups gluten-free all-purpose flour, 2 tbsp cornstarch, 2 tsp ground cinnamon, 0.5 tsp ground nutmeg, 1 tsp ground ginger, and 0.5 tsp salt. This sifting step prevents lumps in your pie filling and ensures even distribution of those warm autumn spices.
Gradually whisk the dry ingredients into your wet mixture until just combined. I like to use a rubber spatula here to scrape the bottom of the bowl—you want to make sure all that flour gets incorporated without overmixing. The batter should be smooth with a pudding-like consistency.
🥘 Step 3: Prepare the Crust (No Rolling Required!)
In a food processor, pulse the 0.5 cup coconut oil and 1.5 cups gluten-free all-purpose flour until it resembles coarse crumbs with pea-sized oil pieces. This texture is perfect for a rustic, flaky crust without needing to roll it out.
Add 0.25 cup ice water and pulse until the dough just comes together when pressed. Don't overprocess—you want it to hold when formed but still be workable. Press this dough firmly into a 9-inch pie dish, creating a ½-inch thick crust all the way up the sides. Use your fingers to smooth the edges and create a slight rim.
🔥 Step 4: Bake to Golden Perfection
Preheat your oven to 375°F. Pour the pumpkin filling into the prepared crust, spreading it evenly. For that classic pumpkin pie look, I like to make a few small cuts in the top crust (if using) or just leave it smooth—your choice.
Bake for 45-50 minutes until the center is just set but still slightly jiggly (it'll firm up as it cools). The edges should be golden brown, and you'll smell that wonderful spice aroma filling your kitchen. If the edges brown too quickly, cover them with aluminum foil.
⏰ Step 5: Chill and Serve with Whipped Cream
Let the pie cool completely at room temperature, then refrigerate for at least 2 hours (overnight is even better). This chilling time allows all the flavors to meld together and the texture to set properly—patience here makes all the difference.
Before serving, top with 0.5 cup whipped coconut cream for that classic pumpkin pie presentation. Slice into wedges and enjoy the perfect balance of creamy filling, spiced flavors, and that satisfying coconut crust. Store leftovers in the fridge for up to 5 days or freeze for longer storage.
Pro Tips For Making Allergen Free Pumpkin Pie
- Whisk the Flaxseed: Mix ground flaxseed with 3x its volume of warm water first—it thickens like egg wash in 5 minutes. I learned this the hard way when my pie filling turned watery because I added dry flaxseed straight to the coconut milk.
- Preheat That Oven: Bake at 350°F (175°C) for 45–50 minutes, but only after preheating for 15 minutes. Cold pans steal heat, and your crust (or lack thereof) will suffer—this isn’t just about speed, it’s about even baking.
- Strain the Coconut Milk: Skip the thick, greasy sediment at the bottom of the can—strain the coconut milk through a fine-mesh sieve before using. It makes the texture silky instead of gritty, and your pie will taste like it’s from a bakery, not a shortcut.
- Chill the Filling: Let the pumpkin-coconut mixture sit in the fridge for 10 minutes after mixing. The cornstarch thickens better cold, and your pie won’t weep maple syrup all over the crust when you slice it—trust me, it’s a game-changer.
Make-ahead tips for leftovers
Prep Ahead Strategy
The filling is my favorite component to make ahead—it actually tastes better the next day as the flavors meld.
Whisk together all the wet ingredients (pumpkin, coconut milk, maple syrup, and flax eggs) in a bowl, cover with plastic wrap pressed directly on the surface, and refrigerate for up to 24 hours. The cornstarch will help prevent any separation, and the spices will deepen in flavor. 🥥
Crust Timeline
Roll out the crust dough and line your pie dish the night before if you're short on baking time. Wrap it tightly in plastic wrap and refrigerate.
When you're ready to bake, simply remove it from the fridge, let it sit at room temperature for 15 minutes, then add your filling. This shortcut saves you from last-minute prep stress while ensuring a perfectly crisp crust. ⏰
Freezer-Friendly Filling
For long-term prep, freeze the filling in an airtight container for up to 3 months. When ready to bake, thaw it in the refrigerator overnight, then stir gently to recombine any settled ingredients.
I like to add a splash of coconut milk if it looks too thick after thawing—this maintains that perfect silky texture when baked. ❄️
Assembled Pie Prep
Assemble the pie (crust + filling) up to 24 hours before baking and store it uncovered in the refrigerator. This allows the crust to firm up slightly and prevents sogginess.
When baking day arrives, simply pop it in the oven without any extra prep—just add your whipped coconut cream after it cools. This is my go-to method for holiday baking! 🎃
Portioning for Crowds
Double or triple the recipe and portion the filling into airtight containers for easy baking later. Label each container with the baking instructions (oven temp and time) so you can pull them out as needed.
I like to bake smaller pies in 9-inch dishes for individual servings—this way, everyone gets their own perfect slice. 💫
Storage Secrets
Once baked, let the pie cool completely before storing. For short-term fridge storage (5 days), wrap it tightly in plastic wrap and place it in an airtight container. For longer storage, freeze individual slices wrapped in parchment paper—this prevents freezer burn and makes serving easier.
Reheat slices in the microwave for 20-30 seconds to restore that warm, gooey texture. 🔥
Nutrition facts
Frequently asked questions
Can I make this pie without coconut milk?
Yes! For a dairy-free alternative, try cashew cream (blend soaked cashews with water) or oat milk (add an extra ½ tsp cornstarch to compensate for thinner texture). If nut allergies are a concern, coconut-free oat milk works too—just expect a slightly lighter filling. The key is adjusting the thickener to maintain that perfect pumpkin pie consistency.
Will this pie crust crumble too easily?
Not at all! The gluten-free crust uses coconut oil for fat and is pressed firmly into the dish, creating a sturdy base. For extra strength, chill the crust for 30 minutes before adding filling. If you're worried about handling, make the dough ahead and refrigerate it—it holds together beautifully when cold. The secret is not overworking the dough in the food processor.
How do I prevent a soggy bottom?
Prevent sogginess by baking the crust 5 minutes before adding filling (cover with parchment and weights). For an extra barrier, sprinkle 1 tbsp gluten-free flour on the crust before pouring in the filling. Always let the pie cool completely before refrigerating—this helps the filling set properly. The coconut milk thickens as it cools, so no soggy surprises here!
Can I use fresh pumpkin instead of canned?
Fresh pumpkin works but requires extra prep! Roast 3 cups peeled, cubed fresh pumpkin at 400°F for 25 minutes until soft, then blend into purée. Use 15 oz of this purée (same as canned) in the recipe. Fresh pumpkin has more water content, so you may need an extra ½ tsp cornstarch to thicken the filling properly. The flavor is richer but requires more effort.
Is this pie safe for someone with severe nut allergies?
This recipe is nut-free as written, but always check your gluten-free flour blend and coconut milk labels for cross-contamination warnings. For extra safety, use certified nut-free products. The crust and filling contain no nuts, but if you're making this for someone with severe allergies, prepare it in a completely nut-free kitchen environment. When in doubt, ask your allergist for specific guidance.