
Desserts
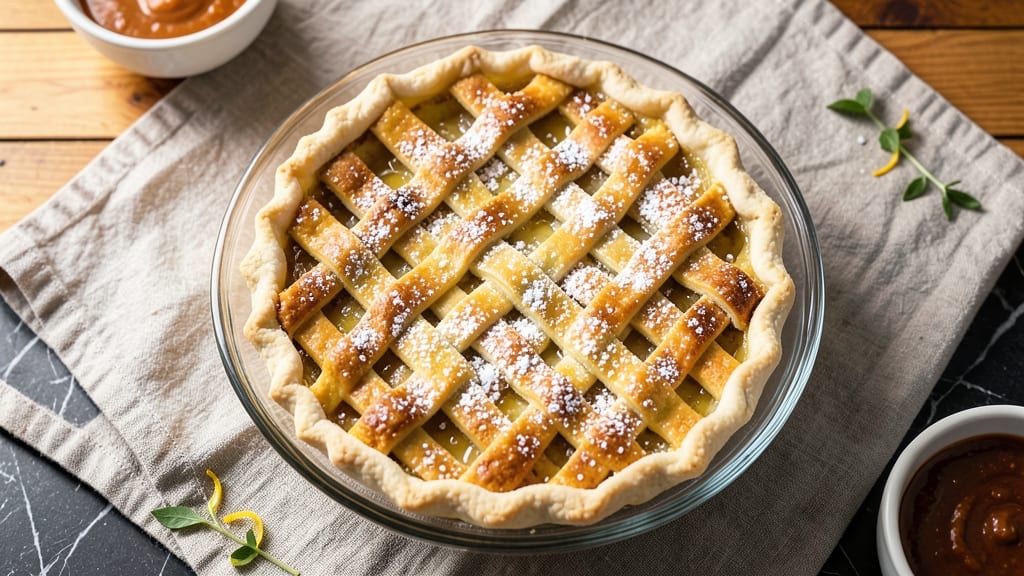
This American pie crust recipe delivers the perfect balance of flaky, buttery layers that shatter with every bite—no shortcuts, just classic technique. The secret lies in cold butter and precise folding, creating those signature layers that make every pie worth the effort.
I've perfected this recipe over years of baking, and it works flawlessly for both sweet and savory pies.
What sets this recipe apart is the attention to detail—chilling the dough between folds ensures maximum flakiness, while proper rolling prevents tearing. The crust bakes to a golden brown with just the right amount of crispness, ready to hold any filling without losing its structure.
Whether you're making apple pie, pecan pie, or even a savory chicken pot pie, this crust will elevate your dish.
By the time you're done, you'll have a pie crust that's light, crisp, and perfectly buttery—each layer separating cleanly for that satisfying crunch. The aroma alone will have everyone anticipating dessert.
This is the kind of crust that makes you want to bake pies all year round, not just for holidays.
Ready to master this classic technique? The ingredients are simple, but the results are anything but ordinary. Let's get started on creating the perfect pie crust foundation for your next masterpiece.
Ingredients for american pie crust
Six ingredients, all cold—this is your flaky foundation for perfect pies.
| Ingredient | Amount | Notes |
|---|---|---|
| All-Purpose Flour 🌾 | 3 cups | Sifted for light texture |
| Unsalted Butter 🧈 | 1 cup | Cold, cubed into 1/2-inch pieces |
| Ice Water ❄️ | ½ cup | Chilled for crisp layers |
| Kosher Salt 🧂 | 1 tsp | Diamond Crystal preferred |
| Granulated Sugar 🍚 | 1 tbsp | For subtle sweetness |
| White Vinegar 🍶 | 1 tbsp | Enhances tenderness |
The butter is non-negotiable here—European-style (like Plugrá) has higher fat content, which means more shatter. Grab it from Whole Foods or specialty stores if you can, but regular unsalted works too. Keep everything cold: flour in the fridge, butter in the freezer for 10 minutes before cutting. The ice water? Freeze it overnight in ice cube trays for perfect chunks. Diamond Crystal salt dissolves better than Morton, but if you've got Morton, just add a pinch extra. Sugar and vinegar are tiny but important—they balance the richness and help the crust brown beautifully.
No ice water? Cold tap water works, but it won't be as crisp. Short on butter? Substitute shortening at the same amount, but you'll lose that buttery flavor. Vinegar substitute? Lemon juice at the same quantity. The flour must be all-purpose—bread flour has too much gluten and will make the crust tough. For a golden crust, brush with egg wash (1 egg + 1 tbsp water) before baking. And if you're nervous about handling cold dough, wear gloves—they make it way easier to fold without warming it up.
This dough stays fresh in the fridge for 3 days, wrapped tightly in plastic. For longer storage, freeze it between parchment paper for up to 3 months. Let it thaw in the fridge overnight before rolling. Pro tip: make two crusts at once—they freeze beautifully. When ready to use, roll between two sheets of parchment to prevent sticking. The secret to success? Keep everything cold until the very last minute before baking—this is what creates those magical flaky layers.
Why You'll Love This Recipe
- No-Fuss Assembly: I swear by this crust because it’s three ingredients, one bowl—just flour, cold butter, and ice water. No food processor, no overworking, just a fork and a few minutes of gentle mixing. The butter stays chunky, the dough comes together like magic, and I’m not left with a greasy mess.
- Buttery Crisp Magic: That cold butter? It’s the star. When baked, it delivers a flaky, golden edge with a tender center—no dry, sad pie crust here. The sugar just adds a whisper of caramel sweetness that makes it perfect for both sweet and savory fillings. Honestly, I’ve used this for apple, chicken pot pie, and even breakfast strudel.
- Your Go-To Base: Need a pie for Thanksgiving? A last-minute pot pie? This crust handles it all. It’s sturdy enough for thick fillings but still melts in your mouth. I’ve even used it for hand pies—just roll, cut, bake. No fuss, no stress, just reliable flavor every time.
- Budget-Friendly Staples: Flour, butter, salt, sugar—these are pantry basics that won’t break the bank. A single batch stretches for two pies (or one giant pot pie), and leftovers? I freeze dough scraps for weeks. No wasted ingredients, no guilt—just pure, delicious efficiency.
Step-by-step instructions for buttery layers that shatter with every bite
Here's how to make a pie crust so flaky it'll have everyone asking for seconds.
Mix Dry Ingredients for Perfect Texture
In a large bowl, combine the 3 cups all-purpose flour, 1 teaspoon kosher salt, and 1 tablespoon granulated sugar. I like to use my fingers to break up any flour lumps, then whisk everything together until smooth. This ensures an even distribution of salt and sugar throughout the crust.
Next, make a well in the center of the dry mixture and add the 1 cup cold cubed butter. The butter should be cold—if it feels soft, pop it in the freezer for 10 minutes. This cold butter is what creates those signature flaky layers later on.
Cut Butter Into Flour Until Pea-Sized
Using a pastry cutter or your fingertips, work the butter into the flour mixture until you have pea-sized crumbs. This takes about 2-3 minutes of cutting and pressing. You're looking for a texture that resembles coarse sand or wet sand—no big butter chunks should remain.
Here's the thing—don't overwork the mixture. If the butter starts to melt, you'll lose those beautiful flaky layers. The moment you see mostly pea-sized crumbs with just a few larger pieces, stop cutting. This is your perfect starting point.
Add Wet Ingredients for a Cohesive Dough
In a small bowl, mix together the 0.5 cup ice water and 1 tablespoon white vinegar. The ice water is crucial—it keeps the butter cold longer during mixing. Pour this mixture slowly over the flour-butter mixture while stirring with a fork.
Only mix until the dough just comes together. You'll know it's ready when you can press it gently and it holds its shape. If it's too dry, add 1 teaspoon more ice water at a time. If it's too sticky, add 1 tablespoon more flour—but don't add too much or your crust will be tough.
Chill the Dough for Maximum Flakiness
Turn the dough out onto a lightly floured surface and divide it into two equal pieces. Shape each piece into a disk about 1 inch thick. Wrap each disk tightly in plastic wrap and refrigerate for at least 1 hour—I usually do 2 hours if I have time.
This chilling step is non-negotiable. It firms up the butter, prevents shrinking during baking, and gives you those perfect flaky layers. Don't skip it, even if you're eager to roll out the dough. Patience here makes all the difference.
Roll and Transfer for a Perfect Crust
On a lightly floured surface, roll one disk of dough into a 12-inch circle—about ⅛-inch thick. If the dough cracks, just gently press it back together. Transfer the rolled dough to a 9-inch pie dish, letting it gently drape over the edges.
Here's where it gets tricky: don't stretch the dough to fit the pan. Instead, gently press it into place, letting it relax naturally. Trim any excess dough hanging over the edge with a sharp knife. Repeat with the second disk for a double-crust pie.
Pro Tips For Making American Pie Crust
- Cut Butter in Small Batches: If you dump all the butter at once, you’ll end up with a gummy mess—no one wants that. Work in 1-2 tablespoons at a time, using a pastry cutter or fork, until the mixture looks like coarse crumbs with pea-sized butter pieces. This keeps the texture flaky without overworking the dough.
- Use Ice Water, Not Cold: I learned this the hard way—room-temperature water makes the dough sticky and hard to handle. Fill a glass with ice cubes and cold water, then let it sit for 10 minutes. The water should be cold, not freezing, so it doesn’t shock the butter. A splash at a time works best.
- Skip the Overmixing: The moment your dough starts looking smooth and shiny, stop. Overmixing develops gluten, and that’s the enemy of a tender crust. Just until the flour is barely incorporated—it’ll still have a shaggy appearance. Trust me, your pie will thank you later.
- Chill the Dough Twice: Most recipes say to chill once, but I double it: 30 minutes after mixing, then another 30-60 minutes after rolling. This prevents shrinking and cracking when it hits the oven. Yes, it’s extra work, but it’s the difference between a perfect edge and a sad, uneven crust.
Troubleshooting this recipe
Dough Too Sticky?
If your dough feels too sticky during handling, resist the urge to add extra flour all at once. Instead, work in 1 tablespoon increments while keeping the surface lightly floured. I’ve found that chilling the dough for an extra 15-20 minutes before rolling also helps tighten the gluten structure.
For stubborn stickiness, try dusting with cornstarch instead of flour—it adds less weight and prevents a dense crust. 🧂
Butter Melting Mid-Mix
When butter starts melting during the cutting process, immediately stop and place the entire bowl in the freezer for 5-10 minutes. This trick hardens the butter back up without losing its cold temperature.
If you’re using a food processor, pulse in 10-second bursts with 30-second chilling breaks between each. European-style butter (like Plugrá) holds up better to handling than regular unsalted butter.
Dough Shrinking in Pan
Shrinking happens when the dough isn’t chilled long enough before baking. To fix this, press the dough gently into the pan with your fingers, then place a dry pie weight or dried beans on top.
Bake at 375°F for 10 minutes before adding filling—this pre-bakes the crust slightly, preventing it from contracting later. For extra insurance, blind-bake the crust for 15 minutes before filling.
Cracks or Tears
Cracks usually appear when dough warms up too quickly or isn’t handled gently. If you notice cracks while rolling, simply press them back together with your fingertips. For a more professional finish, roll the dough between two sheets of parchment paper—this prevents sticking and makes transferring easier.
If cracks happen during baking, brush them with egg wash after removing from the oven for a seamless look.
Pale or Undercooked Crust
A pale crust often means the butter wasn’t cold enough or the oven wasn’t hot enough. To fix this, brush the crust with egg wash (1 egg + 1 tbsp water) before baking, then sprinkle with granulated sugar for extra browning.
Bake at 425°F for 10-12 minutes before adding filling if you’re blind-baking. For a golden finish, place a baking sheet under the pie to reflect heat upward.
Soggy Bottom After Baking
A soggy bottom is usually caused by a filling that’s too wet or a crust that wasn’t pre-baked enough. For fillings like berries or custards, pre-bake the crust for 10-15 minutes before adding filling.
If using a wet filling, sprinkle 1-2 tbsp cornstarch on the bottom crust before adding filling. For extra insurance, brush the bottom crust with apricot jam before adding filling—it creates a moisture barrier. 💡
Nutrition facts
Frequently asked questions
Why does this crust need to chill for so long?
The 2-hour chill is crucial for creating those signature flaky layers. Cold butter needs time to firm up and prevent melting during baking. This also relaxes the gluten, so your crust doesn't shrink in the oven. Think of it as setting the stage for perfect texture—patience here makes all the difference!
Can I make this crust ahead of time?
Wrap the dough disks tightly in plastic and refrigerate for up to 3 days or freeze for 3 months. For frozen dough, thaw overnight in the fridge before rolling. The beauty of this recipe is that you can prep everything in advance and assemble when ready to bake. Perfect for busy bakers!
What's the best way to handle cracks in the dough?
If you see cracks while rolling, simply press them back together with your fingertips. For a cleaner look, roll between two sheets of parchment paper to prevent sticking. After baking, brush any cracks with egg wash for a seamless finish. The key is gentle handling—don't force the dough to stretch!
How do I prevent a soggy bottom?
Pre-bake your crust for 10-15 minutes at 375°F before adding filling. For wet fillings, sprinkle 1-2 tbsp cornstarch on the bottom crust first. Another trick: brush the bottom with apricot jam before adding filling—it creates a moisture barrier that keeps the crust crisp.
Can I use this crust for savory pies too?
This crust works beautifully for both sweet and savory pies! For savory applications, you might reduce the sugar to ½ tablespoon or omit it entirely. The buttery flavor complements chicken pot pie, quiche, or even savory galettes perfectly. Just