
Desserts
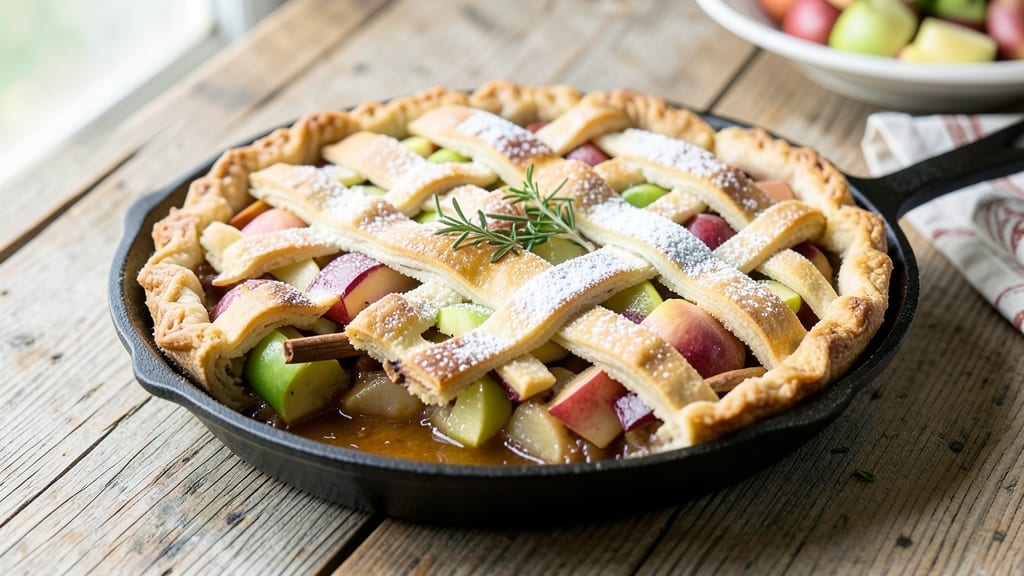
This Amish apple fry pie recipe delivers the perfect harmony of crispy, golden crust and spiced apple filling—all achieved through the traditional technique of frying the pie in hot oil. 🔥 The secret lies in a sturdy dough that holds up during frying and a filling packed with cinnamon, nutmeg, and brown sugar that caramelizes beautifully.
What makes this dessert truly special is the contrast between the tender, spiced apples and the ultra-crispy exterior that only frying can achieve.
The recipe begins with a simple yet robust dough made from flour, lard, and a touch of salt, ensuring it stays firm enough to fry without falling apart.
The filling combines tart apples, warm spices, and a hint of lemon juice to balance sweetness, all baked just until tender before the pie is fried to a perfect golden brown.
This method isn’t just about flavor—it’s about texture, delivering a crust that’s crispy on the outside and tender on the inside, with every bite bursting with apple goodness.
What sets this Amish apple fry pie apart is the frying process itself, which creates a crust unlike any other. The pie is carefully fried in hot oil until it reaches that coveted golden hue, resulting in a dessert that’s rich, aromatic, and impossible to resist.
The spices in the filling infuse the crust with warmth, while the apples remain juicy and fragrant. This is comfort food at its finest, perfect for family gatherings, holiday celebrations, or whenever you crave a dessert that feels like a hug.
Serve it warm with a scoop of vanilla ice cream or a dollop of whipped cream to enhance the flavors even more. The frying technique might sound intimidating, but with the right preparation, it’s foolproof and yields a pie that’s sure to impress.
Let’s get started on creating this timeless dessert!
Ingredients for amish apple fry pie
Six tart apples and a sturdy dough—this is all you need for golden, crispy magic.
| Ingredient | Amount | Notes |
|---|---|---|
| All-Purpose Flour 🌾 | 3 cups | White or whole wheat blend |
| Lard 🍖 | ¾ cup | Leaf or leaf lard preferred |
| Granulated Sugar 🍚 | 2 tbsp | For dough sweetness |
| Ice Water 💧 | ½ cup | Chilled for sturdy dough |
| Salt 🧂 | 1 tsp | Fine sea salt |
| Apples 🍎 | 6 medium | Tart varieties like Granny Smith |
| Brown Sugar 🍚 | 1 ½ cups | Packed, light variety |
| Ground Cinnamon 🌿 | 2 tbsp | Freshly ground preferred |
| Ground Nutmeg 🌿 | 1 tsp | Freshly grated nutmeg |
| Lemon Juice 🍋 | 2 tbsp | Freshly squeezed |
| Vegetable Oil 🫒 | 4 cups | For frying, peanut oil works too |
| Vanilla Ice Cream 🍦 | 1 ½ cups | For serving, optional |
The apples are the heart of this pie, so pick tart varieties like Granny Smith or Honeycrisp—they hold up best during frying. Local farmers markets often have the freshest, most flavorful apples, but regular grocery store apples work too if they're firm and vibrant. Peel and core them, then slice into even 1/4-inch pieces for consistent cooking. The dough's secret? Lard—it keeps the crust firm during frying. Bob's Red Mill or store-brand lard works perfectly, but avoid vegetable shortening—it won't give you that authentic Amish texture. Chill your dough between layers to prevent sticking, and don't skimp on the flour when dusting your work surface.
No Granny Smith apples? McIntosh or Braeburn work in a pinch, but they'll be slightly softer after frying. Running out of lard? Unsalted butter works at a 1:1 ratio, though it'll be slightly less crisp. The cinnamon and nutmeg are non-negotiable for that classic Amish spice profile—Penzeys Spices has the best quality, but regular grocery store brands are fine if they're fresh. For the oil, peanut oil has the highest smoke point, but vegetable oil is perfectly safe. Just make sure it's enough to cover the pie completely during frying. If you're worried about waste, use a deep fryer or Dutch oven—you'll use less oil overall.
This pie is best served immediately after frying, but you can reheat slices in a 350°F oven for 5-10 minutes if needed. The dough stays crispy for about 2 hours at room temperature, but after that, it'll start to soften. Store leftovers in an airtight container for 3 days—though I've never had any last that long! For extra crispiness, freeze the pie unfried and fry it straight from frozen. The oil temperature matters most here: aim for 350°F and keep it steady with a thermometer. Trust me on this—it's worth the extra minute to get it right.
Why You'll Love This Recipe
- No-Fuss Dough: I swear by that lard crust—it’s flaky without the fuss of butter, and the ice water keeps it light. Just mix, fold, and roll. No kneading, no waiting.
- Sweet Crisp Magic: That sugar-laced dough? It caramelizes into a golden, crackly shell while staying tender inside. One bite and you’ll understand why I keep a pan of these on hand.
- Weeknight Crowd-Pleaser: Serve it warm with vanilla ice cream for company or pack slices for school lunches. My kids beg for it, and my husband’s picky friends always ask for the recipe.
- Budget Breakfast Win: Lard and flour stretch farther than you’d think, and leftovers reheat beautifully. I make a double batch on Sundays—half for breakfast, half for snacking all week.
Step-by-step instructions for Amish apple fry pie
Here's how to create that legendary crispy crust and spiced apple filling that makes this pie legendary!
👨🍳 Step 1: Make the Perfect Lard Crust
In a large bowl, combine the 3 cups all-purpose flour, 1 tsp salt, and 2 tbsp granulated sugar. Cut in the 0.75 cup lard using a pastry cutter or two forks until the mixture resembles coarse crumbs with pea-sized fat pieces. Here's the thing - don't overwork it or you'll get tough pastry.
Gradually add the 0.5 cup ice water, 1 tablespoon at a time, mixing gently with a fork until the dough just comes together. Form into a disk, wrap in plastic, and chill for 30 minutes. This resting time is crucial - it relaxes the gluten and makes rolling easier. I press the dough gently during the first minute to prevent it from curling when we roll it out later.
🍳 Step 2: Prepare the Spiced Apple Filling
Peel, core, and slice the 6 medium apples into ¼-inch thick slices. Toss them immediately with 1.5 cups brown sugar, 2 tbsp ground cinnamon, 1 tsp ground nutmeg, and 2 tbsp lemon juice in a large bowl. The lemon juice prevents browning while keeping the apples tender. Let the mixture sit for 15 minutes - this allows the spices to penetrate the apples and the sugars to start drawing out moisture.
After resting, give the apples a gentle stir. You'll notice they've released some juice - this is perfect! The moisture helps create that signature apple sauce consistency in the pie. Don't drain it out - that liquid is what makes the filling so luscious when fried.
🔥 Step 3: Fry the Pie to Golden Perfection
Heat 4 cups vegetable oil in a deep fryer or heavy pot to 350°F. While the oil heats, roll out the chilled dough on a floured surface to about 12 inches in diameter - just slightly larger than your pie dish. Cut a 6-inch circle from the center to create your top crust.
Carefully lower the bottom crust into the hot oil using a slotted spoon or spider. Fry for 2-3 minutes until golden brown on the bottom. Remove with tongs and place on paper towels. Repeat with the top crust circle. Here's where it gets magical - the oil temperature is key. If it's too hot, the crust will burn before cooking through. Watch for small bubbles forming around the edges - that's your signal it's ready.
🥘 Step 4: Assemble and Fry the Complete Pie
Place the fried bottom crust in your pie dish. Spoon the spiced apple filling into the center, mounding it slightly. Then carefully place the fried top crust over the filling, pressing gently around the edges to seal. Here's the secret - don't be shy with the top crust. You want it to completely cover the filling so it gets that perfect golden color when fried.
Return the assembled pie to the hot oil (now around 360°F) and fry for 4-5 minutes, turning occasionally, until the top crust is deep golden brown and crispy all over. The filling should be bubbling gently - this means it's hot enough to create that perfect caramelized texture. Remove with tongs and drain on paper towels for 2 minutes before serving.
🍽️ Step 5: Serve Warm with Ice Cream
Slice the pie into wedges while it's still warm - the filling will be at its most luscious state. Serve immediately with 1.5 cups vanilla ice cream on the side. The contrast of the warm, spiced apple pie with the cool ice cream is what makes this dessert truly special.
Here's the thing about Amish fry pies - they're best enjoyed fresh from the fryer. The crust stays crispy for about 20 minutes, then starts to soften. That's why I always make a double batch - they disappear faster than you can say "apple pie"!
Pro Tips For Making Amish Apple Fry Pie
- CHILL THE LARD: I learned this the hard way—using cold lard straight from the fridge makes the crust tough as shoe leather. Cut it into small cubes and let it sit at room temperature for 30 minutes before mixing with flour. The dough will behave better, and you’ll get that perfect flaky texture without fighting it.
- DON’T OVERWORK THE DOUGH: This isn’t the prettiest method, but it’s the tastiest: handle the dough just enough to combine. Once you add ice water, mix it in with a fork or your hands until it barely holds together—no need for smooth, elastic perfection. Overmixing develops gluten, and that’s the last thing you want in a fry pie crust.
- SALT THE APPLES: Yes, even if you’re impatient like me, take 2 minutes to sprinkle a pinch of salt over the sliced apples before assembling. It draws out moisture, which means less soggy crust later. (Your future self will thank you when the pie stays crisp for hours.)
- BAKE IN STAGES: Start hot, finish low—this is non-negotiable for even cooking. Bake at 425°F for 15 minutes to get the crust golden, then drop to 350°F for the remaining 20-25 minutes. Rushing the second stage leads to a gummy center, and nobody wants that.
Troubleshooting great amish apple fry pie
Oil Temperature Troubles
If your oil isn't hot enough (350°F), the crust will absorb oil instead of crisping. Use a candy thermometer to monitor—350°F is critical for that perfect golden color. I’ve burned pies when oil got too hot (375°F+), so keep it steady.
A deep fryer maintains temperature better than a pot, but if using a pot, avoid stirring once the pie is in the oil—it drops temperature instantly. 🌡️
Dough Falling Apart
Overworked dough or too much water weakens the structure, causing it to break during frying. Chill the dough for 30 minutes before rolling, and handle it gently. If the dough cracks, patch it with extra dough scraps before frying.
I’ve also found that using leaf lard (not vegetable shortening) gives the dough the firmness it needs to hold up in hot oil.
Filling Too Watery
If your apple filling releases too much juice, the crust won’t crisp properly. Toss apples with 2 tbsp cornstarch before adding spices to absorb excess moisture. Also, avoid overcrowding the pie dish—leave ½-inch space between the filling and crust edges.
I’ve had pies where the filling oozed out during frying, soaking the crust. This trick keeps everything in place. 🍎
Uneven Browning
Turn the pie every 30 seconds during frying to ensure even browning. If one side browns faster, reduce oil temperature to 340°F and fry more slowly. A 9-inch pie dish works best—smaller dishes fry too fast, while larger ones take too long.
I’ve also found that using a wire cooling rack under the pie dish while frying helps heat circulate evenly.
Crust Too Greasy
If your crust feels soggy after frying, it absorbed too much oil. Drain the pie on a wire rack (not paper towels) for 3-5 minutes to let excess oil drip off. Also, avoid overfilling the pie—leave ½-inch space between the crust and filling.
I’ve had pies where the crust turned greasy because the filling was too close, soaking up oil. This adjustment keeps it crispy. 🍴
Nutrition facts
Frequently asked questions
Why does Amish apple fry pie need to be fried instead of baked?
The frying technique creates a unique crispy texture that baking can't match. The hot oil caramelizes the crust instantly, giving it that signature golden-brown crunch while keeping the filling warm and gooey inside. This method also makes the crust extra sturdy—perfect for holding up to the juicy apple filling. Plus, it adds a rich, slightly smoky flavor that's hard to replicate in the oven.
Can I make this pie ahead of time?
You can prep the dough and filling up to 24 hours ahead, but the best approach is to fry and serve immediately. The crust loses its crispiness after about 20 minutes, though you can reheat slices in a 350°F oven for 5 minutes if needed. For a make-ahead option, freeze the assembled (unfried) pie, then fry straight from frozen—just add 1-2 extra minutes to the frying time.
What's the best apple variety for this recipe?
Tart apples like Granny Smith or Honeycrisp work best because they hold their shape during frying. If you can't find those, McIntosh or Braeburn are good substitutes—they're slightly softer but still delicious. Avoid very sweet varieties like Gala, as they'll make the filling too cloying. The key is balance: tart enough to stand up to the spices, but not so sour it overpowers the sweetness.
Is there a way to make this pie healthier?
You can swap half the lard for unsalted butter (though it won't be as crispy) or use olive oil for frying instead of vegetable oil. For a lighter crust, try whole wheat flour (replace 1 cup of all-purpose). The filling stays healthy with fresh apples, cinnamon, and no refined sugar substitutes—just reduce the brown sugar slightly if needed. Remember, though, that frying inherently makes it indulgent!
How do I know when the oil is ready for frying?
Use a candy thermometer to monitor the oil—it should reach 350°F before adding the pie. If you don't have one, test with a small piece of dough: it should sizzle and turn golden in 30 seconds. Never let the oil get above 375°F, or the crust will burn before cooking through. A deep fryer maintains temperature better than a pot, but if using a pot, avoid stirring once the pie is in the oil.