
Desserts
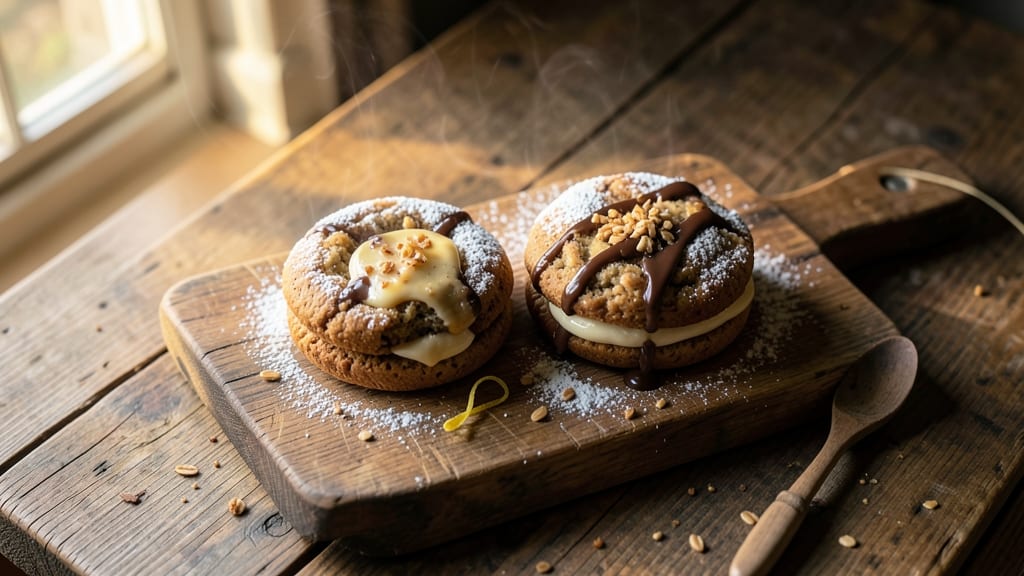
This Amish oatmeal whoopie pie recipe delivers the perfect balance of spiced cake layers and creamy filling that feels like a warm hug in dessert form.
The secret lies in the oatmeal base—ground oats add a tender, slightly chewy texture that pairs beautifully with the traditional cream cheese or chocolate filling. I've refined this recipe over years, keeping the classic Amish baking techniques while making it accessible for home bakers.
The cake layers rely on simple ingredients like flour, baking powder, and warm spices (cinnamon and nutmeg) for that signature Amish flavor. There's no need for complicated mixing—just combine dry ingredients, then fold in melted butter and buttermilk for a tender crumb.
The filling comes together in minutes with cream cheese, powdered sugar, and vanilla, creating a smooth, velvety center that holds the two cake layers together perfectly.
What makes these whoopie pies truly special is the contrast between the spiced cake and the rich filling. The cake stays moist for days, while the filling remains soft and spreadable, making each bite a harmonious blend of textures and flavors.
Whether you're serving them at a family gathering or enjoying a quiet afternoon treat, these pies deliver comfort in every bite.
Traditional recipes often use butter and eggs, but you can easily adapt this for dietary needs. For a gluten-free version, swap the all-purpose flour for a 1:1 gluten-free blend, and use certified gluten-free oats. The result is just as delicious—proof that classic Amish baking can be both timeless and flexible.
Ingredients for amish oatmeal whoopie pie
Twelve simple ingredients transform into twelve perfect whoopie pies with tender oatmeal cake and velvety cream cheese filling.
| Ingredient | Amount | Notes |
|---|---|---|
| All-Purpose Flour 🌾 | 2 ½ cups | Sifted for light texture |
| Old-Fashioned Rolled Oats 🥣 | 1 ½ cups | Blended into fine powder |
| Granulated Sugar 🍚 | 1 ½ cups | White or light brown |
| Unsalted Butter 🧈 | 1 cup | Melted, cooled slightly |
| Buttermilk 🥛 | 1 cup | Room temperature |
| Large Eggs 🥚 | 2 whole | Room temperature |
| Baking Powder 🧂 | 2 tsp | Aluminum-free preferred |
| Ground Cinnamon 🌿 | 2 tsp | Freshly ground for warmth |
| Ground Nutmeg 🌿 | ½ tsp | Freshly grated preferred |
| Salt 🧂 | ½ tsp | Fine sea salt |
| Cream Cheese 🧀 | 8 oz | Room temperature, full-fat |
| Powdered Sugar 🍚 | 2 cups | Sifted for smooth filling |
| Pure Vanilla Extract 🌸 | 1 tsp | High-quality preferred |
| Vanilla Bean Paste 🌸 | ½ tsp | For extra richness |
| Powdered Sugar (for dusting) 🍚 | ¼ cup | Optional garnish |
The oats are non-negotiable here—they create that signature Amish texture. Bob's Red Mill rolled oats are my go-to, but any old-fashioned kind works. For the flour, King Arthur all-purpose is ideal, but the store brand from Walmart or Kroger is fine too. The cream cheese matters—Philadelphia brand is consistent, but Tillamook has a richer flavor. Always buy full-fat; low-fat versions won't give that luscious filling. The spices should be fresh—if your nutmeg smells like dust, toss it. Penzeys sells bulk spices that last months in a cool, dark place.
No buttermilk? Mix 1 tablespoon lemon juice or vinegar with 1 cup milk and let sit for 5 minutes. Running short on vanilla? Vanilla bean paste doubles as both extract and seeds—just use half the amount. The cake layers can handle gluten-free flour blend if needed, but the texture will be slightly denser. For a chocolate twist, swap half the powdered sugar in the filling for cocoa powder. The oatmeal powder can be made ahead—just blend oats in a food processor until fine, then store in an airtight container for up to 2 weeks. Don't skip sifting the flour and powdered sugar; it makes all the difference in texture.
These pies stay fresh for 5 days at room temperature, wrapped tightly in plastic. For longer storage, freeze the assembled pies (unfrosted) for up to 3 months1 day ahead and stored in the fridge—it actually tastes better after flavors meld. I like to dust with powdered sugar right before serving, but that's optional. Leftovers? They're even better the next day—if they last that long.
Why You'll Love This Recipe
- No Mixer Needed: I just toss the dry ingredients—flour, oats, sugar—with cold butter until it looks like wet sand. No electric mixer, no fuss, and honestly? The texture comes out better this way. That buttermilk binding? It’s magic for holding everything together without overworking.
- Oatmeal Magic: Between us, those rolled oats add a chewy, hearty bite that’s not too sweet, not too dry. The butter and sugar caramelize just enough when baking to give it this warm, buttery depth—like a cross between a cookie and a cake. My kids call it "breakfast dessert," and I don’t correct them.
- Double-Duty Delight: These freeze like a dream, so I bake a batch on Sundays and pull them out for quick breakfasts or after-school snacks. Or—here’s the real win—stack two with whipped cream for a picnic dessert that’s way easier than pie. (Yes, even on a Tuesday night.)
- Pantry Staple Power: You’re already using stuff you’ve got: flour, sugar, butter. The oats add that rustic charm, and buttermilk? Often hiding in the fridge. I’ve made these for potlucks, lunchboxes, and late-night cravings—always with zero guilt. Budget-friendly and foolproof.
Step-by-step instructions for Amish oatmeal whoopie pies
Here's the method for perfect whoopie pies with tender cake layers and velvety cream cheese filling.
Prepare the Cake Batter
Preheat your oven to 350°F and line two baking sheets with parchment paper. In a food processor, blend the 1.5 cups Old-Fashioned Rolled Oats into a fine powder—this creates the signature oatmeal texture. Transfer the oat powder to a mixing bowl.
Add the 2.5 cups All-Purpose Flour, 1.5 cups Granulated Sugar, 2 tsp Baking Powder, 2 tsp Ground Cinnamon, 0.5 tsp Ground Nutmeg, and 0.5 tsp Salt. Whisk these dry ingredients together until fully combined. In a separate bowl, melt the 1 cup Unsalted Butter and let it cool slightly.
Add the melted butter, 1 cup Buttermilk, and 2 whole Large Eggs to the dry ingredients. Mix on low speed until just combined—don't overmix or the cakes will be dense. The batter should be thick but pourable. Divide the batter evenly between two greased 12-cup mini muffin tins or a whoopie pie pan.
Bake the Cake Layers
Bake for 12-15 minutes until the edges are golden brown and a toothpick inserted into the center comes out clean. The cakes should spring back when gently pressed but not be wet. Rotate the pans halfway through baking for even cooking.
Let the baked cakes cool in the pan for 5 minutes before transferring them to a wire rack to cool completely. This cooling step is crucial—warm cakes will crumble when you try to fill them. Once fully cooled, you can separate the cakes into individual layers for filling.
Make the Cream Cheese Filling
In a mixing bowl, beat the 8 oz Cream Cheese with an electric mixer until smooth. Gradually add the 2 cups Powdered Sugar, 1 tsp Pure Vanilla Extract, and 0.5 tsp Vanilla Bean Paste while mixing on medium speed. Beat until the filling is light, fluffy, and completely smooth.
Here's the thing—this filling needs to be perfectly smooth to pipe between the cake layers. If it's too thick, add 1-2 teaspoons of buttermilk to reach the ideal consistency. The filling should hold its shape when piped but still be spreadable with a knife.
Assemble the Whoopie Pies
Place a generous dollop of the cream cheese filling between two cake layers, pressing gently to create a sandwich. Repeat with the remaining cake layers and filling. The key is to use enough filling to create a thick layer—this is what makes whoopie pies so decadent.
For a professional finish, dust the tops with the 0.25 cup Powdered Sugar (for dusting) using a fine-mesh sieve. This adds a beautiful decorative touch and balances the rich flavors. Serve immediately or store in an airtight container in the refrigerator for up to 5 days.
Serve and Enjoy
These whoopie pies are best enjoyed at room temperature, so let them sit for 10-15 minutes before serving. The contrast between the warm, spiced cake and cool, creamy filling is what makes them truly special. Cut through the center to reveal the perfect layers of texture and flavor.
Real talk: The first bite should deliver a tender cake with just the right amount of oatmeal nuttiness, followed by that luscious cream cheese filling. If you want to take it up a notch, serve with a scoop of vanilla ice cream or a dollop of whipped cream for an extra indulgent treat.
Pro Tips For Making Amish Oatmeal Whoopie Pie
- Pulse the Oats First: I learned this the hard way—just tossing oats into the dry mix leaves you with a dense, chewy mess. Pulse them in a food processor for 10-15 seconds until they’re fine but still slightly textured. This keeps the texture light and fluffy without turning into oatmeal.
- Use Cold Butter, Not Soft: The recipe calls for butter, but I used to melt it first—big mistake. Cut the butter into tiny cubes and mix it into the dry ingredients until it’s pea-sized. The cold butter creates pockets of steam when baking, which makes the whoopies tender, not greasy.
- Don’t Overmix the Batter: After burning three batches, I finally figured out that overmixing is the enemy. Stir the wet ingredients into the dry just until combined—lumps are fine. The moment you get a smooth batter, you’ve gone too far, and the whoopies turn out tough instead of cakey.
- Fill the Pies Quickly: Sounds weird, but it works: fill the whoopie molds halfway, bake for 8-10 minutes, then add the second layer. This prevents the bottoms from getting too dark before the tops cook through. (Yes, even if you’re impatient like me.)
Make-ahead tips for this recipe
Batter Prep Ahead
Make the cake batter up to 24 hours in advance and store it in an airtight container in the fridge. The flavors deepen overnight, and the oatmeal absorbs moisture for a more tender crumb.
When ready to bake, let the batter sit at room temperature for 30 minutes before dividing into pans—this ensures even distribution. 🧂
Filling Make-Ahead
The cream cheese filling can be prepared 1 day ahead and stored in the fridge in a sealed container. It actually tastes better after flavors meld, and the texture remains perfect for assembly.
Just give it a quick whisk before piping between cake layers. For extra richness, add 1 tbsp sour cream to the filling when making it ahead. 🧀
Bake and Freeze
Bake the cake layers as directed, then let them cool completely. Stack the cooled layers with filling between them, wrap individually in plastic wrap, and freeze for up to 3 months.
Thaw at room temperature for 1-2 hours before serving—no reheating needed. This is my go-to method for holiday prep! ❄️
Assemble in Batches
Assemble only what you need for the day. Store unassembled cake layers in an airtight container at room temperature for 3 days or freeze for 2 months. Keep the filling refrigerated separately. This way, you can enjoy fresh whoopie pies whenever cravings strike without making a full batch. 💡
Storage Solutions
For short-term storage, keep assembled whoopie pies in an airtight container at room temperature for 5 days. For longer storage, freeze the entire batch (unfrosted) for up to 3 months.
Wrap each pie individually in plastic wrap before placing in a freezer bag to prevent sticking. Label with the date—trust me, you'll forget! 🗓️
Reheating Tips
Whoopie pies don't need reheating, but if you prefer them warm, place them in a 300°F oven for 5-7 minutes wrapped in foil. The cake stays moist while the filling melts slightly for a gooey surprise.
For microwave reheating, use 20-second intervals on low power to avoid drying out the filling. 🔥
Nutrition facts
Frequently asked questions
Why do Amish oatmeal whoopie pies have oats in the cake?
The oats create a signature tender yet slightly chewy texture that sets these apart from regular whoopie pies. Blending the oats into a fine powder distributes their flavor and moisture evenly throughout the cake, giving each bite that comforting Amish homestyle taste. The oatmeal also helps keep the cake moist for days after baking.
Can I make these gluten-free or without eggs?
For gluten-free, replace the all-purpose flour with a 1:1 gluten-free blend and use certified gluten-free oats. For egg-free, substitute with 2 tablespoons flaxseed meal + 6 tablespoons water per egg (let sit 5 minutes to thicken). The texture stays tender, though the cake may be slightly denser.
What's the secret to keeping the cake layers from falling apart?
Cool the baked cakes completely before filling—warm cakes crumble when pressed. Use a generous amount of filling (about 1 tablespoon per pie) to create a strong "glue" between layers. Chill the assembled pies in the fridge for 30 minutes before serving to help them hold together better.
Can I use a different filling besides cream cheese?
Yes! For a chocolate version, mix 1 cup melted chocolate + 1 cup powdered sugar + 1 tsp vanilla and chill until thick. For a nutty twist, blend 1 cup peanut butter + 1 cup powdered sugar + 1 tsp vanilla. The key is to make sure your alternative filling is thick enough to hold the layers together.
How do I store leftovers without them getting soggy?
Store assembled whoopie pies in an airtight container at room temperature for up to 5 days. For longer storage, freeze individual pies wrapped tightly in plastic wrap for up to 3 months. Thaw at room temperature—never microwave, as this makes the filling too soft.