
Desserts
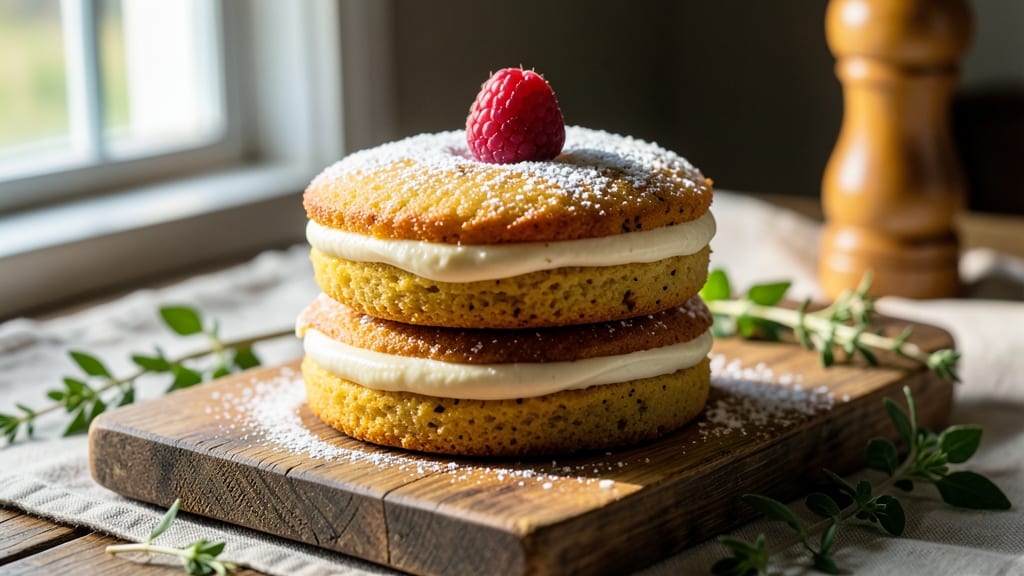
This Amish vanilla whoopie pie recipe brings old-fashioned charm to your dessert table with its simple, wholesome ingredients and perfect balance of spiced cake and creamy filling. 💛 The secret lies in traditional baking techniques that create tender, moist layers without a trace of artificial flavors—just pure, comforting sweetness that reminds you of homemade goodness.
The recipe starts with a classic vanilla cake batter made from scratch, using basic pantry staples like flour, sugar, and baking powder. What sets this apart is the warm vanilla flavor infused throughout, paired with a subtle hint of cinnamon that enhances every bite.
The filling—typically a rich vanilla buttercream or a lighter cream cheese version—binds the two cake layers together into that signature whoopie shape.
By the time you stack the final pieces, you'll have a dessert that's both nostalgic and impressive, with a tender crumb that melts in your mouth and a filling that's neither too sweet nor too heavy.
The beauty of this recipe is its versatility—whether you're baking for a family gathering or simply treating yourself, the simplicity of the ingredients makes it feel like a homemade hug.
Perfect for holidays, potlucks, or just a cozy afternoon snack, these whoopie pies keep well for days, making them ideal for sharing. The traditional Amish approach focuses on quality over complexity, ensuring every bite delivers that comforting, old-fashioned sweetness we all crave.
Ingredients for amish vanilla whoopie pie
Twelve simple ingredients transform into nostalgic whoopie pies with tender layers and creamy filling.
| Ingredient | Amount | Notes |
|---|---|---|
| All-Purpose Flour 🌾 | 3 ½ cups | Sifted for light texture |
| Granulated Sugar 🍚 | 2 ½ cups | White or light brown |
| Pure Vanilla Extract 🌸 | 2 tbsp | High-quality, not imitation |
| Unsalted Butter 🧈 | 1 ½ cups | Room temperature, full-fat |
| Large Eggs 🥚 | 3 whole | Room temperature, separated |
| Baking Powder 🧂 | 2 tsp | Double-acting preferred |
| Ground Cinnamon 🌿 | 1 ½ tsp | Freshly ground for warmth |
| Salt 🧂 | ½ tsp | Fine sea salt |
| Milk 🥛 | 1 cup | Whole milk preferred |
| Powdered Sugar 🍚 | 4 cups | For filling, sifted |
| Cream Cheese 🧀 | 16 oz | Room temperature, full-fat |
| Vanilla Bean Paste 🌸 | 1 tbsp | For extra vanilla flavor |
| Powdered Milk 🥛 | 1 tbsp | For stability in filling |
| Confectioners' Glaze 🍬 | ½ cup | Optional for topping |
The flour and sugar are your foundation—King Arthur or Gold Medal flour makes all the difference for that tender crumb. Bob's Red Mill baking powder ensures proper rise, while McCormick ground cinnamon delivers that warm Amish spice. For the vanilla, Nielsen-Massey pure extract is my go-to—it's worth the splurge. The butter? Land O'Lakes or Plugrah full-fat sticks melt perfectly. If you're using powdered sugar for the filling, Domino brand dissolves smoothly without clumping. Pro tip: measure your dry ingredients by weight if you're feeling fancy—more consistent results.
No vanilla bean paste? Double the extract—just know it won't be quite as rich. Running low on cream cheese? Substitute with equal parts butter and powdered milk for a lighter texture, though it won't be identical. The confectioners' glaze can be skipped entirely if you prefer a simpler finish. For the cake batter, separate the eggs completely—whisk the yolks with sugar first, then fold in whites at the end for that classic whoopie lightness. If your kitchen's humid, chill the batter 30 minutes before baking to prevent spreading. The filling can be made ahead and stored in the fridge for up to 5 days—just bring it to room temp before assembling.
Whoopie pies keep beautifully—wrap individually in parchment and store in an airtight container for 5 days at room temperature or 2 weeks in the fridge. For longer storage, freeze unassembled cakes and filling separately for up to 3 months. The filling can be piped directly onto cooled cakes or spread with a knife for that classic stacked look. Pro tip: Dust with extra powdered sugar right after baking while still warm—it melts into the crust for a professional finish. These taste even better the next day as the flavors meld!
Why You'll Love This Recipe
- No-Fuss Mixing: I swear by the creamy butter-egg combo here—just cream butter and sugar, toss in eggs, and fold in flour. No food processor, no fancy techniques, just a bowl and a whisk. That’s it. Honestly, it’s the kind of recipe that makes me feel like I’ve won the week.
- Vanilla Overload: The pure vanilla extract isn’t just a hint—it’s the star. That warm, buttery cake layer gets hit with enough vanilla to make your taste buds throw a party, and the filling? It’s like a hug in dessert form. My kids actually ask for seconds on the vanilla alone.
- Packable Magic: These freeze like champs, so I bake a batch on Sunday and stash them for school lunches, potlucks, or when I’m too tired to bake. They thaw in minutes, and the texture stays perfect—no soggy whoopie pies here. Between us, they’re my go-to for any occasion that needs something sweet but effortless.
- Pantry Staple Power: You’re probably already staring at these ingredients in your cupboard. Flour, sugar, butter, eggs—no weird imports or hard-to-find items. I’ll be real: I’ve made this with store-brand vanilla and it still tasted like a victory. Budget-friendly? Absolutely. Worth it? Even more so.
Step-by-step instructions for Amish vanilla whoopie pies
Here's how to make these classic two-layered treats with perfect texture and rich flavor.
👨🍳 Step 1: Cream Butter and Sweeteners for Light Cake Layers
In a large mixing bowl, combine the 1.5 cups unsalted butter and 2.5 cups granulated sugar. Beat with an electric mixer on medium speed until light and fluffy—about 3-4 minutes. This step is crucial for creating air pockets that make the cakes tender. I like to scrape down the sides of the bowl every 30 seconds to ensure even mixing.
Add the 3 whole large eggs, one at a time, mixing well after each addition. Then stir in the 2 tbsp pure vanilla extract until fully combined. In a separate bowl, whisk together the 3.5 cups all-purpose flour, 2 tsp baking powder, 1.5 tsp ground cinnamon, and 0.5 tsp salt. Gradually add the dry ingredients to the wet mixture, mixing on low speed just until combined—don't overmix or the cakes will be tough.
🍳 Step 2: Add Milk and Prepare the Batter
Pour in the 1 cup milk and mix until the batter is smooth and well incorporated. The consistency should be like thick pancake batter—neither too runny nor too stiff. Here's the thing—if your batter looks too thick, add 1-2 tablespoons more milk to help the cakes rise properly in the oven.
Divide the batter evenly between two greased and floured 9-inch round cake pans (or use a piping bag to create individual whoopie pies). Bake at 350°F for 15-18 minutes, until a toothpick inserted in the center comes out clean. Let the cakes cool in the pans for 5 minutes before transferring to a wire rack to cool completely.
🥘 Step 3: Make the Cream Cheese Filling
In a medium bowl, beat the 16 oz cream cheese with an electric mixer until smooth and creamy. Add the 4 cups powdered sugar, 1 tbsp vanilla bean paste, and 1 tbsp powdered milk, mixing until fully combined. The filling should be thick but spreadable—if it's too stiff, add 1 teaspoon milk at a time until it reaches the right consistency.
Here's a pro tip: For extra flavor, you can add a pinch of ground cinnamon or a dash of lemon zest to the filling. Once the filling is ready, spread it generously between two cooled cake layers to create those classic whoopie pie sandwiches.
🔪 Step 4: Assemble and Glaze (Optional)
Place one cake layer on a serving plate and spread a generous amount of the cream cheese filling on top. Place the second cake layer on top of the filling, pressing gently to create a neat sandwich. Repeat with the remaining cake layers and filling to make 12 whoopie pies. For a decorative touch, you can use a round cookie cutter to trim any uneven edges.
If you're using the 0.5 cup confectioners' glaze, heat it gently in a microwave-safe bowl for 10-15 seconds until it's smooth and runny. Drizzle the glaze over the top of each whoopie pie for a glossy finish. Let the glaze set for 10 minutes before serving. These whoopie pies are best enjoyed fresh, but they can be stored in an airtight container in the refrigerator for up to 5 days.
Pro Tips For Making Amish Vanilla Whoopie Pie
- MEASURE FLOUR RIGHT: Spoon it into the cup and level it—don’t scoop. Packed flour throws off the texture, and these whoopies need that tender crumb. I learned this the hard way when my first batch turned out dense as a brick.
- CREAM BUTTER AND SUGAR UNTIL PALE: Beat the butter and sugar on medium-high until the mixture lightens by 5-7 minutes. That pale, fluffy stage is what keeps the whoopies from tasting greasy. Skip this, and you’ll regret it—trust me.
- DON’T OVERMIX THE BATTER: Mix just until combined—no streaks, no overworking. Overmixed batter makes tough whoopies, and nobody wants that. Fold in the dry ingredients gently, like tucking in a baby.
- CHILL THE DOUGH 30 MINUTES: Pop the batter in the fridge while you preheat the oven. Cold dough spreads less and bakes evenly, giving you those perfect, thick whoopie rounds. I used to skip this—now I never do.
Common mistakes when making this recipe
Overmixing the Batter
I can't stress this enough—overmixing the cake batter is the #1 mistake that turns tender whoopie pies into dense, chewy bricks. Once you've combined all the dry ingredients with the wet, mix just until everything is barely incorporated.
The moment you see streaks of flour disappear, stop mixing immediately. I've ruined perfectly good batches by keeping the mixer going for an extra 30 seconds—don't make my mistake! 🌾
Skipping the Room-Temp Ingredients
Using cold butter, eggs straight from the fridge, or chilled cream cheese will throw off your texture completely. Room-temperature ingredients blend smoothly and create that signature tender crumb. Here's my trick: Take out your butter and eggs 20 minutes before baking while you preheat the oven.
The cream cheese should sit at room temp for 30-45 minutes before whipping. Trust me, this small step makes all the difference in the final texture.
Incorrect Baking Time
Underbaking or overbaking are both silent killers of perfect whoopie pies. The cakes should bake until a toothpick comes out clean, but not so long that they develop a dry crust. At 350°F, most ovens need 15-18 minutes—but watch yours closely after 14 minutes.
If you see the edges browning too quickly, tent with foil. The cakes will continue cooking as they cool in the pan. Pro tip: Rotate your pans halfway through baking for even cooking.
Filling Too Thick or Too Thin
The filling needs to be thick enough to hold the cakes together but spreadable enough to create that signature whoopie shape. If yours is too stiff, add milk 1 teaspoon at a time until it reaches a pipeable consistency. Too runny?
Add 1 tablespoon powdered sugar at a time. I've seen people use whipped cream instead—don't! It won't hold the cakes together properly. The filling should be like thick frosting that leaves a clean knife mark when you cut through it.
Assembling on Warm Cakes
Assembling whoopie pies with warm cake layers causes the filling to melt and create a soggy mess. Always let your cakes cool completely before adding the filling. I know it's tempting to eat them fresh out of the oven, but patience here is key.
The filling will also firm up as it chills in the fridge, making for cleaner slices. If you're in a hurry, pop the assembled pies in the fridge for 15 minutes before serving to help everything set.
Using Low-Quality Vanilla
This is where many homemade whoopie pies fall short. Imitation vanilla extract or cheap vanilla bean paste will give you a flat, artificial flavor. Invest in Nielsen-Massey pure extract or McCormick vanilla bean paste—it's worth every penny.
The difference between good vanilla and great vanilla is like night and day. I've tasted whoopie pies made with both, and the homemade versions using quality vanilla always win. Trust me, your taste buds will notice the difference immediately. 🌸
Nutrition facts
Frequently asked questions
Can I make these whoopie pies without a mixer?
Use a sturdy wooden spoon or whisk to cream the butter and sugar—just work it vigorously for 5-7 minutes until light and fluffy. For the filling, beat the cream cheese with a hand mixer or even a fork until smooth. The key is patience—keep at it until you achieve that airy texture.
How do I store homemade whoopie pies?
Wrap individual whoopie pies in plastic wrap or parchment paper, then store them in an airtight container. They'll keep at room temperature for 3-4 days or in the fridge for 5-7 days. For longer storage, freeze unassembled cakes and filling separately for up to 3 months. The filling can be piped onto thawed cakes when ready to serve.
Can I substitute cream cheese filling with something else?
Yes! For a lighter option, try vanilla buttercream (mix 1 cup softened butter with 3 cups powdered sugar and 1 tbsp vanilla). Or for a chocolate twist, use melted chocolate ganache. The key is to keep the filling thick enough to hold the cakes together. Test consistency by piping a small amount—it should hold its shape.
Why are my whoopie pies dense instead of tender?
Most likely, you overmixed the batter or used cold ingredients. The batter should be mixed just until combined—no more! Also, ensure your butter, eggs, and cream cheese are at room temperature. Another common issue is overbaking—remove cakes when a toothpick comes out clean (not dry). Let them cool completely before assembling.
Can I make mini whoopie pies instead of full-size?
Use mini muffin tins or a piping bag with a small round tip to create bite-sized whoopie pies. Reduce baking time to 10-12 minutes at 350°F. The filling amount stays the same per cake layer—just use a tiny spoon to spread it. These make perfect party appetizers!