
Desserts
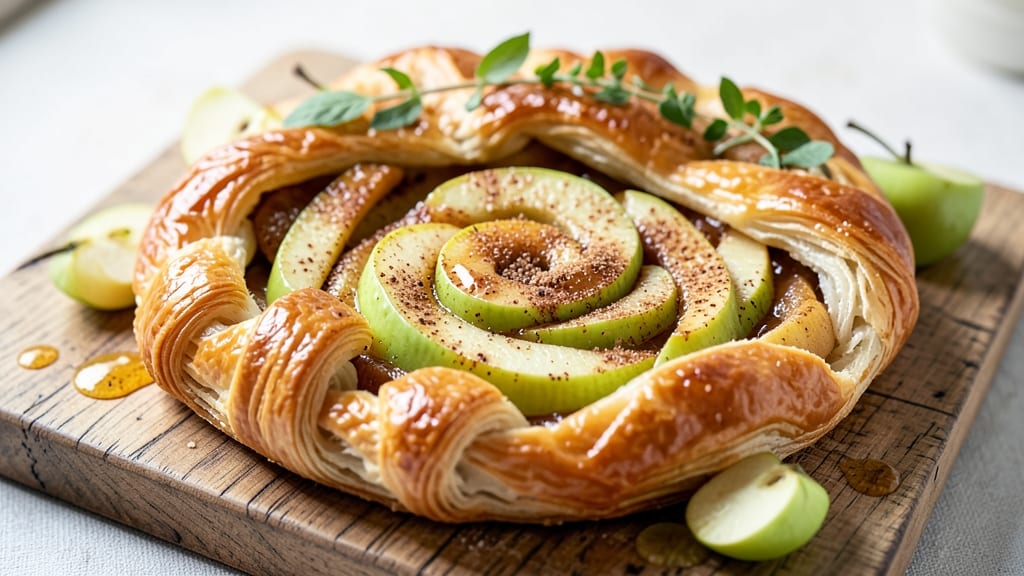
This apple hand pie recipe with puff pastry delivers the perfect balance of flaky crust and spiced apple filling—no rolling required. ✨ The secret lies in using store-bought puff pastry for effortless layers while keeping the filling tender with just the right amount of cinnamon and brown sugar.
I’ve perfected this recipe over years of baking, ensuring every bite is buttery, golden, and packed with warm apple flavor.
What sets these hand pies apart is their rustic charm—no fancy lattice crusts needed. Simply fold the puff pastry into half-moon shapes, fill with a spiced apple mixture, and bake until the edges are crisp and the filling bubbles.
The result? A handheld dessert that’s as satisfying to make as it is to eat, with a texture that’s crisp on the outside and soft on the inside.
Ready in just 30 minutes, this recipe is ideal for potlucks, holiday gatherings, or a cozy dessert night in. The filling stays tender thanks to a quick cook-down with lemon juice, while the puff pastry creates a buttery, melt-in-your-mouth crust.
Serve warm with a dusting of powdered sugar or a drizzle of caramel for extra indulgence.
Whether you’re a seasoned baker or just starting out, these hand pies are a foolproof way to impress. The best part? You can customize the filling with your favorite apples or spices, making them as versatile as they are delicious. Let’s get baking!
Ingredients for apple hand pie recipe puff pastry
Store-bought puff pastry and a few simple pantry staples make these hand pies effortless yet impressive.
| Ingredient | Amount | Notes |
|---|---|---|
| Puff Pastry Sheets 🥧 | 2 sheets | Store-bought, thawed if frozen |
| Granny Smith Apples 🍎 | 4 medium | Peeled, cored, diced small |
| Granulated Sugar 🍚 | ½ cup | For filling sweetness |
| Light Brown Sugar 🍚 | ¼ cup | Packed, for depth |
| Ground Cinnamon 🌿 | 2 tsp | Freshly ground preferred |
| Lemon Juice 🍋 | 2 tbsp | Freshly squeezed |
| Unsalted Butter 🧈 | ¼ cup | Cold, cubed |
| All-Purpose Flour 🌾 | 2 tbsp | For dusting |
| Powdered Sugar 🍚 | ¼ cup | For dusting finished pies |
| Vanilla Extract 🌸 | ½ tsp | Pure vanilla preferred |
| Salt 🧂 | ½ tsp | Fine sea salt |
| Heavy Cream 🥛 | 2 tbsp | For brushing crust |
The apples are the star—Granny Smiths add tartness that balances the sweet filling, but Honeycrisp or Fuji work too. Trader Joe's often carries pre-peeled apples if you're short on time, but fresh is always better. For the puff pastry, Pepperidge Farm or Storebrand are my go-tos—they're reliable and easy to find. Keep the pastry cold until you're ready to use it, or it'll get too soft to handle. If your apples are watery after peeling, pat them dry with a paper towel before dicing—this keeps the filling from getting soggy.
No Granny Smiths? Any tart apple works—even a mix of sweet and tart. The brown sugar can be swapped for white if you're avoiding molasses notes, but I like the depth it adds. Short on butter? Vegan butter or coconut oil works in a pinch, though the flavor won't be quite the same. For a quicker prep, use pre-minced apples from the produce section, but fresh always tastes better. The lemon juice is non-negotiable—it tenderizes the apples and balances the sweetness. If you don't have fresh, bottled works in a bind, but the flavor won't be as bright.
Puff pastry is best used fresh from the package, but it freezes beautifully. Wrap it tightly in parchment and foil for up to 3 months. The filled pies can be prepped ahead and baked later—just cover them with plastic wrap and refrigerate for up to 24 hours. For make-ahead convenience, assemble the pies, freeze them unbaked on a tray, then transfer to a bag. Bake straight from frozen, adding 5-7 extra minutes. The powdered sugar dusting keeps best if you do it right after baking—it prevents the crust from getting soggy.
Why You'll Love This Recipe
- Puff Pastry Magic: The flaky layers of store-bought puff pastry do all the hard work—no rolling, no fuss. Just fold, cut, and bake while I sip coffee. Honestly, the only effort is peeling apples, and even that’s forgivable.
- Tart-Sweet Perfection: Granny Smiths hold their shape while the brown sugar caramelizes into a sticky, cinnamon-kissed glaze. That crisp edge on the pastry? It’s the kind of contrast that makes me close my eyes and sigh.
- Picnic or Pajama Party: These bite-sized pies travel beautifully—no plates needed. Pack them for a hike, serve them at a game night, or eat them straight from the oven while watching movies. (Yes, even on a Tuesday night.)
Step-by-step instructions for apple hand pies with puff pastry
Here's how to create flaky, golden hand pies that taste like a hug from Grandma.
👨🍳 Step 1: Prepare the Spiced Apple Filling
In a large bowl, combine the diced 4 medium Granny Smith Apples with the 0.5 cup Granulated Sugar, 0.25 cup Light Brown Sugar, 2 tsp Ground Cinnamon, 0.5 tsp Salt, and 0.5 tsp Vanilla Extract. Toss gently until every apple piece is evenly coated. Let it sit for 5 minutes—this helps the flavors meld.
Next, add the 2 tbsp Lemon Juice and mix again. The acidity will brighten the apples and prevent the filling from turning mushy. I like to press down on the mixture with a spoon to release any excess liquid—this ensures your pies won't be soggy. The filling should look glossy but not wet.
🍳 Step 2: Cook the Filling Until Thickened
Transfer the apple mixture to a medium saucepan and cook over medium heat for 8-10 minutes, stirring occasionally. You're looking for the filling to thicken slightly and the liquid to reduce—it should coat the back of a spoon but still be loose enough to pipe easily.
Real talk: Don't let it simmer too long or the apples will turn to mush. When the filling reaches the right consistency, remove it from heat and stir in the 0.25 cup Unsalted Butter until fully melted and incorporated. The butter adds richness and helps create that perfect balance of sweet and tart in every bite.
🥘 Step 3: Assemble the Hand Pies
Preheat your oven to 375°F and line a baking sheet with parchment paper. Roll out one of the 2 sheets Puff Pastry Sheets on a lightly floured surface until it's about 1/8-inch thick. Cut the pastry into 4-inch circles using a round cutter or glass. I use a glass rimmed with flour to keep it from sticking.
Place 1 tbsp of the cooked apple filling in the center of each pastry circle. Fold the pastry over the filling to form a half-moon shape, then press the edges together firmly with your fingers. Crimp the edges with a fork or your fingers to seal—this prevents filling from leaking out during baking. Place the assembled pies on the prepared baking sheet.
🔥 Step 4: Bake Until Golden and Flaky
Brush the tops of the hand pies with the 2 tbsp Heavy Cream using a pastry brush. This creates a beautiful golden finish and adds a touch of richness. Bake for 20-25 minutes until the crust is deep golden brown and puffed in spots.
Here's the thing—don't overbake. The crust should be crisp but not burnt. If the edges brown too quickly, cover them loosely with aluminum foil. The pies are done when the filling is bubbling gently and the crust is golden all over. Let them cool on the baking sheet for 5 minutes before transferring to a wire rack.
🍽️ Step 5: Dust and Serve Warm
Once cooled slightly, dust the warm hand pies generously with the 0.25 cup Powdered Sugar using a fine-mesh sieve. This adds that classic touch and balances the spiced apple filling beautifully. Serve them warm with a scoop of vanilla ice cream or a dollop of whipped cream for the ultimate dessert experience.
These hand pies stay fresh at room temperature for 2 days or can be frozen for up to 3 months. Just reheat in a 350°F oven for 10 minutes to restore that warm, flaky perfection. Trust me, they're worth every minute of effort!
Pro Tips For Making Apple Hand Pie Recipe Puff Pastry
- Preheat Pan Properly: Puff pastry needs a screaming-hot oven—425°F (220°C) or higher—to rise right. I used to slide these in at 375°F and ended up with sad, flat hand pies. Preheat for 10 minutes, then bake on the middle rack so the bottom doesn’t steam instead of crisp.
- Toss Apples with Sugar: Granny Smiths release water like crazy when sliced, which makes the filling soggy. Toss them with 1 tablespoon of sugar before baking to draw out moisture and caramelize the edges. Skip this, and your pie will taste like a sad apple compote instead of a crisp, spiced bite.
- Skip Overfilling the Pastry: Stuffing those little pockets to the brim guarantees a messy, uneven bake. Fill each half-sheet pocket about ¾ full—trust me, they’ll puff up like magic. Overpacking leads to leaks, and nobody wants apple syrup dripping onto their counter.
- Use a Mix of Sugars: Brown sugar adds depth, but too much can make the filling cloying. Split the difference: 1 tablespoon granulated sugar per 2 tablespoons brown sugar for every 2 cups of sliced apples. The granulated keeps the texture bright, while the brown sugar caramelizes beautifully—no need to fuss with extra steps.
Serving suggestions for this apple hand pie recipe puff pastry
Classic Pairings
Serve these hand pies warm with a scoop of vanilla bean ice cream—the creamy cold contrasts beautifully with the warm spiced apples. I love Breyer's vanilla for its rich flavor, but any high-quality brand works.
For a lighter option, try whipped cream with a sprinkle of cinnamon on top. 🥛
Caramel Drizzle
Elevate your presentation with a salted caramel drizzle. Warm ½ cup caramel sauce (I use Trader Joe's for convenience) with 1 tsp sea salt, then drizzle over the pies before serving.
The salty-sweet combo takes these hand pies to the next level. For homemade caramel, simmer ½ cup brown sugar and ¼ cup heavy cream until thickened.
Spiced Rum Glaze
Add a boozy twist with a spiced rum glaze. Simmer ¼ cup brown sugar, 2 tbsp water, and 1 tbsp spiced rum (like Bacardi) until syrupy.
Brush over warm pies just before serving. This glaze adds depth and a subtle warmth that pairs perfectly with the cinnamon-spiced filling. 🍷
Coffee or Tea
Pair your hand pies with a hot cup of coffee or chamomile tea to balance the sweetness. A dark roast like Peet's Major Dickason's enhances the caramelized apple flavors, while herbal tea adds a soothing contrast. For a festive touch, serve with mulled wine during the holidays.
Cheese Platter
Create a sweet-and-savory spread by serving hand pies alongside aged cheddar, brie, and walnuts. The sharpness of the cheese cuts through the sweetness, making for a sophisticated dessert experience. I recommend Cabot Clothbound Cheddar for its creamy yet tangy profile. 🧀
Nutrition facts
Frequently asked questions
Can I use frozen puff pastry for this recipe?
Yes, but thaw it completely first! Place the frozen puff pastry sheets on a baking sheet and let them sit at room temperature for 30-45 minutes until pliable. Never microwave—it can make the pastry unevenly soft and harder to handle. Keep the thawed pastry cold while working to prevent it from becoming too sticky.
What if my puff pastry tears when rolling?
Don't panic! Simply press the torn edges together and continue shaping. For extra security, chill the pastry for 10 minutes before cutting circles—this makes it firmer. If it still tears, use a smaller cutter or carefully patch with extra pastry scraps sealed with a bit of water.
Can I make these hand pies ahead of time?
Assemble the pies up to 24 hours ahead and refrigerate them uncovered on a baking sheet. When ready to bake, add 5 extra minutes to the baking time. For longer storage, freeze unbaked pies for up to 3 months—bake straight from frozen with 10 extra minutes covered with foil.
Why is my filling too watery?
Overcooking the apples releases too much liquid. Cook the filling only until it thickens slightly (8-10 minutes max). Drain excess juice after cooking by pressing the filling through a fine-mesh sieve, or add 1 extra tbsp flour to thicken. The filling should coat the back of a spoon but still be spoonable.
How do I make these gluten-free?
Replace the puff pastry with a gluten-free puff pastry sheet (like Schär or King Arthur) and use a gluten-free flour blend for dusting. The filling recipe is naturally gluten-free—just ensure your sugar and spices are certified GF. Expect slightly different textures, but the flavor will be just as delicious!