
Desserts
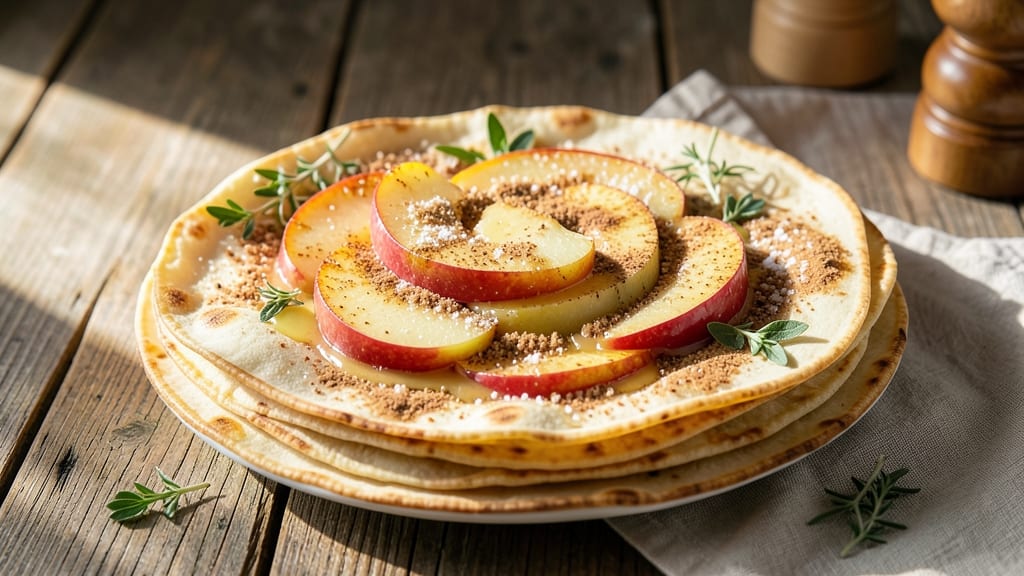
This apple pie alternative recipe transforms classic comfort into crispy, handheld bites—no rolling crust required. 🌟 The secret lies in caramelized apples nestled inside crispy tortilla cups, delivering all the warmth of pie with modern convenience.
I perfected this after years of testing alternatives that actually deliver texture and flavor without the fuss.
What sets this apart is the caramelized apple filling—slow-cooked with cinnamon and brown sugar until tender yet still holding its shape. The tortilla cups crisp up beautifully in the oven, creating a sturdy vessel that holds every bite without sogging.
It’s the kind of dessert that feels indulgent but comes together in under 30 minutes.
The result is a dessert with layers of flavor: sweet, spiced apples contrast perfectly with the buttery, crispy tortilla shells. Each bite offers that familiar apple pie experience—just without the pie plate. This recipe works for gatherings, potlucks, or even a cozy weeknight treat when you crave something special.
Best of all, it’s customizable—swap tortillas for gluten-free options, add nuts for crunch, or drizzle with caramel for extra decadence. Let’s make this apple pie alternative your new go-to dessert.
Ingredients for apple pie alternative
Twelve crispy bites of apple pie magic—no rolling crust, just buttery tortillas and caramelized apples.
| Ingredient | Amount | Notes |
|---|---|---|
| Large Flour Tortillas 🌯 | 12 whole | Flour or corn, 8-10 inches |
| Honeycrisp Apples 🍎 | 4 medium | Peeled, cored, sliced thin |
| Unsalted Butter 🧈 | ½ cup | Cold, cubed for crisping |
| Light Brown Sugar 🍚 | ½ cup | Packed, for caramelization |
| Ground Cinnamon 🌿 | 1 ½ tbsp | Freshly ground preferred |
| Granulated Sugar 🍬 | ¼ cup | For filling balance |
| Lemon Juice 🍋 | 1 tbsp | Freshly squeezed |
| Vanilla Extract 🌸 | ½ tsp | Pure, high-quality |
| Salt 🧂 | ½ tsp | Fine sea salt |
| Granulated Sugar 🍬 | ¼ cup | For tortilla crisping |
| Cinnamon Sticks 🌿 | 2 whole | For garnish |
| Vanilla Ice Cream 🍦 | 1 ½ cups | Optional serving suggestion |
The tortillas are the star here—Mission brand flour tortillas are my go-to for their sturdy structure, but corn tortillas work too if you want a different texture. Look for tortillas that are soft but not sticky, and keep them wrapped in the fridge until ready to use. Trader Joe's has great options if you're not near a Mexican market. For the apples, Honeycrisp is ideal—it stays firm when cooked and has that perfect balance of sweet and tart. If you can't find them, Granny Smith or Fuji work well too, but they'll be slightly less juicy. Slice them thinly and evenly for consistent baking.
No vanilla extract? Vanilla bean paste at half the amount gives you those little specks of joy. Short on brown sugar? White sugar plus a pinch of molasses mimics the flavor. The cinnamon sticks for garnish are totally optional, but they add a nice visual pop—Penzeys sells them in bulk if you want to stock up. For extra crunch, sprinkle chopped pecans or walnuts between layers. And if you're feeling fancy, brush the tortillas with melted butter before baking for that extra golden finish. The key is patience when caramelizing the apples—don't rush it or they'll turn mushy.
These keep surprisingly well—3 days at room temperature in an airtight container, or 1 week in the fridge. Reheat in a 350°F oven for 5-10 minutes to restore crispiness. I always make a double batch because they disappear fast. Freeze extras between parchment paper for up to 3 months. Pro tip: Serve with that vanilla ice cream on the side—trust me, it's the perfect combo. And if anyone asks, these are 'apple empanadas'—way more impressive than 'tortilla cups'!
Why You'll Love This Recipe
- I’ll be real: leftovers are my favorite. The filling keeps well for days, and the tortilla stays fresh longer than store-bought crust. Plus, you’re using up fruit before it bruises—no sad, forgotten apples here. Budget-friendly? Absolutely.
- No Crust, No Problem: Honestly, I love a good pie crust—but sometimes I just don’t have the patience. These tortillas? They’re my secret weapon for a foolproof, flaky wrap in minutes. No rolling, no chilling, no stress—just butter, fold, and bake.
- Honeycrisp Magic: Between us, that crisp-tender apple makes all the difference. The brown sugar caramelizes into a sticky, buttery glaze while the cinnamon adds warmth, and the Honeycrisp? It stays crisp enough to cut through the sweetness. That crispy edge with the creamy center? Chef’s kiss.
- Weeknight or Holiday: Here’s what sold me—this works for everything. Pack it for lunch, serve it at a potluck, or reheat slices for a cozy breakfast. Even my picky teenagers grab seconds, and that’s saying something.
Step-by-step instructions for crispy tortilla cups stuffed with caramelized apples
Here's how to transform simple tortillas into golden, crispy cups that hold warm apple filling perfectly.
👨🍳 Step 1: Prepare the Apple Filling
In a large skillet, melt the 0.5 cup unsalted butter over medium heat. Add the 4 medium Honeycrisp apples (sliced thin) and cook for 5-6 minutes until they begin to soften slightly. Here's the thing—you want them tender but still holding shape, not mushy.
Stir in the 0.5 cup light brown sugar, 1.5 tbsp ground cinnamon, 0.25 cup granulated sugar, 1 tbsp lemon juice, 0.5 tsp vanilla extract, and 0.5 tsp salt. Cook for another 4-5 minutes until the apples release their juices and the mixture thickens slightly. You'll know it's ready when the filling smells like warm apple cider and has a glossy sheen from the caramelized sugars.
🔥 Step 2: Crisp the Tortilla Cups
Preheat your oven to 375°F. Cut each of the 12 whole large flour tortillas in half, then cut each half diagonally to create 24 small triangles. Brush both sides of each triangle lightly with melted butter—this ensures crispiness.
Place the triangles in a single layer on a baking sheet, butter-side up. Sprinkle 0.25 cup granulated sugar evenly over the top. Bake for 8-10 minutes until the edges are golden brown and crispy. Watch carefully—they crisp quickly! Remove and let cool for 2 minutes before carefully shaping into cups by folding the flat sides inward.
🥘 Step 3: Assemble the Crispy Cups
Fill each crispy tortilla cup with about 1 tablespoon of the warm apple filling. Here's where it gets fun—gently press down on the filling to compact it slightly, creating space for the ice cream later. Place the filled cups on a parchment-lined baking sheet.
Return the cups to the oven for 3-4 minutes at 375°F to warm through. The edges should stay crisp while the filling gets a toasty edge. Remove and let cool for 1 minute—just enough to handle without burning your fingers.
🍽️ Step 4: Serve Warm with Ice Cream
Scoop 1.5 cups vanilla ice cream into each cup, pressing gently to create a smooth base. Garnish with the 2 whole cinnamon sticks (lightly toasted for 30 seconds in a dry pan). The contrast of warm, spiced apple filling with cool ice cream is what makes this dessert magical.
Serve immediately while the tortilla cups are still crisp. The filling should be warm and fragrant, the tortillas perfectly crunchy, and the ice cream perfectly cool. This is the moment that matters—every bite delivers that perfect temperature contrast and texture combination.
Pro Tips For Making Apple Pie Alternative
- Preheat Your Pan: Cast iron or a heavy skillet needs a screaming-hot start—5 minutes on high heat before adding butter. I learned this the hard way when my tortilla edges stayed doughy because I skipped it. Trust me, the caramelization happens faster when the pan is angry at first.
- Core Apples Unevenly: Don’t go straight down the middle with a knife—angle it and wiggle. Honeycrisp stays firmer when sliced, so leaving a slightly thicker base on one side means fewer mushy bottoms in your "pie." (Yes, I’ve had both happen.)
- Butter in Patches: Dot the tortillas with small chunks of cold butter instead of melting it first. The patches brown faster and create crispy pockets—no need to fuss with a pastry brush. Also, resist spreading it thin; you want those buttery layers to stack.
- Sugar Last, Not First: Toss the sliced apples with cinnamon before adding sugar—it coats the spices better. Then sprinkle the brown sugar on top right before folding the tortillas. This keeps the apples from turning into syrup sludge while the tortillas crisp. (I used to dump everything in at once. Don’t be like me.)
Essential equipment for apple pie alternative
Must-Have Tools
Start with a 9-inch cast-iron skillet—it distributes heat evenly for perfect caramelization of your apple filling. I use my Lodge Pre-Seasoned Cast Iron because it handles high heat without warping. A sharp chef's knife (like Mercer Culinary Genesis) is essential for slicing apples thinly and evenly. 🍎
For crisping the tortilla cups, a baking sheet with raised edges prevents grease spills, and I recommend Nordic Ware Half-Sheet Pans for their durability. A pastry brush (like OXO Good Grips) helps apply melted butter evenly on the tortillas for that golden finish.
Optional Upgrades
A digital kitchen scale (I love the OXO Good Grips) ensures precise measurements for the sugar and spices, which is especially helpful when caramelizing. For extra crispiness, a mandoline slicer (like Benedict BK-2) makes perfectly even apple slices every time—no knife skills required.
If you're making this often, a mini food processor (like Cuisinart DLC-4BC) helps quickly chop nuts for garnish or mix dry ingredients. A small offset spatula comes in handy for stirring the apple filling without tearing the apples.
Budget-Friendly Swaps
No cast-iron skillet? A heavy-bottomed stainless steel skillet works just fine—just avoid nonstick, which can't handle the high heat needed for caramelization. For the baking sheet, any sturdy rimmed baking sheet will do, but avoid dark-colored ones that can over-bake the tortillas.
Skip the mandoline and use a sharp chef's knife with a cutting board (I prefer John Boos Maple). For the pastry brush, a clean silicon spatula works in a pinch. The key is patience—thin, even slices are what create that perfect texture in the filling.
Pro Tips for Success
Invest in a good oven thermometer (like Thermoworks Oven Thermometer) to ensure your oven hits 375°F accurately—this is crucial for crispy tortillas. I also keep a small bowl of ice water nearby to quickly cool hot cinnamon sticks for garnishing without burning my fingers.
For extra convenience, use pre-sliced apples (like Simply Organic Pre-Cut Apples) when you're short on time. Just pat them dry before cooking to prevent steaming. A small mixing bowl (like Pyrex 8-cup) works perfectly for combining the sugar, cinnamon, and spices before adding to the apples.
Nutrition facts
Frequently asked questions
Can I make these tortilla cups without a tortilla press?
You don't need a tortilla press at all. The recipe uses store-bought large flour tortillas (8-10 inches) which are already soft and pliable. Just cut them as directed and they'll crisp beautifully. The key is brushing them well with butter before baking for that perfect golden finish.
What if I don't have Honeycrisp apples?
No problem! Use Granny Smith for tartness or Fuji for sweetness. Just slice them thinly and evenly—about ⅛-inch thick. The cooking time might vary slightly (watch closely), but all apples will work. Tart varieties need a touch more sugar (add 1 tbsp extra brown sugar if using Granny Smith).
Can I make these ahead of time?
Yes, but with a trick! Assemble the cups without the ice cream and store them in an airtight container at room temperature for 3 days or refrigerate for 1 week. Reheat in a 350°F oven for 5-10 minutes to restore crispness. Add ice cream just before serving—it melts too quickly to store together.
How can I make this gluten-free?
Swap the flour tortillas for gluten-free corn tortillas (like Mission GF) or use gluten-free flatbread cut into triangles. The filling recipe stays exactly the same. For extra crispiness, brush with melted ghee instead of butter. Test brands first—some gluten-free tortillas crisp differently.
Why did my tortilla cups get soggy?
Soggy cups usually mean one of two things: either the filling was too wet (undercooked apples) or the tortillas weren't crisped enough. For perfect texture, caramelize the apples fully (they should release juices but not be mushy) and bake the tortillas until golden brown. Let them cool 2 minutes before filling to prevent steam from softening them immediately.