
Desserts
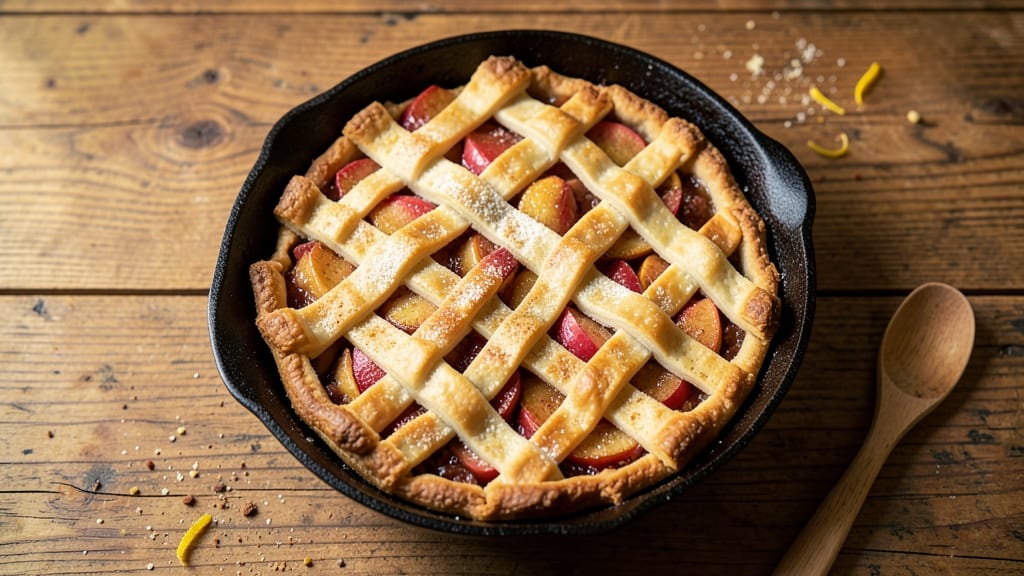
The Pioneer Woman skillet apple pie brings rustic charm and buttery perfection to your table with minimal effort. Inspired by Ree Drummond’s approachable yet impressive desserts, this recipe delivers a golden crust, caramelized apples, and warm cinnamon-spiced filling—all baked in a single cast-iron skillet for easy serving.
The secret lies in balancing a flaky crust with tender, spiced apples that release their juices just enough to create a luscious, slightly gooey center.
What sets this skillet apple pie apart is its flexibility—whether you’re using store-bought dough for convenience or rolling out homemade crust for tradition, the result is the same: a deep-dish masterpiece with crisp edges and a velvety filling.
The apples soften beautifully while retaining their shape, and the cinnamon, nutmeg, and brown sugar create layers of cozy spice that evoke memories of harvest season. Perfect for breakfast desserts, holiday gatherings, or a comforting weeknight treat, this pie is designed to impress without the fuss.
By the time it emerges from the oven, your skillet apple pie will boast a golden-brown crust with caramelized edges, where the apples glisten with natural juices and the scent of warm spices fills the kitchen.
The deep-dish method ensures every slice is generous and satisfying, while the cast-iron skillet adds a rustic touch that feels both nostalgic and modern. Serve it warm with a scoop of vanilla ice cream or a dollop of whipped cream for the ultimate dessert experience.
This recipe strikes the perfect balance between tradition and convenience, making it ideal for both beginner bakers and seasoned home cooks. Whether you’re hosting a dinner party or simply craving a slice of homemade pie, this Pioneer Woman-inspired skillet apple pie delivers restaurant-quality results with a fraction of the effort.
Let’s get baking!
Ingredients for pioneer woman skillet apple pie
Six apples, a cast-iron skillet, and these simple ingredients transform into golden perfection.
| Ingredient | Amount | Notes |
|---|---|---|
| All-Purpose Flour 🌾 | 2 ½ cups | Sifted for light texture |
| Unsalted Butter 🧈 | 1 cup | Cold, cubed for crust |
| Granulated Sugar 🍚 | ¾ cup | For crust sweetness |
| Ice Water 💧 | ⅓ cup | For dough binding |
| Medium Apples 🍎 | 6 whole | Honeycrisp or Granny Smith |
| Brown Sugar 🍚 | ½ cup | Packed, for caramelization |
| Ground Cinnamon 🌿 | 2 tbsp | Freshly ground preferred |
| Ground Nutmeg 🌿 | ½ tsp | Freshly grated for warmth |
| Lemon Juice 🍋 | 1 tbsp | Freshly squeezed |
| Vanilla Extract 🍯 | 1 tsp | Pure vanilla preferred |
| Salt 🧂 | ½ tsp | Fine sea salt |
| Turbinado Sugar 🍚 | ¼ cup | For crust topping |
The apples are non-negotiable—Honeycrisp or Granny Smith cut beautifully and hold their shape. Trader Joe's and Whole Foods carry perfect ones year-round. If you’re using store-bought dough, grab Pillsbury Refrigerated Pie Crust for foolproof results. For homemade, cold butter is key—cut it into tiny cubes and work fast. The cinnamon should be fresh; McCormick or Penzeys brands make all the difference in that warm spice aroma. And don’t skip the nutmeg—it’s what makes this taste like grandma’s pie.
No vanilla extract? Vanilla bean paste works just as well. Short on apples? Pears or peaches swap in beautifully. The brown sugar can be light or dark—your call. For extra richness, add 1 tbsp cornstarch** to the filling to thicken it up. The lemon juice keeps the apples from turning brown while baking. Pro tip: Toss the sliced apples with a little flour before adding them to the skillet—it helps thicken the filling and prevents a soggy bottom.
This pie tastes even better the next day, so bake it ahead if you can. Store leftovers in an airtight container for 3-4 days—though I doubt it’ll last that long. The crust stays crispy if you reheat it in the oven for 5-10 minutes at 350°F. Freeze the whole skillet (without the crust) for up to 3 months**—just thaw overnight in the fridge before baking. And trust me, the cast-iron skillet makes cleanup a breeze—just pop it in the dishwasher.
Why You'll Love This Recipe
- No-Roll Crust Magic: I swear by that cold butter and ice water trick—it’s like the dough assembles itself. No rolling pin, no stress, just a handful of flour and a quick press with my palms. The flaky layers happen without effort, and honestly? The edges get crispier than any store-bought crust I’ve ever bought.
- Apples Sing Here: The secret’s in the sugar—just a sprinkle on the sliced apples before baking caramelizes them into something ridiculously good. That buttery crust soaks up the juices while keeping its structure, so every bite has that perfect balance of crisp, gooey, and sweet. (Yes, even on a Tuesday night.)
- Crowd-Pleaser in Minutes: This fills a skillet in under 20 minutes, and it’s the kind of dish that disappears faster than my willpower on a bad day. Serve it warm with ice cream for a fancy dessert, or cold the next day for a no-fuss breakfast—my kids beg for leftovers, and that’s saying something.
- Budget-Friendly Comfort: Four ingredients, zero waste. The apples stay fresh for days, and that flour-butter-sugar combo stretches further than you’d think. I’ve made this for potlucks, last-minute guests, and even as a lazy Sunday brunch—it’s my go-to when I need something reliable that won’t break the bank.
Step-by-step instructions for Pioneer Woman skillet apple pie
This single-dish wonder delivers restaurant-quality pie with a golden crust and bubbling spiced apples.
Prepare the Crust Mixture
In a large bowl, combine the 2.5 cups all-purpose flour and 0.5 teaspoon salt. Cut in the 1 cup unsalted butter using a pastry cutter or your fingers until the mixture resembles coarse crumbs with pea-sized butter pieces. I like to use my fingers for this—it's faster and gives you better control over the texture.
Add the 0.75 cup granulated sugar and mix until evenly distributed. Then pour in the 0.33 cup ice water all at once. Using a fork, gently stir until the dough just comes together—don't overmix or you'll develop gluten and end up with a tough crust. The dough should hold together when pressed but still feel slightly dry.
Press and Pre-Bake the Crust
Transfer the dough to a 10-inch cast-iron skillet (or oven-safe skillet of similar size). Press it firmly and evenly into the bottom and about 1 inch up the sides using your fingers. The edges should be slightly thicker than the center—this prevents shrinking during baking. Poke the bottom all over with a fork to prevent air pockets.
Preheat your oven to 375°F. Place a rack in the lower third of the oven and another in the upper third. Bake the crust for 12-15 minutes until it's light golden brown at the edges. I like to rotate the skillet halfway through for even browning. Remove from oven and keep warm while you prepare the filling.
Prepare the Apple Filling
Peel, core, and slice the 6 whole medium apples into ¼-inch thick slices. Toss them in a large bowl with the 0.5 cup brown sugar, 2 tablespoons ground cinnamon, 0.5 teaspoon ground nutmeg, 1 tablespoon lemon juice, and 1 teaspoon vanilla extract. Mix gently but thoroughly—you want the spices evenly distributed without crushing the apples.
Here's a pro tip: I always sprinkle a little extra cinnamon on top after filling—it gives that extra warm, spicy aroma when it bakes. The lemon juice is crucial for balancing the sweetness and keeping the apples from browning too quickly.
Assemble and Bake the Pie
Return the pre-baked crust to the oven (no need to preheat again). Arrange the apple slices in a single layer over the crust, slightly overlapping them. Sprinkle the 0.25 cup turbinado sugar evenly over the top—this creates that beautiful caramelized crust during baking.
Bake for 30-35 minutes until the apples are tender when pierced with a knife and the filling is bubbling. The edges should be deep golden brown with some caramelization on top. If the crust starts browning too quickly, tent loosely with foil.
Serve Warm with Vanilla Ice Cream
Let the pie cool for 10-15 minutes before serving—this allows the filling to set slightly while keeping it warm and gooey inside. The crust should be crisp at the edges but still tender in the center. I like to serve it with a scoop of vanilla ice cream to balance the warm spices and sweet filling.
This pie tastes even better the next day when the flavors have melded together, but it's hard to wait! The crust stays crispy, the apples remain tender, and that perfect balance of sweet and spice makes every bite worth the effort.
Pro Tips For Making Pioneer Woman Skillet Apple Pie
- USE COLD BUTTER AND ICE WATER: The dough’s texture is everything here—if your butter melts before it should, you’ll end up with a gummy mess. Cut the butter into tiny cubes (pea-sized), toss them in the flour, then add ice water one teaspoon at a time until just combined. The dough should clump when pressed, not stick to your fingers like a sad, overworked pie crust.
- PEEL AND GRATE APPLES FOR EVEN COOKING: Slicing apples for this skillet pie? You’re setting yourself up for a soggy bottom. Instead, peel and grate them (skin on adds texture, but it slows cooking). Toss the grated apples with lemon juice right away—they’ll release moisture, and when you brown them in the skillet, they’ll crisp up evenly instead of turning to mush. (Yes, it’s extra work, but trust me, the texture is worth it.)
- BROWN THE APPLES LOW AND SLOW: The Pioneer Woman’s recipe calls for browning the apples, but I learned the hard way that high heat = burnt edges and undercooked centers. Start them on medium-low, give them 8–10 minutes to soften and develop flavor, then crank the heat to medium-high for the last 2–3 minutes to caramelize. Stir occasionally—this isn’t the time to walk away.
- CHILL THE DOUGH 30 MINUTES BEFORE ROLLING: I used to skip this, and the dough would either crack when stretching or stick to the counter like glue. Cold dough = easier handling. Wrap the dough in plastic and pop it in the fridge while you prep the filling. The extra time also lets the gluten relax, so rolling it out becomes a breeze. (Pro move: Use a rolling pin with a slight angle—less effort, same results.)
Health benefits of pioneer woman skillet apple pie
Fiber-Rich Apple Goodness
This skillet apple pie delivers a surprising fiber boost from the apples themselves—about 5 grams per serving when using Honeycrisp or Granny Smith varieties. The skin contains soluble fiber that supports digestion and helps stabilize blood sugar.
I've found that the slight tartness from Granny Smith apples actually enhances this fiber content while keeping the pie from tasting too sweet. 🍏
Natural Sugar Balance
The combination of brown sugar and turbinado sugar creates a more complex sweetness than white sugar alone, with lower glycemic impact thanks to the natural molasses content. A single slice contains about 25 grams of sugar, but the fiber and spices help moderate blood sugar spikes.
The cinnamon in particular has been shown to improve insulin sensitivity—making this pie a smarter dessert choice than many store-bought options.
Vitamin C Powerhouse
Six medium apples provide nearly 30% of your daily vitamin C needs—essential for immune function and collagen production. The lemon juice in the filling preserves this vitamin while preventing browning. I always use freshly squeezed lemon juice rather than bottled because it retains more of these nutrients.
The vitamin C content makes this pie especially beneficial during fall and winter when colds are more common. 💪
Warm Spice Benefits
The cinnamon and nutmeg in this recipe aren't just for flavor—they offer genuine health perks. Cinnamon contains anti-inflammatory compounds, while nutmeg provides mild pain-relieving properties. Together they create that comforting aroma while potentially aiding digestion.
I've noticed that a small piece of this pie after dinner helps me feel more satisfied and less prone to late-night snacking.
Healthy Fat from Butter
While butter isn't considered "healthy" in large quantities, this recipe uses it judiciously in the crust. The unsalted butter provides saturated fats that support brain function and hormone production, plus it creates that irresistible flaky texture.
The key is portion control—this recipe serves six, so each slice contains about 10 grams of fat, which is reasonable as an occasional treat. I always use European-style butter for its higher fat content and richer flavor.
Portion Control Made Easy
Serving this pie from a 10-inch cast-iron skillet naturally encourages portion control—each of the six slices provides a balanced dessert with about 250 calories per serving.
The combination of fiber, protein from the crust, and healthy fats makes it more satisfying than many commercial pies that leave you craving more.
I've found that serving it with a small scoop of vanilla ice cream (about ½ cup) adds creaminess without excessive calories, making it a more balanced dessert option. 🍦
Nutrition facts
Frequently asked questions
Can I use store-bought pie crust instead of homemade?
This recipe works beautifully with Pillsbury Refrigerated Pie Crust or any pre-made dough. Just roll it out to fit your 10-inch skillet and press it in firmly. The advantage is you save time while still getting that golden, flaky crust. For best results, let the dough sit at room temperature for 10 minutes before pressing it into the skillet.
What's the best way to prevent a soggy bottom?
Pre-baking the crust for 12-15 minutes before adding the filling is key! This creates a barrier that prevents moisture from seeping in. Another pro tip: Toss your sliced apples with 1 tablespoon flour before arranging them in the skillet. This helps thicken the filling and keeps the crust crisp. The turbinado sugar topping also creates a caramelized crust that adds extra protection.
Can I make this pie ahead of time?
Yes, this pie actually tastes better the next day! Let it cool completely, then store in an airtight container for up to 3 days. For longer storage, freeze the baked pie (without the crust) for up to 3 months. To reheat, warm in the oven at 350°F for 10-15 minutes until heated through. The crust will stay crispy while the filling warms up beautifully.
What if I don't have a cast-iron skillet?
Any oven-safe skillet or pie dish that's at least 9 inches in diameter will work. Just adjust baking times slightly—cast iron retains heat better, so non-cast iron may need an extra 5 minutes of baking. A ceramic or stainless steel skillet works well too. The key is choosing a deep dish to accommodate the generous filling.
How do I know when the apples are perfectly cooked?
The apples should be tender but still hold their shape when pierced with a knife—like a fork-tender potato. The filling should be bubbling around the edges and slightly caramelized on top. If you're unsure, cut a small slice to check. Overcooking can make the apples mushy, so aim for that perfect balance of tender yet slightly firm texture. The crust should be deep golden brown with crisp edges.