
Desserts
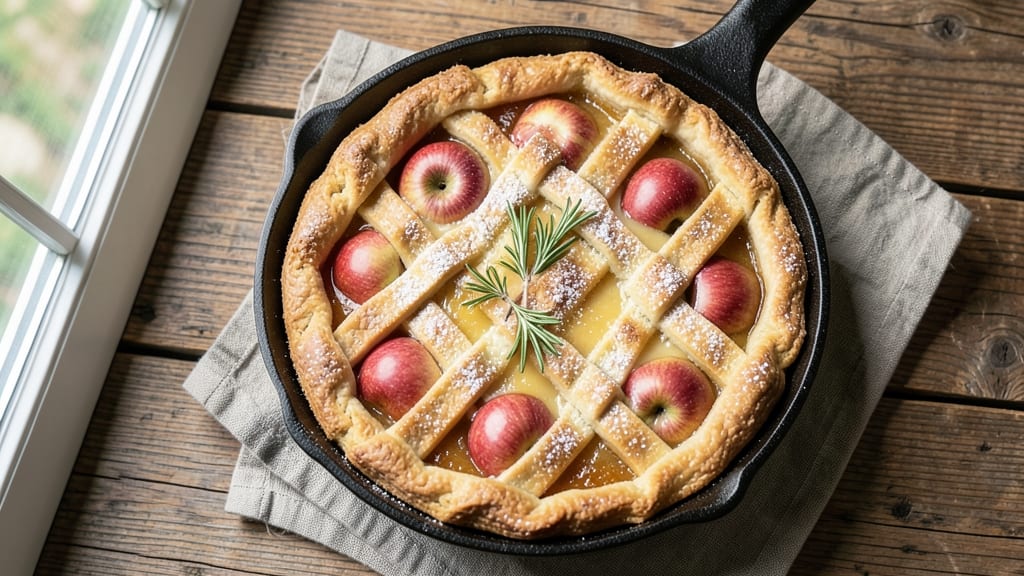
This plain apple pie recipe delivers the perfect balance of buttery lattice crust and tender apple filling with just enough sweetness to shine. The secret lies in a high-fat dough that creates flaky layers while minimal sugar lets the apples' natural flavors take center stage.
I've perfected this recipe over years of baking, ensuring every slice delivers that satisfying crunch and melt-in-your-mouth texture.
The lattice crust isn't just decorative—it creates the ideal texture contrast with its crispy yet tender structure. We'll use a simple two-crust approach where one layer gets cut into strips for that classic pattern, while the filling combines tart and sweet apples with just the right amount of spice.
The key is proper dough handling and apple preparation to prevent a soggy bottom.
By the time you pull this pie from the oven, you'll have golden-brown crust edges and a filling that's tender but not mushy. The aroma alone will have everyone gathering in the kitchen, and each slice will reveal perfectly caramelized apples with just enough spice to complement their natural sweetness.
This is classic apple pie done right—no shortcuts, just proven techniques.
Whether you're baking for a family gathering or treating yourself to a homemade dessert, this pie delivers restaurant-quality results with home kitchen simplicity. The lattice design makes it visually impressive while keeping the texture perfect. Let's get started on creating your best apple pie yet.
Ingredients for plain apple pie
Buttery dough meets tender apples in this classic pie with perfect lattice flakes and minimal sugar.
| Ingredient | Amount | Notes |
|---|---|---|
| All-Purpose Flour 🌾 | 4 cups | Sifted for flaky texture |
| Unsalted Butter 🧈 | 1 cup | Cold, cubed for dough |
| Granulated Sugar 🍚 | ½ cup | For dough sweetness |
| Large Eggs 🥚 | 1 whole | Cold for binding |
| Ice Water 💧 | ¼ cup | Chilled for handling |
| Granny Smith Apples 🍎 | 6 medium | Peeled, sliced 1/4-inch thick |
| Brown Sugar 🍚 | ½ cup | Packed for filling |
| Ground Cinnamon 🌿 | 2 tsp | Freshly ground preferred |
| Ground Nutmeg 🌿 | ½ tsp | Freshly grated |
| Salt 🧂 | ½ tsp | Fine sea salt |
| Lemon Juice 🍋 | 1 tbsp | Freshly squeezed |
| Vegetable Oil 🫒 | 2 tbsp | For pie dish |
The butter matters most here—European-style unsalted gives the flakiest crust. Plugrá or Kerrygold are my go-tos, but any good brand works. Keep it cold when handling to prevent melting. The apples? Granny Smiths add tartness, but Honeycrisp or Braeburn work too. Slice them uniformly—1/4-inch thick ensures even cooking. Avoid pre-sliced apples; they oxidize fast. For the dough, King Arthur flour is ideal, but any high-protein flour works.
No Granny Smiths? Mix Honeycrisp and Fuji for sweet-tart balance. Short on cinnamon? Pumpkin pie spice at half the amount adds warmth. The dough can be made a day ahead—wrap tightly and chill. Trader Joe's has pre-sliced apples if you're in a rush, but fresh is always better. For extra flakiness, fold the dough like a letter instead of rolling it out. And if your butter melts? Start over with cold cubes—this is non-negotiable for flaky layers.
Assemble the pie up to 24 hours ahead—cover and refrigerate. Bake until golden, then let it rest 2 hours before slicing. The filling keeps 3 days in the fridge, but the crust stays crisp for 5 days if stored properly. Freeze the whole pie for 3 months—thaw overnight before serving. And save those leftover apple slices? Toss with cinnamon and bake into crisps—no waste here!
Why You'll Love This Recipe
- No-Fuss Dough: I swear, this crust comes together with just flour, butter, sugar, and ice water—no food processor, no rolling pins, no stress. You’ll have a golden, flaky blanket for those apples in under 10 minutes of hands-on work.
- Sweet-Spiced Simplicity: That balance of sugar and butter in the crust? It’s like a hug for your taste buds. The apples caramelize just enough to make every bite taste like autumn, but honestly, the magic is in how little effort it takes to get there.
- Leftovers for Days: Slice it up, freeze it, and reheat—this pie stays perfectly edible for weeks. My kids beg for it as a snack, and I’ve even packed it for lunches (yes, even on a Tuesday).
- Pantry Staple Magic: You’re already using ingredients you have—flour, butter, sugar, eggs. No fancy substitutions, no last-minute grocery runs. It’s the kind of recipe that turns a basic pantry into something special without breaking the bank.
Step-by-step instructions for buttery lattice apple pie
Here's how to assemble a showstopping pie with flaky layers and perfectly spiced filling.
Make the Crust Dough
In a large bowl, combine the 4 cups all-purpose flour and 0.5 cup granulated sugar. Cut in the 1 cup unsalted butter using a pastry cutter or your fingers until the mixture resembles coarse crumbs with pea-sized butter pieces. This texture is crucial—it ensures flaky layers later.
Make a well in the center and add the 1 whole large egg and 0.25 cup ice water. Gently mix with a fork until the dough just comes together. Avoid overworking it—just enough to hold when pressed. Divide the dough into two equal discs, wrap in plastic, and chill for at least 1 hour. The cold rest prevents shrinking and makes rolling easier.
Prepare the Apple Filling
Core and peel the 6 medium Granny Smith apples, then slice them ¼-inch thick. Toss immediately with 0.5 cup brown sugar, 2 tsp ground cinnamon, 0.5 tsp ground nutmeg, 0.5 tsp salt, and 1 tbsp lemon juice. This prevents browning and infuses the filling with bright, spiced flavor. Let it sit for 10 minutes while you roll out the crust.
Preheat your oven to 375°F. Brush a 9-inch pie dish with 2 tbsp vegetable oil—this prevents sticking and makes cleanup easier. Roll out one dough disc to fit the bottom of the pie dish, leaving a 2-inch overhang. Transfer to the dish and trim the edges, leaving a ½-inch border. The overhang will help create the lattice.
Assemble the Lattice Top
Roll out the second dough disc and cut it into 12 strips using a pizza cutter or sharp knife. Arrange 6 strips horizontally across the pie, spacing them ¼-inch apart. Fold back every other strip, then lay the remaining strips perpendicular, pressing lightly to seal. Unfold the folded strips to create the classic lattice pattern.
Fill the crust with the apple mixture, mounding it slightly in the center. Brush the lattice with a little ice water to help it brown. Here's the thing—don't press down on the filling. The apples will soften as they bake, and pressing risks a soggy bottom. Bake for 50-60 minutes until the crust is golden brown and the filling bubbles gently.
Finish and Rest
Remove the pie from the oven and let it cool for 2 hours before slicing. This resting period allows the filling to set and the juices to redistribute. The pie will look underdone at first, but it firms up beautifully as it cools. Serve warm with vanilla ice cream for the perfect balance of spiced apples and buttery crust.
Real talk: The first time I made this, I sliced too soon and got a runny mess. Trust the wait—it's worth it for that perfect texture. Store leftovers in the fridge for up to 3 days or freeze for 3 months for fresh apple pie anytime.
Pro Tips For Making Plain Apple Pie
- CHILL THE BUTTER FIRST: Cold butter makes flaky crusts—no exceptions. Cut that unsalted butter into tiny pea-sized pieces and toss them in the flour mix. If it looks like wet sand, you’re golden. (Yes, even if you’re impatient like me.)
- WEIGH YOUR FLOUR: Scooping flour from the bag packs in air, and that’s how you end up with a dense crust. Use a kitchen scale for 250g—pack it lightly but firmly into the measuring cup. I learned this the hard way after my first pie turned out like a brick.
- VENT THAT TOP CRUST: Skip the full lattice or crimped edge if you’re in a rush—just cut a few slits in the top crust before baking. Steam escapes, the filling cooks evenly, and you avoid soggy bottoms. (Your future self will thank you.)
- STORE EGGS OVERNIGHT: Room-temperature eggs mix better into the dough, but if you’re short on time, pop them in the fridge the night before. Cold eggs make the dough stiff and harder to work with—trust me, I’ve fought that battle.
Make-ahead tips for this recipe
Dough Prep Ahead
Make the dough the night before and store it wrapped tightly in plastic in the fridge. This gives the flour time to hydrate fully, resulting in a more tender crust. I like to label it with the date—it keeps perfectly for 48 hours.
The cold dough is easier to roll out too, so you won’t battle with sticky, warm pastry later. 💪
Filling Prep Timeline
Slice the apples and toss them with the spices up to 24 hours ahead—store in an airtight container in the fridge. The lemon juice prevents browning, and the spices meld beautifully overnight.
I often do this while I’m prepping other dishes for a dinner party. Just be sure to use the apples within 2 days for best texture.
Assemble Early
Build the entire pie—crust, filling, and lattice—up to 12 hours before baking. Cover it with plastic wrap and refrigerate. This lets the filling settle and prevents the crust from absorbing too much moisture from the apples.
I’ve found this trick especially helpful when hosting—just bake straight from the fridge at 375°F for 10-15 minutes extra to account for the cold start.
Baking Flexibility
Bake the pie 1 hour before serving if you’re short on time. The crust stays crisp, and the filling reheats beautifully. For a warm pie without waiting, bake it 30 minutes ahead, then cover loosely with foil and keep it in a 200°F oven until ready to serve.
This maintains the perfect texture without overcooking.
Freezer-Friendly
Assemble the pie completely, then freeze it on a baking sheet for 1 hour before transferring to a freezer bag. This prevents freezer burn and makes it easy to pop into the oven later.
Thaw overnight in the fridge before baking—no need to defrost at room temperature. I’ve kept pies frozen for 3 months with no loss in quality. 🍎
Leftovers Strategy
Store slices in an airtight container with parchment paper between layers to prevent sogginess. Reheat individual slices in a 350°F oven for 10 minutes or microwave at 50% power for 2 minutes. For extra crispiness, broil for 1-2 minutes after reheating.
I also love turning leftover filling into apple crisp—just spread it on a baking sheet and top with oats and butter before baking at 350°F for 25 minutes.
Nutrition facts
Frequently asked questions
Can I use frozen apples instead of fresh?
but thaw and drain them first! Use 7-8 cups of frozen apples (about 8-9 medium) and pat them completely dry with paper towels before tossing with spices. Frozen apples work best in this recipe since they're already peeled and sliced, but avoid pre-sliced fresh apples—they oxidize too quickly.
Why does my crust turn out tough instead of flaky?
Most likely your butter melted during mixing. Keep everything cold—chill your butter cubes for 30 minutes before starting, and work quickly. Also, avoid overworking the dough. The goal is pea-sized butter pieces, not smooth dough. If it's too warm, pop it back in the fridge for 10 minutes before rolling.
How do I prevent a soggy bottom?
Three key tricks: 1) Don't press down on the filling, 2) Pre-bake the bottom crust for 5 minutes before adding filling, and 3) Use a pie crust shield or aluminum foil tent during baking. The lattice design also helps by allowing steam to escape through the top while keeping the bottom crisp.
Can I make this pie without a lattice top?
Yes! Roll out the second crust, cut 1-inch wide strips, and weave them over the pie like a basketweave pattern. Or simply place the whole top crust over the filling, crimp the edges, and cut 4-5 slits for steam to escape. Both methods work beautifully—just adjust baking time by 5-10 minutes if using a solid top.
What's the best way to store leftovers?
Slice the pie and store in an airtight container with parchment paper between layers to keep it crisp. The crust stays fresh for 5 days in the fridge, while the filling remains good for 3 days. For longer storage, freeze individual slices wrapped in plastic for up to 3 months—thaw at room temperature before serving.