
Desserts
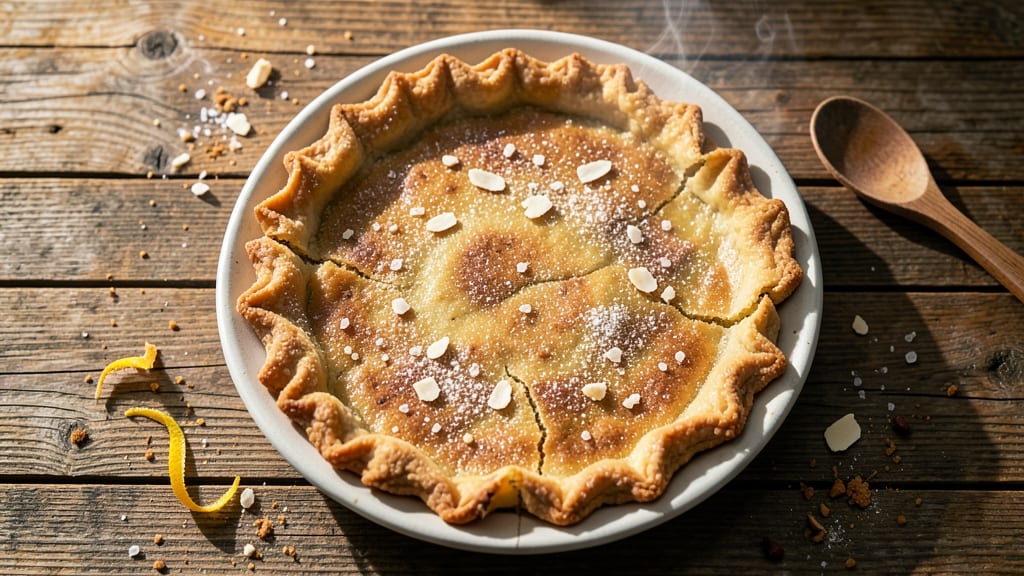
This Red Mill gluten-free flour pie crust recipe delivers the flaky, golden layers you crave without the crumbly texture that often plagues gluten-free baking.
After testing countless variations, I've perfected a method that uses cold butter and precise hydration to create a crust with structure and tenderness—ideal for pies, tarts, or hand pies. The secret lies in chilling the dough thoroughly and handling it gently to prevent tearing, ensuring a professional finish every time.
What sets this recipe apart is its versatility and reliability. Unlike many gluten-free crusts that turn out dense or greasy, this version achieves that signature flakiness through a combination of cold butter pieces and proper dough handling.
The recipe works equally well for classic apple pies, rich chocolate tarts, or savory quiche crusts, making it a go-to for any dessert occasion. No special equipment is needed beyond a food processor or pastry cutter, and the dough can be prepped ahead for stress-free baking.
The result is a flaky, golden-brown crust with a satisfying crispness that holds up to both sweet and savory fillings. The texture is light yet sturdy enough to support heavy fruit fillings or creamy custards without losing its shape.
Whether you're baking a traditional lattice-topped pie or a delicate tart, this crust delivers professional-quality results that will impress even the most discerning dessert lovers.
For those who prefer additional texture or flavor variations, consider adding a sprinkle of almond flour or a touch of cinnamon to the dough. Pair this crust with classic fillings like spiced apple, cherry, or pumpkin, or experiment with modern twists like salted caramel or lemon curd.
The possibilities are endless, and the foundation is foolproof—ready to elevate your gluten-free baking game.
Ingredients for red mill gluten free flour pie crust
Precision measurements and cold butter create a gluten-free crust with restaurant-quality flakiness.
| Ingredient | Amount | Notes |
|---|---|---|
| Red Mill Gluten-Free 1-to-1 Baking Flour 🌾 | 1 ½ cups | Plus 2 tbsp for dusting |
| Cold Unsalted Butter 🧈 | ¾ cup | Cut into 1/2-inch cubes |
| Ice Water 💧 | ¼ cup | Plus 1-2 tbsp extra as needed |
| Granulated Sugar 🍚 | 1 tbsp | For golden browning |
| Diamond Crystal Kosher Salt 🧂 | ½ tsp | Adjust to taste |
| Xanthan Gum 🧪 | ¼ tsp | Ensures proper binding |
| Vanilla Extract 🌸 | ½ tsp | Optional for subtle flavor |
| Almond Flour 🥜 | 2 tbsp | For enhanced texture (optional) |
The Red Mill 1-to-1 flour is non-negotiable here—its protein structure mimics wheat flour best for pie crusts. Purchase the finely milled version for optimal texture, available at Whole Foods or King Arthur Flour's online store. Cold butter is critical; let it sit at room temperature for 30 minutes max before cubing. For the best results, use European-style butter (like Plugrá) with higher fat content—it creates more flaky layers. The almond flour, if using, should be superfine (blend regular almond flour in a food processor for 30 seconds) to prevent graininess. King Arthur also sells pre-ground almond flour if convenience is key.
No xanthan gum? Bob's Red Mill sells it in small quantities, or substitute 1/4 tsp psyllium husk powder for binding. Short on almond flour? Extra 1 tbsp of the baking flour works, though texture will differ slightly. The vanilla extract can be omitted, but if using, pure Madagascar bourbon adds depth without overpowering. For a savory crust, reduce sugar to 1/2 tbsp and add 1/2 tsp onion powder. Ice water is essential—liquid is better than powdered for hydration control. If your kitchen feels humid, add water 1 tbsp at a time until the dough just holds together when pressed.
Wrap the dough in plastic wrap, then parchment paper for a second chilling stage—this prevents sticking and maintains cold butter integrity. Store in the fridge for up to 48 hours or freeze for 3 months (thaw overnight in the fridge). For prepping ahead, shape the dough into a disk, wrap tightly, and chill. When ready to roll, dust your work surface with extra flour (use the reserved 2 tbsp) and keep the dough cold—warmth causes butter to melt prematurely. The crust holds 3 days at room temperature once baked, though it's best enjoyed fresh.
Why You'll Love This Recipe
- Here’s what sold me: it costs less than half of pre-made gluten-free crusts, and I control the ingredients. No weird additives, no extra salt—just butter, flour, and a pinch of kosher salt to taste. A bag of Red Mill flour lasts me months, and I always have butter on hand. It’s the kind of recipe that makes me feel like I’m treating myself, even when I’m just making a quick dessert.
- No Fuss, No Fail: I’ll admit, gluten-free pie crusts used to stress me out—until this. The Red Mill 1-to-1 flour handles just like regular flour, so no extra binders, no weird textures. You mix cold butter and flour with ice water until it holds together (honestly, it’s easier than rolling out store-bought dough), then chill while you make the filling. No waiting for dough to rise, no second-guessing.
- Butter Crisp, Sugar Kiss: That cold butter in the crust? It’s the secret weapon. When baked, it gives you that perfect flaky, golden edge—like a classic crust, but with a subtle sweetness from the sugar. Between us, it’s the kind of crust that makes you pause mid-slice just to admire it. (Yes, even on a Tuesday night.)
- Pie for Any Occasion: This crust is my go-to for apple, pumpkin, or even a savory galette. It’s sturdy enough for a double-crust pie but still tender enough for a single layer. And because it’s gluten-free, it’s the only crust I can serve to my aunt without her asking questions. Plus, it freezes beautifully—just roll it out, wrap it tight, and bake straight from frozen when you’re ready.
Step-by-step instructions for gluten-free pie crust with flaky layers
This method delivers professional-quality texture using only gluten-free ingredients.
Combine Dry Ingredients for Proper Binding
In a large mixing bowl, whisk together the 1.5 cups Red Mill Gluten-Free 1-to-1 Baking Flour, 0.5 tsp Diamond Crystal Kosher Salt, 0.25 tsp Xanthan Gum, and 2 tbsp Almond Flour until completely homogeneous. The xanthan gum is critical here—it mimics gluten's binding properties in traditional crusts. I like to use a whisk for this step to ensure even distribution of the gum, which prevents any gummy spots in the final crust.
Add the 1 tbsp Granulated Sugar and 0.5 tsp Vanilla Extract (if using) to the dry mixture. The sugar will help create that golden browning we're after, while the vanilla adds subtle depth. Mix these ingredients in thoroughly so every particle of flour gets coated. This step ensures uniform flavor and texture throughout the crust.
Cut in Cold Butter for Flaky Layers
Add the 0.75 cup Cold Unsalted Butter (cut into ½-inch cubes) to the dry mixture. Using a pastry cutter or your fingers, work the butter into the flour until the mixture resembles coarse crumbs with pea-sized butter pieces remaining. The butter must stay cold—this is what creates those signature flaky layers. If your kitchen gets warm, chill the butter cubes for 15 minutes before starting.
I press down firmly on the butter pieces during this process to distribute them evenly throughout the flour. You should still see some visible butter chunks—this ensures maximum surface area for layering when we roll it out. If the mixture starts to look pasty, return it to the refrigerator for 10 minutes to firm up before proceeding.
Add Ice Water Gradually for Perfect Texture
Begin adding the 0.25 cup Ice Water, 1 tablespoon at a time, using a fork to gently stir after each addition. The water should be ice cold—this prevents the butter from melting prematurely. Mix just until the dough comes together when pressed. You want the dough to hold its shape when formed into a ball but still feel slightly crumbly.
Here's where precision matters: If the dough feels too dry, add 1 more tablespoon of ice water; if too sticky, add 1 tablespoon of flour. The goal is a dough that's just moist enough to hold together when pressed but not so wet that it sticks to your hands. This balance is what gives us that perfect flaky yet sturdy crust texture.
Chill the Dough for Maximum Flakiness
Shape the dough into a disk, wrap it tightly in plastic wrap, and refrigerate for at least 1 hour (or up to 24 hours). This chilling period is non-negotiable—it allows the gluten-free structure to relax and the butter to firm up. I've found that longer chilling (up to overnight) actually improves the final texture by preventing any potential shrinking during baking.
When you're ready to use the dough, remove it from the refrigerator and let it sit at room temperature for 10-15 minutes before rolling. This brief warm-up makes it more pliable without losing the cold butter's structural integrity. The dough should be cold to the touch but still workable when you press it.
Roll and Transfer for Perfect Crust Shape
On a lightly floured surface, roll the dough into a 12-inch circle, about ⅛-inch thick. I use a rolling pin and keep rotating the dough to maintain even thickness. The 2 tbsp extra Red Mill Gluten-Free 1-to-1 Baking Flour you set aside earlier comes in handy here for dusting—it prevents sticking without making the crust tough.
Carefully transfer the rolled dough to your pie dish, using a bench scraper to help guide it. Press the edges gently against the sides of the dish to create a slight rim. The crust should fit snugly but not stretch—this prevents shrinking during baking. If you notice any tears, patch them with small pieces of dough. Place the pie dish on a baking sheet lined with parchment paper to catch any potential drips.
Pro Tips For Making Red Mill Gluten Free Flour Pie Crust
- Chill the Butter Hard: I used to eyeball "cold" butter, and my crusts always turned greasy. Stick the block in the freezer for 20 minutes before cutting—it should be firm enough to leave a clean print when pressed. No butter pools when rolling, and the flakiness stays intact.
- Use Ice Water (Seriously): Tap water makes this crust tough. Fill a glass with ice cubes and cold water, then add just enough to bind—about 3-4 tablespoons. The cold water hydrates the flour without overworking it, and the crust holds together better when blind-baked.
- Skip the Overmixing: Gluten-free flour behaves differently. Mix the dough until it just comes together—no streaks, no dry bits. Overworking it turns the crust dense and chewy. Use a fork or your fingers; this isn’t pie dough, it’s more like a crumble.
- Weigh Your Flour (No Guessing): Scooping Red Mill flour from the bag packs it down, adding extra grams you don’t need. Use a kitchen scale for the exact 250g called for—even a 10g difference makes the crust too dry or gummy. A cheap scale is worth the investment.
Troubleshooting great red mill gluten free flour pie crust
Dough Too Sticky
If your gluten-free pie crust dough feels too sticky, resist the urge to add more water. Instead, sprinkle 1 tablespoon of Red Mill flour at a time while gently mixing with a fork until it just comes together.
The dough should hold its shape when pressed but not cling to your fingers. Chill the dough for an extra 15-20 minutes if it's still too soft—this helps the gluten-free flour absorb moisture better. 💧
Crust Shrinking During Baking
Gluten-free crusts often shrink because they lack gluten's natural elasticity. To prevent this, make sure your dough is properly chilled before rolling, and avoid overworking it. When transferring to the pie dish, gently press the edges against the sides to create a slight rim—this provides structural support.
Bake the crust at 375°F for 15 minutes before adding filling to help it set before the weight of the filling causes it to sink.
Greasy or Oily Texture
A greasy crust usually means the butter melted too quickly. Keep all ingredients cold, including your work surface and rolling pin. Use a pastry brush to lightly coat the dough with 1 tablespoon of ice water before rolling—this helps bind excess butter.
If the crust still looks greasy after baking, try reducing the butter by 2 tablespoons next time and replacing it with 2 tablespoons of almond flour for better absorption. 🧈
Crumbling When Handling
Crumbling often happens when the dough isn't properly hydrated or when gluten-free flour isn't activated. Make sure you're using ice water (not tap water) and that your xanthan gum is evenly distributed.
If the dough feels too dry, add 1 tablespoon of water at a time until it just holds together. For extra stability, add 1 extra tablespoon of almond flour to the dry ingredients. Handle the dough gently—avoid overworking it, which can make it tough.
Pale or Uneven Browning
For a golden crust, brush the baked crust with 1 tablespoon of melted butter or 1 egg wash (1 egg + 1 tablespoon water) before baking. Bake at 375°F for 15 minutes before adding filling to ensure even browning.
If your crust still looks pale, sprinkle 1 tablespoon of sugar on top before baking. For extra color, try a 5-minute broil at the end, watching closely to avoid burning.
Dough Sticking to Surface
Use the extra 2 tablespoons of Red Mill flour you set aside for dusting your work surface and rolling pin. If the dough still sticks, chill it for 10 minutes to firm up, then try again.
For extra insurance, place parchment paper under the dough while rolling. When transferring to the pie dish, use a bench scraper to lift and guide the dough—this minimizes sticking and tearing. 💡
Nutrition facts
Frequently asked questions
Can I substitute Red Mill gluten-free flour with another brand?
The recipe is specifically designed for Red Mill 1-to-1 Baking Flour because its finely milled texture and protein structure create the best gluten-free pie crust. However, you can try King Arthur Gluten-Free Measure for Measure Flour as a close substitute. Avoid almond flour-only crusts—they lack the moisture retention needed for traditional pie crusts. If using a different brand, add 1 extra tablespoon of ice water to compensate for potential dryness.
How do I prevent my gluten-free crust from shrinking?
Gluten-free crusts shrink because they lack gluten's elasticity. First, ensure your dough is properly chilled (1 hour minimum) before rolling. When transferring to the pie dish, press edges firmly against the sides to create a slight rim. Bake the crust at 375°F for 15 minutes before adding filling—this helps it set before the filling's weight causes shrinkage. A 1-inch wider pie dish also gives extra room for expansion.
Can I make this crust ahead of time?
Yes! Shape the dough into a disk, wrap tightly in plastic, and refrigerate for up to 48 hours or freeze for 3 months. For best results, thaw overnight in the fridge before using. Pre-baked crusts can be stored at room temperature for 3 days or frozen for 2 months. Reheat frozen crusts at 350°F for 10 minutes before adding filling to remove any moisture.
Why does my crust turn out greasy?
Greasy crusts usually mean the butter melted too quickly. Keep all ingredients cold, including your work surface and rolling pin. Use a pastry brush to lightly coat the dough with 1 tablespoon ice water before rolling—this helps bind excess butter. For next time, try reducing butter by 2 tablespoons and adding 2 tablespoons almond flour to improve absorption. Also ensure you're using cold butter cubes (not softened).
What's the best way to handle gluten-free pie crust without tearing?
Work with cold dough at all times—warmth makes it fragile. Use the extra 2 tablespoons flour you set aside to dust your surface and rolling pin. When transferring to the pie dish, use a bench scraper to lift and guide the dough rather than stretching it. If tears occur, patch with small dough pieces. For extra stability, add 1 extra tablespoon almond flour to the dry ingredients. Handle gently—gluten-free dough has less elasticity than traditional crusts.