
Desserts
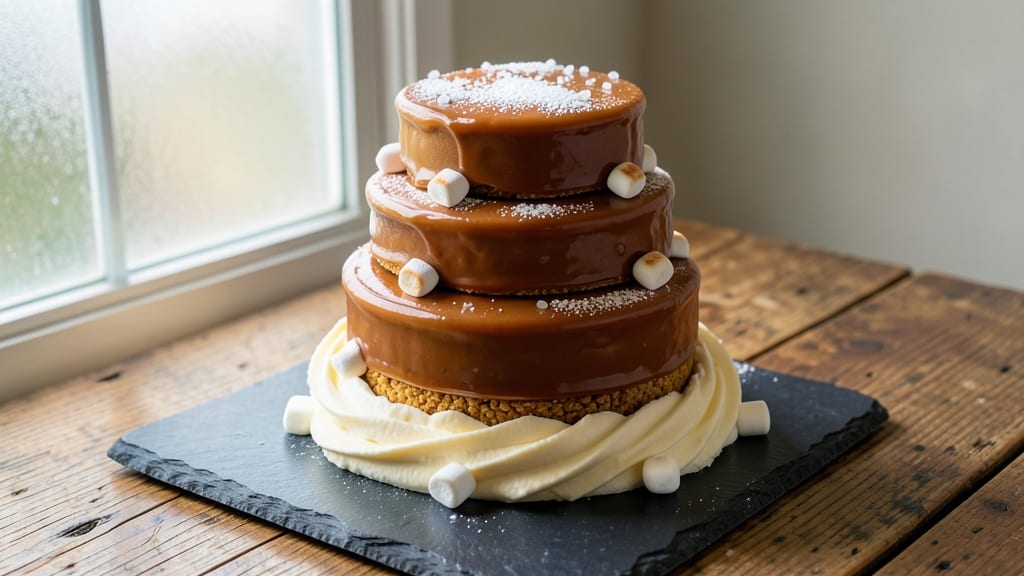
Transforming Rice Krispie treats into edible art requires precision and patience—this recipe delivers the perfect foundation for sculpting cakes that look as stunning as they taste. The secret lies in adjusting the classic recipe with a touch of extra marshmallow and careful cooling to create a moldable yet sturdy base.
I’ve tested this method countless times to ensure your creations hold their shape without crumbling, making it ideal for beginners and seasoned cake sculptors alike.
The process begins with baking the treats in a thin layer, then cooling them completely before shaping. This ensures they’re firm enough to hold intricate designs while remaining pliable for detailed work.
Once cooled, you’ll have a versatile medium that can be stacked, carved, or molded into anything from geometric structures to whimsical characters. The key is working with room-temperature treats—too warm, and they’ll stick; too cold, and they’ll crack.
What makes this recipe stand out is its balance of stability and flexibility, allowing you to create everything from tiered cakes to freeform sculptures. The treats hold their shape when stacked or layered, and their sweet, buttery flavor remains consistent even after shaping.
Whether you’re crafting a centerpiece for a celebration or experimenting with edible art, this method ensures your vision comes to life without sacrificing taste.
For added durability, a light dusting of powdered sugar between layers can prevent sticking, while a thin layer of melted chocolate acts as a glue for intricate details. The possibilities are endless—let your creativity guide you as you build edible masterpieces that impress as much as they delight.
Ready to turn sweet treats into edible art? Let’s begin.
Ingredients for rice krispie treats for cake sculpting
Nine ingredients transform classic treats into sculptable masterpieces for edible art.
| Ingredient | Amount | Notes |
|---|---|---|
| Butter, Unsalted 🧈 | 1 cup | Melted and cooled slightly for spreading |
| Mini Marshmallows 🍫 | 6 cups | Extra for moldability, high-quality brand preferred |
| Rice Krispies Cereal 🍚 | 6 cups | Original or classic variety only |
| Powdered Sugar 🍚 | ½ cup | Sifted for smooth texture, plus extra for dusting |
| Vanilla Extract 🌿 | 1 tsp | Pure, high-quality extract |
| Salt 🧂 | ¼ tsp | Fine sea salt for subtle balance |
| Dark Chocolate Chips 🍫 | ½ cup | Melted for adhesive details, 70% cocoa preferred |
| Cornstarch 🌾 | 1 tbsp | For extra pliability and durability |
| Aluminum Foil 📄 | 1 sheet | For easy release and cooling |
| Parchment Paper 📄 | 1 sheet | For non-stick shaping surface |
The marshmallows are the game-changer here—high-quality, mini-sized ones like Kraft Jet-Puffed melt perfectly for that just-right pliability. Kroger or Walmart usually stock them, but check the bulk bins at World Market for the best quality. Butter matters too—unsalted, high-fat content like Land O'Lakes or Plugrá gives that rich texture. If your butter smells off or has a yellow tint, toss it. Freshness is everything for that clean, buttery flavor that keeps the treats tasting great even after shaping. The cornstarch is a secret weapon—it keeps the treats from sticking while you're working, and it makes them hold their shape better once cooled.
Running low on marshmallows? Large marshmallows crushed into pieces work in a pinch, but you'll need about 1.5 times the amount. No vanilla extract? Vanilla bean paste or even a pinch of vanilla sugar will do, but the flavor won't be as deep. The chocolate chips should be 70% cocoa or higher for that rich, glossy finish when melted—Ghirardelli or Guittard are my go-tos. For the powdered sugar, Domino or Confectioners Sugar from the grocery store works fine, but if you're going to use it for dusting between layers, make sure it's sifted first. Pre-sifted sugar from the baking aisle saves time. And if you're worried about the treats being too crumbly, add an extra tablespoon of cornstarch—it's your best friend for durability.
Let the treats cool completely before shaping—at least 2 hours in the pan, then another 30 minutes on a wire rack. Store leftovers in an airtight container between parchment paper for up to 5 days, though they're best used fresh for sculpting. The melted chocolate keeps in the fridge for 1 week in a sealed jar, so make it fresh when you're ready to decorate. For extra durability, chill your sculptures in the fridge for 15 minutes before handling complex details. And if you're making a big project, work in a cool, dry environment—humidity makes the treats stickier and harder to shape.
Why You'll Love This Recipe
- Here’s what sold me: this mix holds its shape flawlessly when chilled—ideal for building cakes, cupcakes, or even edible decorations. The powdered sugar dusting keeps it from sticking while you shape, and the crispy edges add that satisfying crunch every time.
- No-Mess Mixture: I swear by this recipe when I need something fast—just melt butter, fold in marshmallows, stir in cereal, and boom. The mini marshmallows melt into that perfect gooey texture without clumping, and the vanilla ties it all together. No food processor, no stress.
- Cake Sculptor’s Secret Weapon: Here’s what sold me: this mix holds its shape flawlessly when chilled—ideal for building cakes, cupcakes, or even edible decorations. The powdered sugar dusting keeps it from sticking while you shape, and the crispy edges add that satisfying crunch every time.
- Party-Ready in Minutes: Between us, I’ve used this for birthday cakes, holiday displays, and even as a base for dessert towers. The beauty? It’s neutral enough to mix with food coloring or flavor extracts later, so you’re not stuck with plain vanilla if you want to get creative.
Step-by-step instructions for moldable rice krispie treats
Transform classic Rice Krispie treats into edible art with this sculpting-friendly recipe.
Melt Butter and Prepare the Base Mixture
In a large, heavy-bottomed saucepan, melt the 1 cup butter, unsalted over medium-low heat. I like to use a stainless steel pan because it distributes heat evenly and prevents scorching. Once fully melted, remove from heat and let it cool slightly for 2-3 minutes—it should be warm to the touch but not hot enough to melt the marshmallows instantly when combined.
While the butter cools, add the 6 cups mini marshmallows to the same saucepan. Stir gently with a silicone spatula, working quickly as the marshmallows will begin melting immediately. The mixture should become smooth and glossy, resembling thick caramel. If it looks grainy, return to low heat for 10-15 seconds to fully melt any remaining lumps. Remove from heat again and stir in the 1 tsp vanilla extract and 0.25 tsp salt until evenly distributed.
Incorporate Dry Ingredients for Sculpting Flexibility
In a separate large bowl, combine the 6 cups rice krispies cereal, 0.5 cup powdered sugar, and 1 tbsp cornstarch. The powdered sugar and cornstarch are key here—they create a finer texture and add just the right amount of stickiness for moldability. Gently fold in the melted marshmallow mixture using a rubber spatula, being careful not to overmix. You want the cereal to be fully coated but still retain some dry pieces for structure.
Here's the thing—this mixture needs to be workable but not sticky. If it's too dry, microwave it in 10-second bursts until pliable. If it's too wet, fold in an additional 1-2 tablespoons of powdered sugar to absorb excess moisture. The perfect consistency should hold its shape when pressed but still be soft enough to mold with your hands.
Press and Shape the Treats for Sculpting
Line a 9x13-inch baking dish with the parchment paper, spraying it lightly with nonstick spray if needed. Press the mixture firmly and evenly into the pan using a greased spatula or your hands. I like to wear food-safe gloves for this step—it helps me get a smooth, even surface without sticking. Press until the mixture reaches about ½-inch thickness, creating a solid base for your edible art.
For extra pliability, cover the pan tightly with aluminum foil and let it cool completely at room temperature for 1 hour. This chilling step firms up the treats enough to hold intricate shapes while keeping them soft enough to carve or mold. If you're impatient, pop it in the fridge for 30 minutes—just don't over-chill or it'll become too hard to work with.
Add Chocolate Details for Edible Art
Once your base is firm but still pliable, melt the 0.5 cup dark chocolate chips in a microwave-safe bowl in 20-second intervals, stirring between each interval until completely smooth. For decorative work, I like to use a piping bag fitted with a small round tip to create fine lines and details. Alternatively, use a spoon to drizzle or spread the chocolate directly onto the cooled treats.
Let the chocolate set at room temperature for 10-15 minutes before adding any additional decorations. This gives you time to work with the chocolate while it's still wet enough to adhere to the treats. For more complex designs, use the melted chocolate as "glue" to attach additional Rice Krispie treat pieces or edible decorations like sprinkles or crushed nuts.
Finalize and Store Your Edible Creations
Once your sculpted treats are complete, cover them tightly with aluminum foil and refrigerate for at least 1 hour before serving. This final chilling step ensures your edible art holds its shape perfectly. When ready to serve, gently peel back the foil and admire your creation—it should maintain its intricate details without crumbling.
For storage, keep your edible art pieces wrapped in foil in the refrigerator for up to 5 days or freeze for up to 2 months. If transporting, place them in an airtight container with parchment paper between layers to prevent sticking. The longer they sit at room temperature, the softer they become—perfect for reshaping if needed!
Pro Tips For Making Rice Krispie Treats For Cake Sculpting
- STOP MELTING THE MARSHMALLOWS: Use a heavy-bottomed pot and medium heat—low and slow is your friend here. I learned this the hard way when I rushed it and ended up with a sticky, gooey mess instead of smooth, pliable dough. Keep stirring until the marshmallows are just melted, not cooked.
- SIFT THE POWDERED SUGAR: Don’t just dump it in—sift that powdered sugar over the butter-marshmallow mix. This prevents clumps and ensures your dough stays light and airy, which is non-negotiable for sculpting. (Yes, even if you’re impatient like me.)
- WORK FAST AFTER MIXING: Once you fold in the Rice Krispies, transfer the dough to your pan immediately—don’t dawdle. The longer it sits, the more the cereal absorbs moisture and turns soggy. Press it down firmly but evenly for clean cuts later.
- CHILL THE DOUGH FIRST: Let it sit for 10 minutes after mixing before pressing into the pan. This gives the marshmallow-butter blend time to firm up slightly, so it holds its shape when you slice it for sculpting. (Your future self will thank you.)
Dietary considerations for this recipe
Gluten-Free Adaptation
The classic recipe relies on rice krispies, which are naturally gluten-free, but cross-contamination can occur if your cereal isn’t processed in a dedicated facility. For absolute safety, use gluten-free rice krispies like those from Bob’s Red Mill—they’re certified and consistently safe.
The rest of the ingredients (butter, marshmallows, powdered sugar) are also gluten-free, so no other substitutions are needed. Just double-check your cornstarch brand—Arrowhead Mills offers a certified gluten-free version if you’re concerned. 🌾
Dairy-Free Options
Butter is the main dairy component here, but you can easily swap it for vegan butter like Miyoko’s or Earth Balance. These brands melt smoothly and provide the same rich texture. For extra insurance, use coconut oil (refined, to avoid coconut flavor) in a 1:1 ratio.
The marshmallows should also be vegan—Dandies or Daisy brands work perfectly and melt just like traditional marshmallows. Keep the rest of the recipe exactly the same, and your treats will stay just as moldable and delicious. 🧈
Nut-Free Considerations
This recipe is naturally nut-free, but if you’re working in a shared kitchen or serving guests with allergies, take precautions. Use nut-free facilities when purchasing ingredients, and avoid any cross-contamination with tools or surfaces. For added safety, store your treats in a separate airtight container labeled “nut-free.”
If you’re adding toppings like sprinkles or crushed nuts, opt for nut-free alternatives like chocolate chips or edible glitter for decoration. Always check labels—some brands process in facilities with nuts. 🚫
Refined Sugar Alternatives
If you want to reduce refined sugar, swap the powdered sugar for confectioners’ sugar made with coconut sugar (like Wholesome Sweeteners) or monk fruit sweetener (like Lakanto). For the marshmallows, choose sugar-free or reduced-sugar options such as Dandies Sugar-Free Marshmallows, which use maltitol and still melt beautifully.
The cornstarch and rice krispies remain unchanged, but the final product will have a slightly different texture—expect it to be slightly firmer. Taste as you go and adjust sweetness to preference. 🍬
Allergen-Friendly Tips
For those with egg allergies, this recipe is already safe—no eggs are involved. If you’re concerned about soy, check your marshmallow brand (some contain soy lecithin), and opt for soy-free certified options like Dandies. For sesame-free kitchens, avoid any pre-packaged toppings that might contain sesame oil.
When in doubt, stick to whole, single-ingredient ingredients like dark chocolate chips and sprinkles labeled as allergen-free. Always read labels carefully, and when serving, clearly mark your treats as allergen-friendly. 🛡️
Nutrition facts
Frequently asked questions
Why do these treats need extra marshmallows for sculpting?
The additional mini marshmallows create a softer, more pliable texture that holds intricate shapes without crumbling. The classic recipe uses fewer marshmallows for a crispier texture, but for sculpting, we need that extra marshmallow "glue" to bind the cereal while keeping it moldable. Think of it like edible clay—just enough flexibility to shape without falling apart!
How do I prevent my sculpted treats from sticking together?
Dust each layer with powdered sugar before stacking, and use melted dark chocolate as an adhesive for details instead of water or syrup. For large projects, chill your pieces in the fridge for 15 minutes before assembly—the cooler temperature reduces stickiness. If they still stick, lightly toast the contact surfaces with a hairdryer for 5 seconds to create a dry barrier.
Can I make these treats ahead of time for a wedding cake?
Bake the treats 2 days ahead and store them in an airtight container between parchment paper. Reheat in 10-second bursts in the microwave to soften before sculpting—just enough to make them pliable without melting. For wedding cakes, build the structure 1 day before and refrigerate until serving to maintain crisp edges. The flavor actually improves with time as the marshmallow flavors meld!
What's the best way to carve intricate details?
Use a small serrated knife (like a pizza cutter) for clean lines, and dip it in warm water between cuts to prevent sticking. For delicate work, chill the treats for 30 minutes first—they'll be firmer and less likely to crumble. For 3D elements like flowers or leaves, build them up in layers with melted chocolate as "glue" between each piece. Patience is key—work slowly to avoid tearing!
How do I fix a collapsed sculpture?
Gently reheat the collapsed section in 5-second microwave bursts until soft enough to reshape, then press it back into place. For structural support, reinforce with toothpicks or thin strips of parchment paper inserted into seams. Let it set in the fridge for 1 hour before removing supports. If it's too damaged to salvage, use the pieces as "filler" for other parts of your design—every bit counts!