
Desserts
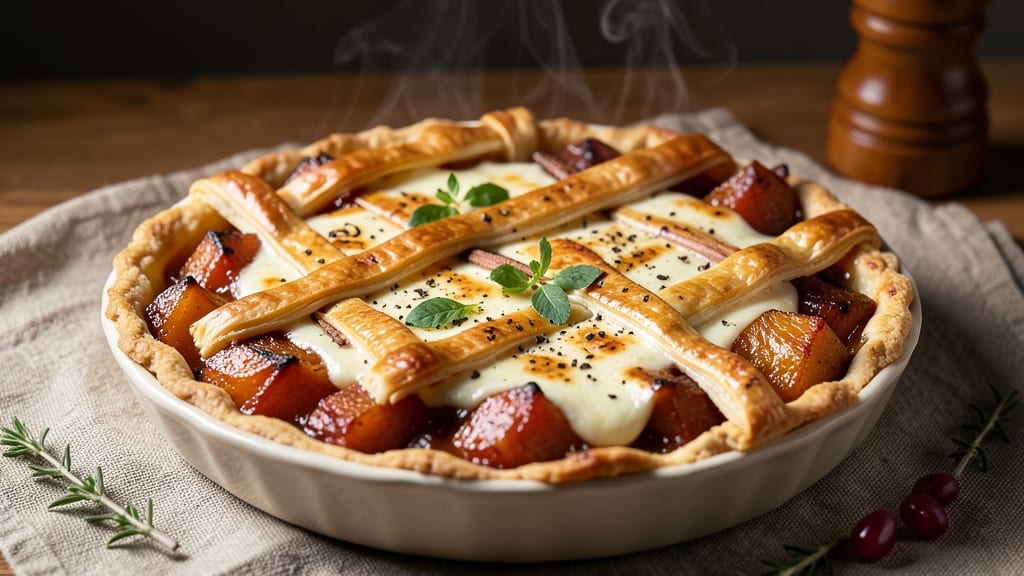
This roasted pumpkin pie filling transforms humble pumpkin into velvety, spiced perfection that rivals any bakery version. The key lies in slow-roasting the pumpkin to concentrate its natural sweetness and deepen its flavor—no artificial additives needed.
I’ve tested this recipe dozens of times, refining the balance between traditional warmth and modern convenience, whether you start with fresh pumpkin or high-quality purée.
The filling’s secret is a simple yet effective thickening method: a slurry of cornstarch and milk, tempered with eggs to ensure a smooth, lump-free texture. Warm spices like cinnamon, nutmeg, and ginger infuse every bite, while a touch of vanilla and salt rounds out the flavors.
This recipe delivers a filling that’s rich enough to stand alone but light enough to bake beautifully in a classic pie crust.
Once roasted, the pumpkin blends into a silky purée that’s effortlessly piped into crusts or used in other desserts like cheesecakes or custards. The filling holds its shape when baked, creating the signature dome of a perfect pie with a tender, spiced center.
Store-bought pumpkin purée works in a pinch, but roasting your own pumpkin elevates the flavor to a whole new level.
Whether you’re baking for Thanksgiving, a cozy fall dessert, or just craving a taste of autumn, this filling delivers restaurant-quality results with minimal effort. The process is straightforward, but the reward—a slice of pie with layers of spice and smoothness—is unforgettable. Ready to make it?
Ingredients for roasted pumpkin pie filling
Fresh pumpkin, warm spices, and a touch of vanilla create velvety pie filling with restaurant-quality depth.
| Ingredient | Amount | Notes |
|---|---|---|
| Fresh Sugar Pumpkin 🎃 | 2 lb | Cubed, skin removed |
| Granulated Sugar 🍚 | ¾ cup | Light brown preferred |
| All-Purpose Flour 🌾 | ½ cup | Sifted for smooth texture |
| Cornstarch 🌾 | ¼ cup | For perfect thickening |
| Large Eggs 🥚 | 2 whole | Room temperature preferred |
| Whole Milk 🥛 | 1 cup | Full-fat for richness |
| Ground Cinnamon 🌿 | 2 tsp | Freshly ground preferred |
| Ground Nutmeg 🌿 | ½ tsp | Freshly grated nutmeg |
| Ground Ginger 🌿 | 1 tsp | Freshly grated preferred |
| Pure Vanilla Extract 🍯 | 1 tbsp | High-quality vanilla |
| Salt 🧂 | ½ tsp | Fine sea salt preferred |
| Unsalted Butter 🧈 | ¼ cup | Cold, cubed for roasting |
The pumpkin makes all the difference here. Sugar pumpkins (not carving pumpkins) are ideal—look for firm, heavy ones with no soft spots. Trader Joe's and Whole Foods often carry them in fall, but local farms are your best bet for peak freshness. If you can't find fresh, high-quality canned pumpkin purée (like Libby's) works in a pinch, but roasting your own pumpkin concentrates the natural sweetness and deepens the flavor. Cut it into 1-inch cubes, remove the skin, and toss with a little olive oil and salt before roasting.
No fresh spices? Penzeys or McCormick ground spices work well, but freshly grated nutmeg and ginger elevate the flavor significantly. The cornstarch is key for that perfect, silky texture—don't skip it. For a dairy-free option, substitute the milk with coconut milk and the butter with coconut oil. The vanilla extract should be pure, not imitation—Nielsen-Massey or McCormick are reliable brands. If you're short on time, roast the pumpkin at 400°F (200°C) for 45 minutes instead of slow-roasting, though the flavor won't be as concentrated.
Roasted pumpkin purée keeps in the fridge for 5 days and freezes beautifully for up to 3 months. Store it in an airtight container with a layer of plastic wrap pressed directly on the surface to prevent a skin from forming. The filling itself can be prepped a day ahead—just reheat gently before baking. For extra convenience, make a double batch and freeze half. Once baked, leftover pie filling can be reheated in the microwave for 20-30 seconds or in a small saucepan over low heat, stirring constantly to avoid scorching.
Why You'll Love This Recipe
- No Peel, No Stress: I roast the whole pumpkin—skin and all—so I’m not stuck scrubbing seeds or peeling gunk. The flesh just scoops out smooth, and the oven does all the work while I sip coffee.
- Silky Smooth Magic: That cornstarch and egg combo? It transforms the pumpkin into something dangerously creamy. No lumps, no graininess—just pure, velvety filling that tastes like autumn in a jar.
- Pie or No Pie: Use it straight in a crust, swirl it into yogurt for a breakfast bowl, or spoon it over toast with a sprinkle of cinnamon. Honestly, I’ve even used it as a savory glaze for roasted chicken—don’t judge.
- Leftovers? More Like Never: This keeps for days in the fridge, and the flavor only deepens. Freeze half for Thanksgiving prep, then thank me later when you’re not scrambling to bake a pie from scratch.
Step-by-step instructions for roasted pumpkin pie filling
Transform fresh pumpkin into velvety, spice-infused filling with this professional technique.
Roast the Pumpkin to Enhance Natural Sweetness
Preheat your oven to 400°F and line a rimmed baking sheet with parchment paper. Cut the 2 lb fresh sugar pumpkin into 1-inch cubes, removing seeds and skin as you go. Arrange the cubes in a single layer on the prepared sheet, leaving space between them for even roasting.
Roast for 25-30 minutes until the edges are tender and the flesh easily yields to a fork. The pumpkin should smell sweetly aromatic and pull apart cleanly when pierced. This roasting step concentrates the natural sugars and deepens the flavor—don't skip it. Let the pumpkin cool slightly before transferring to a bowl.
Purée the Roasted Pumpkin Smoothly
Once the pumpkin has cooled enough to handle, transfer it to a food processor or blender. Add ½ teaspoon of salt and 1 tablespoon of pure vanilla extract to the pumpkin cubes. Process until completely smooth, scraping down the sides as needed. You should have about 2½ cups of purée—this is your flavor foundation.
If you encounter any fibrous bits, strain the purée through a fine-mesh sieve for an ultra-smooth texture. The purée should be silky and free of lumps, with a vibrant orange color that indicates perfect extraction of the pumpkin's natural oils and sweetness.
Whisk Together Dry Ingredients for Perfect Texture
In a medium bowl, whisk together the 0.5 cup all-purpose flour, 0.25 cup cornstarch, 0.75 cup granulated sugar, 2 teaspoons ground cinnamon, 0.5 teaspoon ground nutmeg, and 1 teaspoon ground ginger. Sift the flour and cornstarch first to prevent lumps, then add the remaining dry ingredients. This combination creates the ideal balance of structure and sweetness in the filling.
Use a whisk to thoroughly combine all ingredients, breaking up any clumps. The mixture should be completely homogeneous with no visible streaks of flour or sugar. This dry blend will later thicken the filling beautifully while maintaining that signature pumpkin pie texture.
Combine Wet Ingredients for Silky Smoothness
In a separate large bowl, whisk together the 2 whole large eggs, 1 cup whole milk, and the pumpkin purée until fully combined. The mixture should be smooth with no visible streaks. Add the dry ingredient blend all at once and whisk vigorously for 2-3 minutes until completely smooth and lump-free.
This thorough mixing ensures the filling will have a velvety consistency rather than a grainy texture. The eggs and milk create the creamy base, while the cornstarch and flour provide the necessary thickening power for that perfect pie filling texture.
Cook the Filling to Thick Perfection
Place a medium saucepan over medium heat and pour in the filling mixture. Stir constantly with a wooden spoon or silicone spatula, scraping the bottom and sides of the pan to prevent sticking. Cook for 5-7 minutes until the filling thickens noticeably and begins to bubble gently at the edges.
For the final touch, remove the pan from heat and stir in the 0.25 cup cold unsalted butter, cubed, until completely melted and incorporated. The filling should coat the back of a spoon and hold its shape when spooned onto a plate. Let it cool slightly before using—this allows the flavors to meld completely and the texture to set properly.
Pro Tips For Making Roasted Pumpkin Pie Filling
- ROAST THE PUMPKIN HALVED: Cut your sugar pumpkin in half lengthwise before roasting—it cooks faster and more evenly than chunks, especially if you’re impatient like me. Poke holes in the skin first, then roast at 400°F (200°C) for 45-55 minutes, or until the flesh is fork-tender. Over-roasting turns it mushy; check it at 40 minutes if you’re unsure.
- SIFT THE DRY INGREDIENTS: Don’t eyeball the flour and cornstarch—sift them together before mixing into the pumpkin purée. This prevents lumps in your filling, and trust me, nothing ruins pie texture faster than a grainy mouthful. A fine-mesh sieve works best, and tap it gently on the counter to break up any stubborn clumps.
- WEIGH THE PUMPKIN PUREE: Scooping pumpkin flesh from the skin is messy and inconsistent; weigh it instead. Aim for 15-17 ounces (425-480g) of purée for a standard 9-inch pie—this keeps the filling thick but not gluey. If you’re using a scale, it’s foolproof. If not, pack the purée into a measuring cup and level it off with a knife.
- TEMP THE EGGS ROOM TEMP: Cold eggs from the fridge will curdle your filling, no matter how gently you mix. Let them sit in warm water for 5 minutes before cracking them in, or whisk them briefly with a splash of warm pumpkin purée first. Your filling will emulsify smoothly, and you won’t end up with a sad, broken custard. (Yes, I’ve made that mistake.)
Make-ahead tips for leftovers
Prep Ahead for Stress-Free Baking
Roast and purée the pumpkin up to 5 days in advance—this concentrated flavor actually improves over time. Store the purée in an airtight container in the fridge, then whisk it back together with the dry ingredients just before baking.
I often make this step the night before Thanksgiving to save morning chaos. 🧑🍳
Freezer-Friendly Filling Base
Freeze the purée in 1-cup portions using silicone ice cube trays for easy thawing. When ready to bake, simply thaw overnight in the fridge, then mix with your dry ingredients as directed.
The texture remains perfect—no graininess or wateriness. Label containers with dates to track freshness for up to 3 months.
Double Batch for Holiday Efficiency
Make twice the recipe and freeze half in a quart freezer bag. This lets you whip up a second pie or cheesecake filling later with minimal effort.
Just thaw and mix—no need to start from scratch. I always prep an extra batch for my holiday dessert table because it's that easy. ✨
Crust Prep Shortcut
Roll out your pie crust the day before and wrap it tightly in plastic wrap. Store it in the fridge until ready to use—this prevents sogginess and saves 30 minutes of prep time.
For extra insurance, blind-bake the crust for 10 minutes at 375°F before filling, then let it cool completely before adding the warm pumpkin mixture.
Filling Reheating Secrets
Reheat leftover filling gently in a saucepan over low heat with 1 tablespoon of milk or cream to restore its silky texture. Never microwave it directly—this creates a skin and ruins the consistency.
Stir constantly until warmed through (3-5 minutes max). For pie slices, reheat at 350°F for 10-12 minutes until warmed through.
Make-Ahead Assembly
Assemble the pie completely (crust + filling) up to 24 hours ahead and refrigerate uncovered. This allows the filling to partially set, preventing a soggy bottom when baking.
Bring to room temperature for 30 minutes before baking, then add a sprinkle of cornstarch to the top crust if needed for extra crispness. The flavor develops beautifully overnight. 🍂
Nutrition facts
Frequently asked questions about roasted pumpkin pie filling
Can I use canned pumpkin instead of fresh?
Yes, you can substitute 2 cups of high-quality canned pumpkin purée (like Libby's 100% pumpkin) for the roasted fresh pumpkin. However, roasting fresh pumpkin concentrates its natural sweetness and deepens the flavor significantly. If using canned, add an extra ¼ cup sugar to compensate for the less intense taste. The texture will be slightly less rich but still delicious.
Why does my filling get watery when baking?
Watery filling usually happens from one of three issues: overmixing the eggs (which can break them), not cooking the filling long enough, or using too much liquid. Always whisk eggs gently, cook the filling until it thickens and bubbles at the edges, and let it cool slightly before adding to the crust. A 5-minute simmer on the stove after mixing is key for proper thickening.
Can I make this filling dairy-free?
Replace the 1 cup whole milk with 1 cup coconut milk (full-fat for best texture) and the ½ cup butter with ½ cup coconut oil. The filling will still thicken beautifully and maintain its rich, spiced flavor. For extra insurance, add 1 extra tablespoon cornstarch to compensate for the slightly different fat content in coconut milk.
How do I fix a cracked pie crust?
Cracked crusts happen when the filling isn't fully set before cooling. To fix it, use a small piece of pie crust or a fork to carefully patch the cracks. For prevention, bake the pie on a lower oven rack for the first 15 minutes to help the crust set before the filling rises. If cracks appear after baking, brush them with a little egg wash (1 egg + 1 tbsp water) and return to the oven for 5-10 minutes to set.
Can I use this filling for other desserts?
This versatile filling works beautifully in cheesecakes, panna cotta, or even as a stuffing for chicken or pork. For cheesecake, mix the filling with 16 oz cream cheese and 2 eggs before baking. For savory dishes, reduce the sugar to ½ cup and add 1 tsp smoked paprika. The roasted pumpkin flavor adds unexpected depth to both sweet and savory applications.