
Desserts
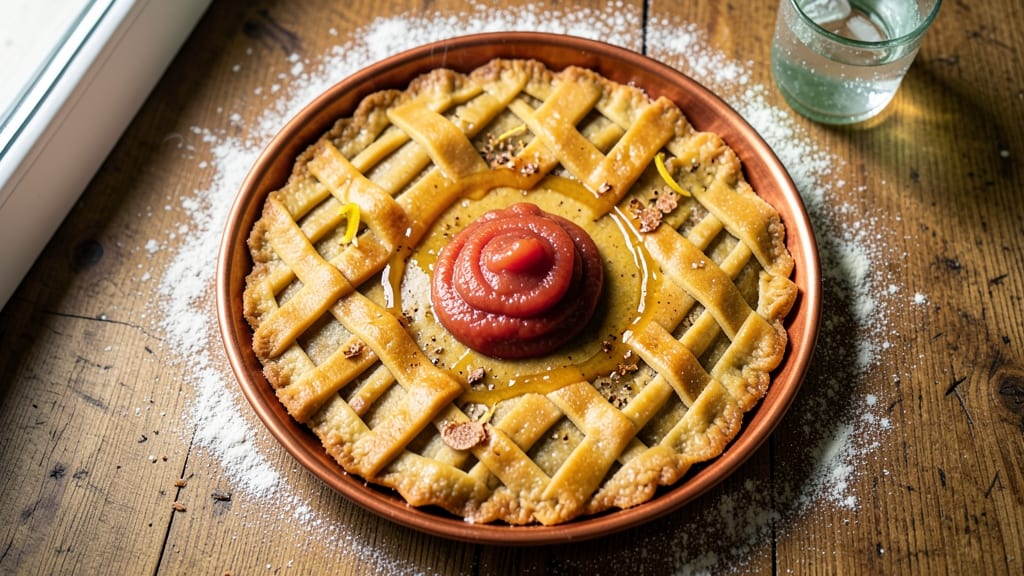
A shortening-free pie crust that delivers flaky layers and rich flavor without a single stick of butter or shortening is absolutely possible—and easier than you think.
This plant-based recipe uses coconut oil and applesauce to create a tender, sturdy crust that holds up to both sweet and savory fillings while staying crisp at the edges and tender inside.
After years of testing vegan crusts that crumbled or turned soggy, I finally cracked the code for a foolproof method that rivals traditional recipes.
The secret lies in the fat combination: coconut oil provides structure and flakiness, while applesauce adds moisture and prevents cracking. I also use a cold dough technique—keeping everything chilled until baking—to ensure the crust stays together when rolling and doesn’t shrink in the oven.
This isn’t a compromise; it’s a revelation for anyone who’s ever struggled with vegan baking.
What you’ll end up with is a golden, perfectly flaky crust that’s sturdy enough to hold your favorite pie filling without turning to mush. The texture is crisp along the edges and tender enough to cut through easily, making it ideal for everything from classic apple pie to savory quiche.
No special equipment is needed—just a few pantry staples and patience for the chilling steps.
Best of all, this recipe scales effortlessly for single-serving tarts or full 9-inch pies, and the dough can be prepped ahead of time. Whether you’re baking for a holiday gathering or a weeknight dessert, this shortening-free crust delivers restaurant-quality results without the guilt. Let’s get started!
Ingredients for shortening free pie crust
Pantry staples that transform into a golden, flaky crust without butter or shortening.
| Ingredient | Amount | Notes |
|---|---|---|
| All-Purpose Flour 🌾 | 2 ½ cups | Unbleached, spooned and leveled |
| Unsweetened Applesauce 🍎 | ½ cup | Unsweetened, smooth texture |
| Coconut Oil 🥥 | ½ cup | Solid, not melted |
| Ice Water 💧 | ¼ cup | Very cold, helps with flakiness |
| Salt 🧂 | 1 tsp | Fine sea salt preferred |
| Sugar 🍚 | 1 tbsp | Granulated, for slight sweetness |
| Vegan Butter 🧈 | 2 tbsp | For brushing, optional |
The flour is your foundation—King Arthur or Gold Medal work best for that tender crumb. Applesauce is non-negotiable here; Mott’s unsweetened is my go-to, but any smooth, unsweetened variety works. Coconut oil needs to be solid (not melted)—Trader Joe’s or Whole Foods carry reliable brands. Pro tip: keep everything chilled until baking. The salt and sugar are simple but essential—Diamond Crystal kosher salt dissolves perfectly, and regular granulated sugar keeps it balanced.
No applesauce? Unsweetened pumpkin puree works in a pinch, but texture might shift slightly. Coconut oil too expensive? Refined olive oil at half the amount gives a neutral flavor. Want extra flakiness? Add 1 tbsp cold vegetable oil to the mix. The vegan butter for brushing is optional but adds that golden finish—Miyoko’s or Earth Balance melt beautifully. If you’re making a savory pie, skip the sugar entirely.
This dough keeps for 3 days in the fridge, wrapped tightly in plastic. For longer storage, freeze portions for up to 3 months—just thaw in the fridge overnight. The crust bakes best straight from the fridge, so don’t let it warm up before rolling. Pre-roll and freeze for convenience—just bake straight from frozen, adding 5-7 minutes to the time. No need to thaw!
Why You'll Love This Recipe
- No-Fuss Assembly: I swear by this crust because it’s literally just mix, shape, chill. No rolling pins, no fussing with cold butter—just toss the applesauce and coconut oil with flour, add ice water, and let your fingers do the work. Honestly, my kids think it’s "pie dough magic."
- Buttery Without Butter: That coconut oil and applesauce combo? It delivers real flaky layers—no greasy shortcuts. The applesauce keeps it tender, while the coconut oil gives that golden, melt-in-your-mouth crispness. (Yes, even my pie-snob aunt noticed.)
- Pie for Any Occasion: Weeknight dinners? Holiday feasts? This crust handles it all—apple, pumpkin, even savory galettes. I’ve made it for potlucks, last-minute desserts, and even frozen leftovers (because let’s be real, not every pie gets eaten in one sitting).
- Pocketbook-Friendly Magic: No specialty ingredients, no markups—just pantry staples. A single can of applesauce and a small tub of coconut oil stretch to four crusts, and they’re cheaper than store-bought. (My budget and my taste buds win.)
Step-by-step instructions for shortening-free pie crust
Here's how to create a flaky, buttery crust without traditional shortening—simple and foolproof.
Mix Dry Ingredients for Perfect Texture
In a large mixing bowl, combine the 2.5 cups all-purpose flour, 1 tablespoon sugar, and 1 teaspoon salt. Whisk gently until evenly distributed—this ensures consistent flavor and texture throughout the crust. The sugar adds a subtle sweetness that balances the richness of the applesauce, while the salt enhances all the flavors.
I like to use a whisk for this step to avoid developing too much gluten, which can make the crust tough. You'll know it's properly mixed when no dry spots remain and the ingredients look like a uniform, fine powder. This dry blend is your foundation, so take your time here—rushing leads to uneven texture later.
Cut in Coconut Oil Until Crumbly
Add the 0.5 cup solid coconut oil (cut into small chunks if needed) to the dry ingredients. Using a pastry cutter or your fingers, work the coconut oil into the flour mixture until it resembles coarse crumbs with pea-sized oil pieces remaining. This step mimics the traditional "cutting in" method but uses coconut oil for a healthier fat source.
Don't overwork the mixture—just until the oil is evenly distributed. You're aiming for a texture similar to wet sand. If the mixture feels too dry, that's normal; the ice water will bind everything together in the next step. The coconut oil provides the fat needed for flakiness, so make sure it's cold but not frozen when you start.
Add Applesauce and Ice Water for Binding
In a separate small bowl, combine the 0.5 cup unsweetened applesauce and 0.25 cup ice water. The ice water is crucial—it helps create steam during baking, which contributes to that beautiful flaky texture. Stir these wet ingredients together until smooth, then pour them into the flour mixture.
Using a fork or your hands, gently mix the wet ingredients into the dry until just combined. The dough should come together but still feel slightly crumbly. If it's too dry, add an extra tablespoon of ice water; if too sticky, sprinkle in a bit more flour. Real talk: this dough will be softer than traditional pie crust dough, but that's what makes it work so well—it's more forgiving and easier to roll out.
Chill the Dough for Easier Handling
Divide the dough into two equal discs (about 1 inch thick each) and wrap them tightly in plastic wrap. Place them in the refrigerator to chill for at least 30 minutes. Chilling firms up the dough, making it much easier to handle and roll out without tearing. I usually chill mine for 45 minutes to an hour if I'm not in a rush—this extra time prevents the crust from shrinking during baking.
While the dough chills, preheat your oven to 375°F. This gives you time to get everything ready before you start working with the crust. The cold dough is your friend—it helps maintain shape when you transfer it to the pie dish. If you're feeling fancy, you can even freeze the dough discs for up to 2 months for a make-ahead option.
Roll and Blind-Bake for Perfect Crust
On a lightly floured surface, roll out one disc of chilled dough to fit your 9-inch pie dish, about 1/8-inch thick. Gently transfer it to the dish, pressing it lightly into the bottom and up the sides. Trim any excess dough hanging over the edge with a sharp knife. For extra flakiness, I like to brush the bottom crust with 2 tablespoons vegan butter, melted, before adding filling.
For a classic blind-baked crust, line the rolled-out dough with parchment paper, fill it with pie weights or dried beans, and bake for 15 minutes. Remove the weights and bake for another 10 minutes until the edges are light golden brown. The crust should look set but not overly browned—you'll finish baking it with your filling. If you're adding a wet filling, you can skip the blind-baking step entirely and just bake the filled pie as directed.
Pro Tips For Making Shortening Free Pie Crust
- CHILL THE COCONUT OIL: Solid coconut oil is easier to work with, and this recipe relies on its texture—don’t melt it first. Pop it in the freezer for 10 minutes before cutting it into small cubes (about ¼-inch), or it’ll turn into a greasy mess when you try to mix it with flour.
- MEASURE THE APPLESAUCE COLD: Warm applesauce makes the dough sticky and gummy. Scoop it straight from the fridge, or even better, chill it in the freezer for 15 minutes if you’re prepping ahead. Cold applesauce behaves better and keeps the crust from sticking to your hands.
- PULSE DON’T OVERWORK: I used to think more mixing meant a better crust, but this dough only needs 6-8 pulses in the food processor—any longer and it turns tough. Stop when it looks like coarse crumbs with pea-sized oil pieces still visible.
- REST THE DOUGH LONGER: The 30-minute rest in the fridge is non-negotiable, but I’ve learned to double it when I’m in a rush. Wrap it tightly and let it sit for an hour if you can—it chills the applesauce further, firms up the texture, and makes rolling out way easier (yes, even if you’re impatient like me).
Storing and reheating this dish
Fridge Storage Tips
Wrap your rolled-out pie crust tightly in plastic wrap or parchment paper to prevent drying. Store it in an airtight container or sealed bag in the fridge for up to 3 days.
I like to place a paper towel between layers if stacking multiple crusts—this absorbs excess moisture and keeps them crisp. The key is to avoid condensation, which can make the crust soggy. 💧
For best results, keep the crust cold until ready to use. If you’ve pre-rolled it, freeze it between parchment paper for 1-2 hours before transferring to the fridge. This extra step prevents the dough from sticking to surfaces or losing its shape when you pull it out later.
Freezing for Later
Freezing is a game-changer for this crust—it keeps for 3 months without losing texture. Wrap each disc tightly in plastic wrap, then place them in a freezer bag with all the air squeezed out.
Label with the date to track freshness. When ready to use, thaw overnight in the fridge or 15-20 minutes on the counter before rolling. 🧊
For convenience, roll out the crust, wrap it around a 9-inch pie dish, and freeze it that way. Just add your filling straight from frozen—no thawing needed.
This shortcut saves time and ensures the crust maintains its shape during baking. Add 5-7 extra minutes to the baking time if using frozen.
Reheating Leftover Crust
If you’ve baked a crust without filling (like for a quiche base), store it in an airtight container at room temperature for 1-2 days. To refresh, place it in a 350°F oven for 5-7 minutes until warm and crisp again.
Avoid the microwave—it makes the crust rubbery. For filled pies, reheat the whole pie at 350°F for 10-15 minutes until heated through. 🔥
For individual tart shells, reheat in the oven for 3-5 minutes until edges are golden. Brush with a little melted vegan butter before reheating to restore crispness. If the crust feels dry, sprinkle with 1-2 teaspoons ice water and bake again—this revives the moisture without sogginess.
Reviving Dried-Out Crust
If your crust loses its crispness after storage, don’t toss it! Brush the inside with a mix of 2 tablespoons vegan butter and 1 tablespoon applesauce, then bake at 375°F for 8-10 minutes.
This trick works like a charm for both sweet and savory pies. The applesauce adds moisture while the butter restores flakiness. ✨
For extra insurance, place a wire rack on the oven rack before baking—this allows heat to circulate evenly and prevents the bottom from getting soggy. A sprinkle of breadcrumbs on the bottom before adding filling also helps absorb excess moisture during baking.
Nutrition facts
Frequently asked questions
Can I use olive oil instead of coconut oil in this recipe?
Yes, but with adjustments! Replace the 0.5 cup solid coconut oil with 0.25 cup refined olive oil (neutral flavor) and add 1 extra tablespoon of ice water to compensate for the oil's liquid form. The crust will still be flaky, but coconut oil's solid texture creates more distinct layers. For best results, chill the dough longer (up to 1.5 hours) to prevent shrinking.
Why does my crust turn out dense instead of flaky?
Overworking the dough or skipping the chilling step are the top culprits. Keep everything cold, work quickly, and avoid excessive handling. Also, ensure your coconut oil is solid (not melted) and use ice water—these create steam during baking for that signature flakiness. If the dough feels too dry, add just 1 teaspoon more ice water; if too sticky, sprinkle in 1 tablespoon flour.
Is this crust suitable for savory pies like quiche?
Skip the 1 tablespoon sugar for savory applications, and the crust works perfectly for quiche, pot pies, or savory tarts. The applesauce adds subtle sweetness that pairs well with cheeses and herbs, while the coconut oil gives a neutral base. Brush the baked crust with a mix of vegan butter and a splash of plant-based milk for extra richness before adding fillings.
Can I make this crust without applesauce?
Yes, but texture may vary slightly. Replace the 0.5 cup applesauce with 0.3 cup unsweetened pumpkin puree or 0.4 cup mashed ripe banana (for sweet pies). For savory pies, use 0.4 cup cold vegetable oil instead. The applesauce acts as a moisture binder, so these alternatives add fat or natural starch to mimic its function. Chill the dough longer if using oil to prevent spreading.
How do I prevent the crust from shrinking in the oven?
Keep the dough cold until baking (even if pre-rolled), and avoid over-handling. Roll the dough to 1/8-inch thickness and transfer it to the pie dish immediately. For extra stability, blind-bake for 10 minutes before adding filling. If the crust still shrinks, it may need more chilling time—try freezing the rolled crust for 15 minutes before baking to firm it up.