
Side Dishes
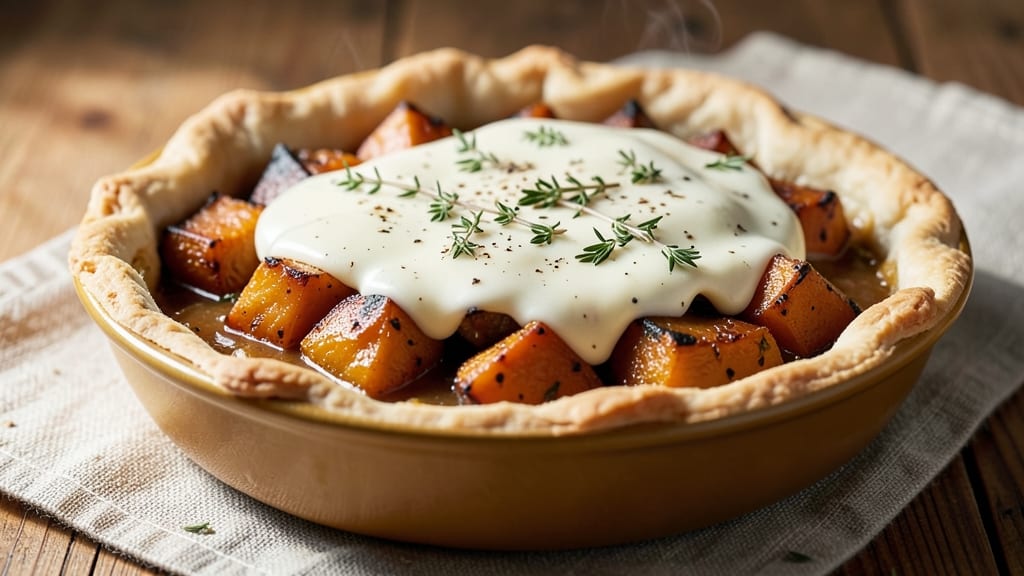
This squash pot pie recipe delivers the comforting flavors of autumn in a single, golden dish—creamy herb-infused filling topped with a flaky crust that turns crispy at the edges.
The secret lies in balancing tender squash with aromatic herbs and a velvety roux, creating a filling that's rich without being heavy. After years of perfecting the technique, I've developed a method that ensures the crust stays golden while the filling remains luscious and perfectly seasoned.
The beauty of this recipe is its versatility—it works as a hearty side for holiday meals or as a satisfying main dish when paired with a simple green salad.
The herb-infused filling transforms ordinary squash into something extraordinary, with layers of savory, slightly sweet, and herby notes that linger on the palate. What sets this apart is the golden crust top, achieved through a precise baking technique that guarantees a crispy finish without sacrificing tenderness below.
By the time you pull this pot pie from the oven, your kitchen will be filled with the warm, inviting aroma of caramelized squash and herbs, while the crust achieves that perfect balance of crispy and flaky.
Each bite delivers a harmonious blend of textures and flavors—creamy filling, tender squash, and a buttery crust that melts in your mouth. This is comfort food at its finest, crafted to impress without requiring advanced skills.
Whether you're serving it as part of a holiday feast or enjoying it as a cozy weeknight dinner, this squash pot pie delivers restaurant-quality results with minimal effort. The recipe is designed to be foolproof, ensuring that even first-time bakers achieve a showstopping dish.
Let's get started on creating this timeless classic that will become a staple in your seasonal repertoire.
Ingredients for squash pot pie
Six servings of autumn comfort—creamy herb-infused filling meets golden crust perfection.
| Ingredient | Amount | Notes |
|---|---|---|
| Butternut Squash 🍠 | 3 lb | Peeled, cubed, and roasted |
| Unsalted Butter 🧈 | ¾ cup | Cold, cubed for roux |
| All-Purpose Flour 🌾 | ½ cup | For velvety roux |
| Heavy Cream 🥛 | 1 ½ cups | Full-fat for richness |
| Chicken Broth 💧 | 1 ½ cups | Low-sodium preferred |
| Fresh Thyme 🌿 | 2 tbsp | Leaves only, chopped |
| Fresh Sage 🌿 | 1 tbsp | Chopped, not crumbled |
| Garlic Cloves 🧄 | 4 cloves | Minced for depth |
| Yellow Onion 🧅 | 1 whole | Diced, medium size |
| Salt 🧂 | 1 tsp | Kosher or sea salt |
| Black Pepper 🌶️ | ½ tsp | Freshly ground |
| Pie Crust 🥧 | 1 package | Store-bought or homemade |
| Large Egg 🥚 | 1 whole | For egg wash |
| Granulated Sugar 🍚 | 1 tbsp | For crust sprinkle |
The squash is the star here, so pick one that's firm, heavy for its size—the deeper the orange, the sweeter the flavor. Costco or Trader Joe's often have pre-cut butternut squash, but whole squash lasts longer in the fridge. For the herbs, fresh thyme and sage make all the difference—dried works in a pinch, but fresh gives that bright, aromatic punch. If you're using store-bought pie crust, check the label for butter content—at least 20% butter fat ensures that crispy, flaky texture. The garlic should be fresh, not that sad jarred stuff—it makes a world of difference in the filling's depth of flavor.
No heavy cream? Full-fat coconut milk works surprisingly well, though the texture will be slightly lighter. Short on thyme? Dried thyme at half the amount gets you close, but the flavor won't be as vibrant. The pie crust can be homemade if you're ambitious, but Pillsbury or store-bought saves time without sacrificing quality. For the egg wash, a splash of milk or water thinned with the egg works too—just make sure it's not too thick. The sugar sprinkle on top is optional but adds that perfect golden caramelization. If you're watching carbs, reduce it to just 1 teaspoon.
This pot pie reheats beautifully—just cover with foil and warm in the oven for 15-20 minutes. Store leftovers in an airtight container for 3-4 days, though honestly, it rarely lasts that long. The crust stays crispy for about 2 days if you keep it refrigerated, but the filling will soften slightly. For make-ahead prep, assemble the pie and refrigerate overnight—it bakes even better the next day. Freezing? Wrap tightly and it keeps for up to 3 months, though the crust might get slightly soggy when thawed.
Why You'll Love This Recipe
- Here’s what sold me: the butternut squash caramelizes into this natural sweetness that pairs perfectly with the tangy cream and savory broth. That crispy flour crust on top? It’s like a hug for your taste buds—sweet, buttery, and just salty enough to balance everything.
- Saves My Weeknights: I swear by this when I’m too tired to fuss—just roast the squash ahead (or use pre-cut cubes) while I toss together the creamy filling. The broth and heavy cream meld into something rich and smooth with almost no effort, and the golden crust? That’s just melting butter and flour, no rolling required.
- Creamy-Sweet Magic: Here’s what sold me: the butternut squash caramelizes into this natural sweetness that pairs perfectly with the tangy cream and savory broth. That crispy flour crust on top? It’s like a hug for your taste buds—sweet, buttery, and just salty enough to balance everything.
- Leftovers That Actually Taste Better: Between us, this pot pie gets better the next day. The flavors deepen, the crust softens just enough, and it reheats like a dream—no soggy bottoms here. I make a double batch on Sundays and freeze half; by Wednesday, it’s my go-to when I’m craving comfort but don’t want to cook.
Step-by-step instructions for herb-infused butternut squash pot pie
Here's the method for creating a velvety squash filling with a golden, flaky crust that seals in all the aromatic flavors.
Roast the Butternut Squash Until Tender
Preheat your oven to 400°F. Toss the 3 lb butternut squash (already peeled and cubed) with 1 tablespoon olive oil, ½ teaspoon salt, and ¼ teaspoon black pepper. Spread the cubes in a single layer on a rimmed baking sheet.
Roast for 25-30 minutes until the squash is fork-tender and the edges are just beginning to caramelize. You'll know it's ready when the skin is slightly wrinkled and the flesh yields easily to gentle pressure. Remove from the oven and let cool slightly before transferring to a mixing bowl.
Build the Herb-Infused Roux and Sauce
In a large, heavy-bottomed pot, melt the 0.75 cup unsalted butter over medium heat. Add the 1 whole yellow onion (diced) and cook for 5 minutes until softened and translucent. Stir in the 4 cloves garlic cloves (minced) and cook for another 30 seconds until fragrant.
Sprinkle the 0.5 cup all-purpose flour over the mixture and whisk vigorously for 1-2 minutes until you achieve a smooth, pale roux with no floury taste. This is your flavor foundation—don't rush this step or you'll develop a raw flour flavor. Gradually whisk in the 1.5 cups heavy cream and 1.5 cups chicken broth, bringing the mixture to a gentle simmer.
Combine Filling Ingredients and Simmer
Add the roasted butternut squash to the pot along with the 2 tbsp fresh thyme, 1 tbsp fresh sage, 1 tsp salt, and 0.5 tsp black pepper. Stir gently to combine, then reduce the heat to low and let the mixture simmer for 10-12 minutes until it thickens slightly and the flavors meld together.
Here's the thing—you want the filling to be creamy but not gluey. It should coat the back of a spoon but still have a slight sheen. If it thickens too much, whisk in 1-2 tablespoons of water to reach your desired consistency. Remove from heat and let cool completely before assembling.
Assemble and Bake the Pot Pie
Preheat your oven to 375°F. Roll out the 1 package pie crust on a lightly floured surface to fit an 8-inch pie dish, leaving a ½-inch overhang on all sides. Transfer the crust to the pie dish and trim the excess, leaving the overhang intact.
Pour the cooled squash filling into the crust, spreading it evenly. Fold the overhang inward to create a decorative edge, then crimp it firmly with a fork or your fingers. Brush the top with the 1 whole large egg beaten with 1 tablespoon water, then sprinkle evenly with the 1 tablespoon granulated sugar.
Bake to Golden Perfection
Place the pot pie on a parchment-lined baking sheet to catch any drips, then bake for 35-40 minutes until the crust is deep golden brown and puffed in places. The filling should be bubbling gently at the edges, and the crust should be crisp to the touch.
Remove from the oven and let rest for 15-20 minutes before slicing. This resting period allows the filling to set slightly, preventing it from running out when you cut into the pie. Serve warm with a simple green salad or crusty bread to soak up every last bit of that creamy, herb-infused goodness.
Pro Tips For Making Squash Pot Pie
- Roast Squash Until Tender: I used to undercook the butternut squash, thinking it’d soften in the pie—wrong. Roast it at 400°F (200°C) for 25-30 minutes until it’s fork-tender, then scoop out the flesh. Overcooked squash turns to mush; undercooked stays chewy. Aim for that sweet, jammy texture.
- Deglaze with Broth Immediately: After browning the flour-butter roux, pour in the chicken broth right away while the pan’s still hot. Let it bubble for 2 minutes to lift up any stuck bits—this makes the sauce richer and prevents a grainy texture. Skipping this step means scraping burnt bits later (or worse, eating them).
- Salt the Heavy Cream: Heavy cream needs salt—more than you’d think, especially since the broth and butter are unsalted. Stir in ½ teaspoon of salt before mixing it into the roux. Trust me, the flavor difference is noticeable, and you’ll thank yourself when the pie tastes balanced.
- Use Cold Butter for the Crust: Cut the unsalted butter into cubes and freeze them for 10 minutes before mixing with flour. Cold butter creates flaky layers in the crust, while soft butter makes it tough. Pulse in a food processor just until pea-sized crumbs form—no need to overwork it. (Yes, even if you’re impatient like me.)
Essential equipment for squash pot pie
Pie Dish Essentials
A deep 8-inch pie dish is non-negotiable for this recipe—it provides enough space for the filling to expand while maintaining that perfect height-to-width ratio. I recommend Ceramic or glass dishes (like Pyrex) because they distribute heat evenly and prevent the bottom crust from getting soggy.
Avoid dark-colored metal dishes—they can make the crust burn before the filling is fully cooked. If you don’t have an 8-inch dish, a 9-inch dish will work, but reduce the oven temperature by 25°F to prevent over-browning. 🍽️
Roux Pot Requirements
For the herb-infused roux, use a heavy-bottomed pot (like All-Clad or Le Creuset) to prevent scorching. A 3-quart pot is ideal—large enough to accommodate the filling but not so big that the mixture spreads too thin.
If you’re short on pots, a stainless steel saucepan works too, but monitor the heat closely to avoid sticking. A wooden spoon is your best friend for whisking the roux—it prevents the butter from burning and helps create that silky texture. 🧈
Crust Tools
A rolling pin with a smooth finish (like OXO Good Grips) makes rolling out the pie crust effortless, especially if you’re using store-bought dough. For trimming and crimping the edges, a sharp chef’s knife or a pie crust crimper tool (like Wilton’s) gives you that professional-looking finish.
If you’re making homemade crust, a pastry brush (for egg wash) and a small bowl (for mixing the egg wash) are must-haves. Pro tip: Chill the crust for 15 minutes before rolling to keep it from sticking. ❄️
Baking Sheet & Parchment
Line a rimmed baking sheet with parchment paper to catch any filling drips—this keeps your oven clean and prevents a soggy bottom crust. A half-sheet pan (13x18 inches) works perfectly, but any baking sheet will do.
If you’re worried about the pie shifting during baking, place it on the center rack of your oven for even heat distribution. For extra insurance, I like to use two layers of parchment under the pie dish to prevent sticking. 🔥
Thermometer & Timer
A kitchen thermometer (like Thermoworks Thermapen) ensures your filling reaches the perfect temperature—180°F for a creamy yet set consistency. I also recommend a timer (or your phone alarm) to avoid overbaking the crust.
The filling should be bubbling gently at the edges, and the crust should be deep golden brown (not pale). If you don’t have a thermometer, use the toothpick test: Insert a toothpick into the center—it should come out clean with no wet filling clinging to it. ⏱️
Nutrition facts
Frequently asked questions
Can I substitute butternut squash with another variety?
Acorn squash or delicata squash work beautifully—they're sweeter and hold their shape well when roasted. For a milder flavor, try hubbard squash, but it has a denser texture. Just adjust roasting time: acorn/delicata (20-25 mins) and hubbard (30-35 mins). The key is fork-tender flesh that's slightly caramelized at the edges.
How do I prevent a soggy bottom crust?
Use a pie dish with sloped sides (like glass or ceramic) and preheat it for 5 minutes in the oven before adding the crust. Chill the filled pie for 30 minutes before baking, and place it on a parchment-lined baking sheet to catch drips. The sugar sprinkle on top also helps create a barrier. For extra insurance, blind-bake the crust for 5 minutes before adding filling.
Can I make this pot pie ahead of time?
Yes! Assemble the pie completely, cover tightly with plastic wrap, and refrigerate for up to 24 hours before baking. The flavors develop even better overnight. For freezing, bake the pie, cool completely, wrap tightly in foil, and freeze for up to 3 months. Thaw overnight in the fridge and reheat covered in the oven at 350°F for 20 minutes. The crust may soften slightly but will crisp up with reheating.
What herbs can I use if I don't have thyme or sage?
Fresh rosemary (1 tsp) or tarragon (1 tbsp) add wonderful depth, while parsley (1 tbsp) brightens the flavor. For dried herbs, use half the amount (e.g., 1 tsp dried thyme instead of 2 tbsp fresh). Avoid strong herbs like oregano—they can overpower the delicate squash flavor. The key is balancing earthy (sage) with bright (thyme) notes for harmony.