
Desserts
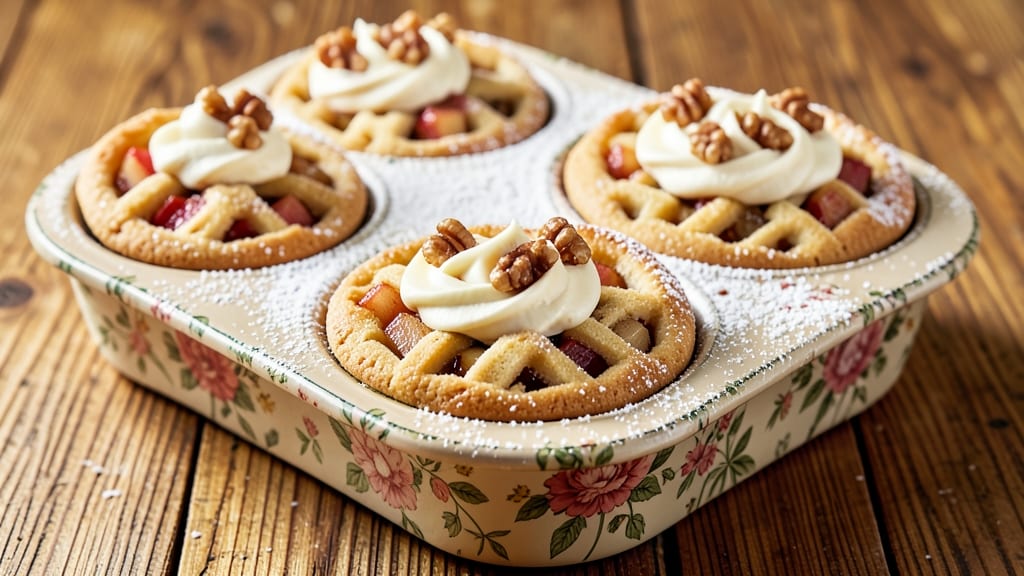
This apple pie cookie cups recipe delivers all the cozy, spiced flavors of classic apple pie in bite-sized, handheld portions. 🌟 The secret lies in a buttery sugar cookie dough shell that gets crisped to perfection, paired with a warm cinnamon-spiced apple filling that caramelizes beautifully during baking.
I developed this recipe after years of perfecting individual-sized desserts—no more cutting pie into awkward slices or dealing with soggy bottoms.
The magic happens in the two-step baking process: first, blind-baking the cookie cups for a sturdy base, then filling and baking until the edges turn golden and the filling bubbles at the top.
This method ensures each bite has that perfect balance of crispy shell and tender, spiced apple filling—just like your favorite pie, but in a form you can eat with one hand while watching the game.
What makes these cookie cups truly special is their versatility. You can make them ahead and freeze them for last-minute gatherings, or customize the filling with diced apples, apple butter, or even a mix of both.
The result? A dessert that’s easy to serve, impossible to resist, and packed with all the comforting flavors of fall in every bite.
Whether you're hosting a holiday party or just craving a nostalgic treat, these apple pie cookie cups are the perfect solution. They’re simple enough for weeknight baking but impressive enough for special occasions. Let’s get started on creating your own batch!
Ingredients for apple pie cookie cups
Twelve cozy ingredients for bite-sized apple pie magic—no pie pan needed.
| Ingredient | Amount | Notes |
|---|---|---|
| All-Purpose Flour 🌾 | 2 cups | Sifted for light texture |
| Unsalted Butter 🧈 | 1 cup | Cold, cubed for dough |
| Granulated Sugar 🍚 | ¾ cup | For dough sweetness |
| Large Eggs 🥚 | 1 whole | Room temperature |
| Vanilla Extract 🌸 | 1 tsp | Pure vanilla preferred |
| Salt 🧂 | ½ tsp | Fine sea salt |
| Ground Cinnamon 🌿 | 1 ½ tsp | For filling warmth |
| Brown Sugar 🍚 | ½ cup | Packed, for filling |
| Apple Butter 🍎 | ¾ cup | Unsweetened preferred |
| Apples 🍏 | 1 ½ cups | Diced, peeled, tart variety |
| Lemon Juice 🍋 | 1 tbsp | Freshly squeezed |
| Allspice 🌶️ | ¼ tsp | Ground for depth |
| Nutmeg 🌿 | ¼ tsp | Freshly grated |
| White Sugar 🍚 | ¼ cup | For sprinkling |
The dough is where it all starts. Butter matters here—use the cold, cubed kind from the fridge, not softened sticks. I grab Land O'Lakes unsalted for the perfect balance of richness. Flour? King Arthur or Gold Medal work best—no substitutions here. The sugar should be fine white granulated, but if you're feeling fancy, swap half for turbinado for a subtle crunch. And that vanilla? Pure extract, not imitation. Trust me, it makes a difference—especially when you're baking a dozen of these.
No apple butter? Mix unsweetened applesauce with a pinch of cinnamon—it's a game-changer. Tart apples like Granny Smith are ideal, but whatever's on sale works (just add a splash more lemon). Running low on allspice? Cinnamon plus a pinch of cloves gets you close. The filling needs to be thick but not dry—if it looks too loose, add a tablespoon of flour. And that sprinkle of sugar at the end? Don't skip it. It caramelizes beautifully and gives that perfect golden finish.
Dough keeps for 5 days wrapped in plastic in the fridge—make a double batch if you're hosting. The filling can be prepped ahead and stored for 3 days in the fridge, but I always make it fresh for maximum flavor. These freeze beautifully too—just bake them, cool completely, then store in an airtight container for up to 3 months. Pro tip: Reheat in the oven at 350°F for 5 minutes to restore that perfect crunch.
Why You'll Love This Recipe
- No Mixer Needed: I swear by this recipe because it’s all about the butter-and-flour magic—just creaming with your fingers until it’s crumbly but holds together. No electric mixer, no fuss, and the texture comes out just right every time.
- Caramelized Apple Magic: That first bite? Warm, spiced, with a gooey center that’s like biting into a mini apple pie. The cinnamon and sugar caramelize right in the oven, and the vanilla in the dough ties it all together—ridiculously good.
- Party in a Cup: Honestly, these are my go-to for holidays, potlucks, or even just a fancy dessert night. They’re single-serving but feel special, and you can make them ahead—just reheat for that fresh-baked taste.
- Budget-Friendly Indulgence: Uses pantry staples (flour, butter, sugar) and makes a dozen for under $5. Leftovers? They freeze like a dream, so I batch them when apples are cheap. My wallet and my sweet tooth win.
Step-by-step instructions for apple pie cookie cups
Here's how to create these perfect little apple pie bites with crispy edges and gooey centers.
👨🍳 Step 1: Make the Cookie Cup Dough
In a large mixing bowl, combine the 2 cups all-purpose flour, 0.5 tsp salt, 1.5 tsp ground cinnamon, 0.25 tsp allspice, and 0.25 tsp nutmeg. Whisk together until evenly distributed—you want no flour clumps for a tender cookie. Cut in the 1 cup cold cubed unsalted butter using a pastry cutter or your fingers until the mixture resembles coarse crumbs with pea-sized butter pieces.
Add the 0.75 cup granulated sugar and mix until combined. Create a well in the center and add the 1 whole large egg and 1 tsp vanilla extract. Gently mix with a fork until the dough comes together. If it seems too dry, add 1-2 teaspoons of cold water—just enough to hold together when pressed. Form the dough into a disk, wrap in plastic, and chill for 30 minutes while you prep the filling.
🍳 Step 2: Prepare the Apple Filling
In a medium bowl, combine the 1.5 cups diced apples, 0.5 cup brown sugar, 0.75 cup apple butter, 1 tbsp lemon juice, and 0.25 cup white sugar. Mix gently with a wooden spoon until the apples are evenly coated. The filling should look glossy and slightly sticky—this ensures maximum flavor transfer when baked. Taste and adjust sweetness if needed (I usually add a pinch more cinnamon at this stage).
Transfer the filling to a small saucepan and cook over medium-low heat for 8-10 minutes, stirring occasionally, until the apples soften slightly but still hold their shape. Let cool completely before using—this prevents the cookie cups from getting soggy during baking.
🔥 Step 3: Assemble and Bake the Cookie Cups
Preheat your oven to 350°F and line a baking sheet with parchment paper. Using a 2-tablespoon cookie scoop (or rounded spoon), portion the chilled dough into 12 equal balls and roll each between your palms to flatten slightly. Press each dough ball into a greased mini muffin tin (about 24 cavities) using your thumb, creating a ¼-inch thick crust around the edges.
Fill each pressed dough cup with 1 tablespoon of cooled apple filling, mounding it slightly in the center. Bake for 12-14 minutes until the edges are golden brown and the tops look slightly puffed. The centers should still look soft—this is perfect! Rotate the pan halfway through baking for even browning.
⏰ Step 4: Finish and Serve Warm
Remove the cookie cups from the oven and let them cool in the pan for 2 minutes before carefully transferring to a wire rack. Here's the fun part—use a small spoon to gently press down on each center, creating that classic "cookie cup" dip. The filling should be warm and gooey, with crispy edges that hold their shape.
Serve immediately while still warm—these are best enjoyed straight from the oven with a scoop of vanilla ice cream or a dollop of whipped cream. If storing, keep in an airtight container for up to 3 days, but honestly? They won't last that long. The contrast of warm spiced apple filling with crispy cookie edges is pure magic.
Pro Tips For Making Apple Pie Cookie Cups
- Chill the Dough First: I learned this the hard way—rolling out cold cookie cup dough straight from the fridge makes all the difference. The butter stays solid, the texture holds together, and you won’t end up with greasy, crumbly cups that fall apart when baking.
- Use Room-Temp Eggs: Cold eggs mix unevenly and leave pockets of wet dough that won’t bake properly. Let them sit out for 30 minutes before cracking—your cups will have a smoother texture and rise better in the oven.
- Don’t Overfill the Cups: Stuffing them too full makes the edges puff unevenly and can cause spillage. Fill each muffin cup about ¾ full—this gives the dough room to expand and creates that perfect dome shape.
- Press Down Firmly: After baking, press each cup gently but firmly into its final shape while still warm. This locks in the crisp edges and prevents them from spreading out as they cool—no more flat, sad-looking bottoms.
Make-ahead tips for this dish
Dough Prep Ahead
Make the cookie cup dough up to 5 days in advance and store it wrapped tightly in plastic in your fridge. I always prep mine the night before—it saves time and ensures the butter stays cold for perfect texture.
When ready to bake, let the dough sit at room temperature for 10 minutes before rolling to prevent cracking. 🌙
Filling Prep
The apple filling can be prepped 3 days ahead and stored in an airtight container in the fridge. I like to make it the day before because the flavors deepen overnight.
If using fresh apples, cook them just until tender—overcooking releases too much moisture, which can make your cookie cups soggy. Let the filling cool completely before assembling. ❄️
Freezing Fully Baked
These cookie cups freeze beautifully after baking! Cool them completely, then place in a single layer on a tray before transferring to a ziplock freezer bag or airtight container. They’ll keep for up to 3 months.
To serve, thaw at room temperature for 1 hour or reheat in a 350°F oven for 5 minutes to restore that perfect crunch. 🧊
Portioning Shortcut
Save time by using a 2-tablespoon cookie scoop for even dough portions. I keep mine in the freezer between batches to maintain consistent size. For the filling, a small ice cream scoop works perfectly—just pack it firmly into each cup.
This ensures every bite has the same delicious balance of crispy shell and gooey center. ⏱️
Make-Ahead Serving
Assemble the cookie cups 24 hours before serving and store them in an airtight container at room temperature. The filling will firm up slightly but still be warm and gooey when served.
I love using these for holiday parties—they’re easy to grab and eat, plus they look stunning on a platter with a dusting of powdered sugar. 🎄
Double Batch Tip
If you're hosting, double the recipe and bake two batches. The dough can be divided into two disks and chilled separately. Store the extra baked cookie cups in the fridge for up to 3 days or freeze them.
I always make a backup batch because they disappear faster than you think! 🍴
Nutrition facts
Frequently asked questions
Can I make these without a mini muffin tin?
Use 24 regular muffin tin cavities or even a standard 12-cup muffin tin—just press the dough thinner to create a wider base. For a rustic look, try ramekins or small oven-safe dishes (about 3-4 inches wide). The key is maintaining that ¼-inch thick edge for crispiness.
Why did my cookie cups turn out soggy?
Soggy centers usually happen when the filling is too wet or the dough isn't baked long enough. First, ensure your apples are fully cooked and cooled before filling. Second, bake until the edges are golden brown (not just set)—this takes 12-14 minutes at 350°F. For extra insurance, chill the assembled cups for 30 minutes before baking.
Can I use store-bought pie crust instead?
Yes, but with adjustments! Roll out 1 sheet of refrigerated pie crust and cut into 12 circles using a 2-inch round cutter. Press into the muffin tin and bake for 5 minutes at 375°F to crisp the edges before adding filling. Reduce baking time by 2-3 minutes afterward since pie crust bakes faster than cookie dough.
How do I make these gluten-free?
Swap the all-purpose flour for a 1:1 gluten-free baking flour blend (like Bob's Red Mill) plus ½ tsp xanthan gum. Replace the butter with vegetable shortening or coconut oil for better texture. The dough may be slightly crumbly, so press it firmly into the tin. Bake at 350°F for 15-17 minutes—gluten-free dough needs extra time to crisp.
What's the best way to serve these at a party?
Arrange them on a wooden board or slate platter with a dusting of powdered sugar for an elegant touch. Add mini scoops of vanilla ice cream or whipped cream on the side. For extra flair, drizzle with caramel sauce or sprinkle with chopped pecans. Keep them warm in a 200°F oven until serving.