
Desserts
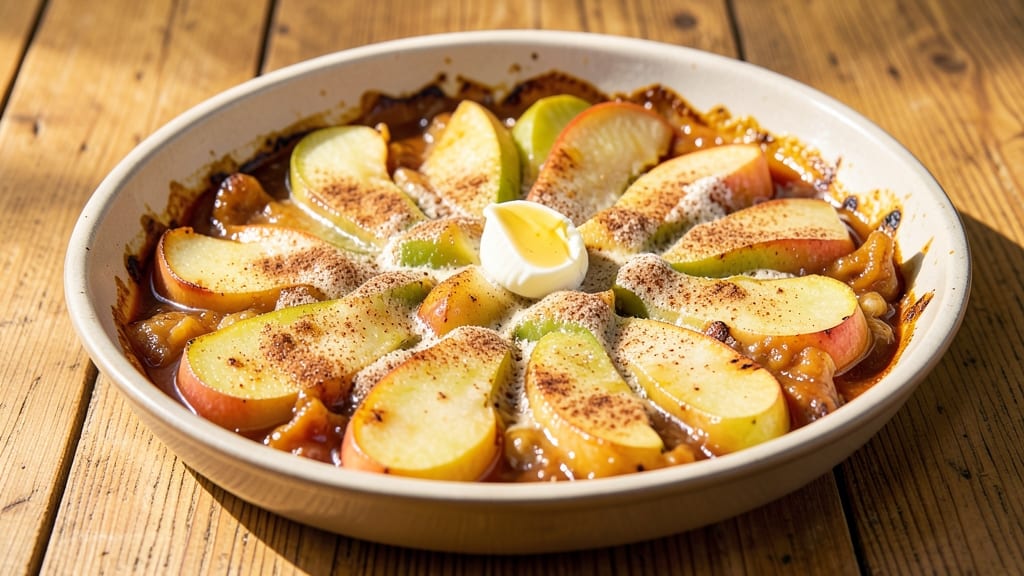
This sautéed apple pie filling transforms ordinary pies into showstoppers with its warm spice-infused center that balances sweetness and tang. The secret lies in properly sautéing apples until tender yet still holding their shape, then thickening with a simple flour-sugar blend that creates that signature pie filling texture.
I've perfected this technique over years of baking, and it's the difference between a good pie and a great one.
The process is straightforward but requires attention to timing—cooking the apples just until they release their juices and soften slightly ensures they don't turn mushy in the oven. A proper spice blend (cinnamon, nutmeg, and allspice) adds depth that store-bought fillings can't match, while lemon juice brightens the flavors.
This filling works equally well in classic apple pies, hand pies, or even as a topping for ice cream.
What you'll end up with is a rich, aromatic filling that's thick enough to hold its shape when baked but still juicy enough to create that perfect balance of tender apples and flaky crust.
The spices develop beautifully during baking, creating layers of warmth that make every bite feel like autumn in a slice. This is the kind of homemade filling that turns dessert into an experience.
Use this filling immediately for fresh pies, or store it in the refrigerator for up to 2 days. For best results, let the filling cool completely before assembling your pie to prevent a soggy crust.
The possibilities are endless—try it in a lattice-topped pie, mini hand pies, or even as a filling for galettes. Here's how to make it perfectly every time.
Ingredients for sauteed apple pie filling
Six apples, five spices, and a touch of magic for that perfect pie filling.
| Ingredient | Amount | Notes |
|---|---|---|
| Apples (Granny Smith and Honeycrisp mix) 🍎 | 4 medium | Peeled, cored, sliced thin |
| Granulated Sugar 🍚 | ¾ cup | Light brown sugar for depth |
| All-Purpose Flour 🌾 | ¼ cup | For thickening filling |
| Unsalted Butter 🧈 | ½ cup | Cold, cubed for sautéing |
| Ground Cinnamon 🌿 | 2 tsp | Freshly ground preferred |
| Ground Nutmeg 🌿 | ½ tsp | Freshly grated nutmeg |
| Ground Allspice 🌶️ | ¼ tsp | For warm spice depth |
| Lemon Juice 🍋 | 1 tbsp | Freshly squeezed |
| Vanilla Extract 🌸 | ½ tsp | Pure vanilla preferred |
| Salt 🧂 | ½ tsp | Kosher or sea salt |
| Heavy Cream 🥛 | ¼ cup | Optional for richness |
The apples are everything—Granny Smith and Honeycrisp give you that perfect balance of tart and sweet. Local farmers markets often have the best selection, but any mix of crisp apples works. I usually grab a mix of Granny Smith for tartness and Honeycrisp for sweetness. Slice them thin so they cook fast but don't turn to mush. The butter? Use unsalted—you're controlling the salt here, not the butter. And trust me, cold cubed butter sautéed in its own fat makes this filling taste like it came from a bakery.
No Granny Smith? Fuji or Pink Lady hold up well too. Short on cinnamon? Cardamom or ginger at half the amount adds a different kind of warmth. The heavy cream is optional, but if you're making this for a lattice-topped pie, it adds that extra richness that makes the crust shine. Want to skip it? Substitute an extra tablespoon of butter—same effect, different texture. Fresh lemon juice is non-negotiable though—it's what keeps the filling from getting too sweet. If you're using dried spices, toast them lightly in a dry pan first to wake up the flavors.
This filling keeps for 2 days in the fridge, but honestly, it's best used fresh. If you're prepping ahead, store it in an airtight container with a layer of plastic wrap pressed right on top to keep it from drying out. Freeze for up to 3 months if you're really planning ahead—just thaw overnight in the fridge before using. I always make a double batch because once you taste homemade, store-bought filling is just sad. And if you've got leftover filling? Toss it on pancakes or ice cream—it's that good.
Why You'll Love This Recipe
- No-Pie Day Fix: I keep a jar of this in my fridge for lazy mornings—just heat it up with yogurt or oatmeal, and suddenly breakfast feels like a cozy autumn hug. The apples stay tender, not mushy, because we’re talking sautéed, not baked, so no waiting for an oven.
- Sweet-Savory Magic: Granny Smith’s sharp bite meets Honeycrisp’s juicy sweetness, then gets a hug from cinnamon and butter that makes me question why I ever ate plain apples. Honestly, the flour thickens it just enough to feel like dessert, but not so much that it turns into glue.
- Leftovers That Work: This stuff doesn’t just disappear after one serving. I’ve used it to top pancakes, stir into pancake batter, or even dumped it into a skillet with cream for a 10-minute breakfast. Between us, I’ve fed a crowd with half a batch—just portion it out before you sauté.
- Pantry Staple Power: Five ingredients, none of which cost an arm and a leg. Butter and flour are always on hand, and apples? You can use whatever’s on sale. I’ve made this with bruised apples, overripe apples—even the ones I forgot in the crisper. It’s the kind of recipe that turns grocery day into a win.
Step-by-step instructions for sautéed apple pie filling
Here's how to make a perfectly balanced apple pie filling with tender apples and rich spice notes.
Sauté the Butter and Apples
Place the 0.5 cup unsalted butter in a large, heavy-bottomed skillet over medium heat. Let it melt completely, then add the 4 medium sliced apples (Granny Smith and Honeycrisp mix). Cook for 5-6 minutes, stirring occasionally, until the apples begin to soften and release their juices.
This is where the magic starts. You'll see the apples release a golden liquid—this is the foundation of your filling. If the butter starts to brown too quickly, reduce the heat slightly to medium-low. The apples should be tender but still hold their shape slightly, not completely mushy. Here's the thing—don't rush this step. Properly sautéed apples develop deeper flavor and create a better texture in your pie.
Add Sugar and Spices
Increase the heat to medium-high and sprinkle the 0.75 cup granulated sugar evenly over the apples. Stir well to distribute the sugar completely. Then add the 2 teaspoons ground cinnamon, 0.5 teaspoon ground nutmeg, 0.25 teaspoon ground allspice, and 0.5 teaspoon salt. Mix thoroughly so every apple slice is coated in the spice-sugar mixture.
Cook for another 5-6 minutes until the sugar begins to caramelize and the filling starts to thicken. You'll notice the aroma becoming more intense—this is the warm spice profile developing. The filling should look glossy and slightly syrupy. If it's not thickening enough, you might need to cook it a bit longer, but don't let it burn. I've found that using light brown sugar here adds depth that regular white sugar can't match.
Thicken with Flour and Finish with Lemon
Reduce the heat to medium-low and sprinkle the 0.25 cup all-purpose flour evenly over the apple mixture. Stir continuously for 1-2 minutes until the flour is fully incorporated and the filling begins to thicken. This step is crucial—it prevents your pie from being too runny.
Next, add the 1 tablespoon lemon juice and 0.5 teaspoon vanilla extract. Stir well and cook for another 2-3 minutes until the filling reaches your desired consistency. It should coat the back of a spoon but still be slightly loose—this ensures it doesn't get gummy in your pie. The lemon brightens the flavors while the vanilla adds warmth. If the filling is too thick, you can add 1-2 tablespoons of water to loosen it up.
Optional Creamy Finish
For an extra-rich filling, stir in the 0.25 cup heavy cream during the last minute of cooking. This adds a velvety texture that pairs beautifully with flaky pie crust. The cream should be warmed through but not boiling—just enough to blend smoothly into the filling.
Remove the skillet from heat and let the filling cool for 5-10 minutes before using. This resting period allows the flavors to meld completely. The filling should be thick enough to hold its shape when spooned but still spreadable. If you're making the pie immediately, this filling will give you that perfect balance of tender apples and rich, spiced sauce that makes every bite irresistible.
Pro Tips For Making Sauteed Apple Pie Filling
- COOK APPLES IN BATCHES: If you’re using a small skillet, work in two rounds—cut, sauté, then set aside the first batch before adding more. I learned this the hard way when my kitchen smelled like burnt apples and my filling turned into glue.
- USE COLD BUTTER: Cut that unsalted butter into cubes and let it chill for 10 minutes before adding it to the pan. Cold butter melts slower, giving the apples time to soften without turning into a greasy mess.
- SKIP THE OVERMIXING: Once you toss the flour and sugar with the apples, stir just until the flour disappears—about 10 seconds. Overmixing turns the filling into dough, and nobody wants pie filling that behaves like pancake batter.
- PAT DRY THE APPLES: After peeling and slicing, spread the apples on a towel and blot them dry with a paper towel. Wet apples steam instead of caramelize, and you’ll end up with a soggy, underwhelming filling.
Creative variations of this sauteed apple pie filling
Spiced Rum Twist
Add 1 tablespoon dark spiced rum (like Kahlúa) when you stir in the lemon juice and vanilla. The alcohol cooks off, leaving behind warm caramel and vanilla notes that deepen the filling's complexity.
This works especially well with Honeycrisp apples—the natural sweetness pairs beautifully with the rum's warmth. 🌟
Caramel Apple Swirl
Before adding the flour, stir in ¼ cup caramel sauce (homemade or store-bought like Smucker's) and let it melt into the apples. Then, after removing from heat, swirl in 2 tablespoons chopped pecans for texture.
This variation is perfect for mini apple hand pies where you want that gooey-sweet surprise in every bite.
Cranberry-Orange Zing
Fold in ½ cup chopped dried cranberries and 1 teaspoon orange zest during the final minute of cooking. The cranberries add tartness that cuts through the sweetness, while the orange zest brightens the whole filling.
This combo is ideal for a lattice-topped pie where the contrast of colors and flavors really shines. 🍊
Cheddar Cheese Surprise
For a savory-sweet twist, stir in ½ cup shredded sharp cheddar (like Cabot) during the last minute of cooking. The cheese melts into the filling, creating pockets of creamy goodness that balance the sweetness.
This variation works surprisingly well in apple galettes or as a filling for apple hand pies with a flaky crust.
Brown Butter Boost
Brown the ½ cup butter until golden (about 3-4 minutes) before adding the apples. The nutty, caramelized flavor adds depth that transforms this into a next-level filling.
For extra richness, finish with 1 teaspoon brown butter stirred in at the end. This variation is perfect for holiday pies where you want that extra-special touch. 🔥
Coconut Cream Dream
Replace the heavy cream with ½ cup coconut cream (chilled overnight) for a dairy-free option. Whisk it in during the final minute of cooking for a luscious, tropical twist.
The coconut pairs surprisingly well with the warm spices, creating a filling that feels both nostalgic and innovative. This works beautifully in vegan apple pies with a flaky crust.
Nutrition facts
Frequently asked questions
Can I use this filling in other desserts besides pie?
This rich, spiced filling works beautifully in mini hand pies, galettes, or even as a topping for ice cream or pancakes. The thick, aromatic texture holds up well in baked goods, while the bright lemon and warm spices make it perfect for breakfast treats too. Just adjust baking times based on your dessert type.
Why does my filling turn out too runny?
Runny filling usually happens when the apples release too much liquid or the flour isn't cooked long enough. To fix this, cook the flour mixture 1-2 minutes longer until it thickens, or add 1 tablespoon cornstarch mixed with cold water to stabilize it. Also ensure your apples are sliced thinly and cooked just until tender—not mushy.
Can I make this filling ahead of time?
Yes! Store the cooled filling in an airtight container for up to 2 days in the fridge. For longer storage, freeze it for 3 months. Thaw overnight in the fridge before using. The flavors actually develop more overnight, making it perfect for weekend baking. Just let it sit at room temperature for 10 minutes before assembling your pie.
What's the best apple variety for this recipe?
The perfect mix is Granny Smith (tart) and Honeycrisp (sweet), but any crisp apple works. If you only have one variety, use Fuji or Pink Lady for sweetness or Braeburn for tartness. Avoid mealy apples like Gala—they won't hold up well in baking. The key is choosing apples that stay firm when cooked.
How do I prevent a soggy pie crust?
Prevent soggy crust by letting the filling cool completely before assembling, then sprinkle the pie crust with 1 tablespoon sugar or crushed cornflakes before adding the filling. For extra insurance, blind-bake the crust for 5-7 minutes before filling. The filling should be thick enough to hold its shape when spooned—this ensures it doesn't leak into the crust during baking.