
Desserts
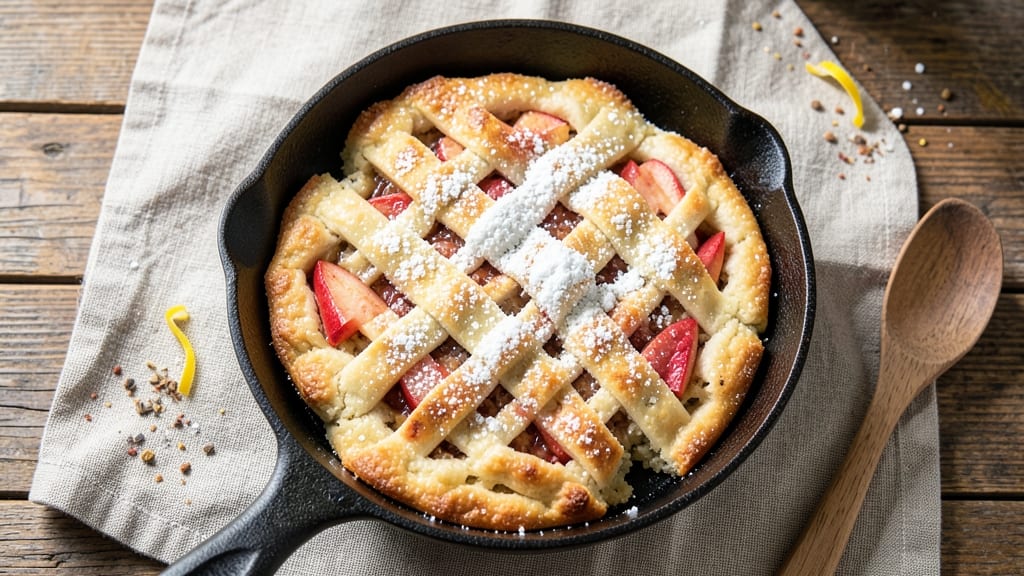
This skillet apple pie biscuits recipe delivers the perfect handheld dessert—flaky, golden biscuit crusts cradling warm, spiced apple filling in one pan. The magic happens when buttery layers of biscuit dough wrap around tender, caramelized apples, creating a dessert that’s both rustic and restaurant-worthy.
I developed this recipe after years of testing, ensuring every bite balances crisp edges with soft, buttery centers and bursts of cinnamon-spiced apple.
The beauty of this skillet method is its simplicity: no pie dish required, just a cast-iron skillet that transforms a simple dough and filling into something extraordinary.
The biscuit dough comes together in minutes with a few pantry staples, while the apple filling simmers down to a thick, fragrant compote that clings to the crust. The result is a dessert that’s easy to serve—no plates needed—just tear-and-share perfection straight from the skillet.
What makes these biscuits truly special is the contrast between the flaky, buttery crust and the tender, spiced apple filling. Each bite delivers a harmony of textures and flavors: the crispness of the biscuit, the softness of the apples, and the warmth of cinnamon and nutmeg.
The skillet ensures even baking, so every piece comes out golden and inviting, with just the right amount of caramelization on the edges.
Serve these warm with a drizzle of vanilla ice cream or a dusting of powdered sugar for an extra touch of sweetness. They’re ideal for brunch gatherings, holiday desserts, or a cozy weekend treat—all while keeping prep and cleanup to a minimum. Let’s get baking!
Ingredients for skillet apple pie biscuits
Buttery biscuit dough and spiced apple filling—just 13 ingredients for restaurant-worthy skillet dessert.
| Ingredient | Amount | Notes |
|---|---|---|
| All-Purpose Flour 🌾 | 2 cups | Sifted for flaky texture |
| Cold Unsalted Butter 🧈 | ¾ cup | Cut into small cubes |
| Granulated Sugar 🍚 | ¼ cup | Plus 2 tbsp for filling |
| Baking Powder 🧂 | 1 ½ tsp | For lift and flakiness |
| Salt 🧂 | ½ tsp | Fine sea salt preferred |
| Granny Smith Apples 🍎 | 4 medium | Peeled, cored, sliced thin |
| Light Brown Sugar 🍚 | ¼ cup | Packed for filling |
| Ground Cinnamon 🌿 | 1 ½ tsp | For warm spice |
| Ground Nutmeg 🌿 | ¼ tsp | Freshly grated preferred |
| Lemon Juice 🍋 | 1 tbsp | Freshly squeezed |
| Heavy Cream 🥛 | ¼ cup | For tender filling |
| Vanilla Extract 🌸 | ½ tsp | Pure vanilla preferred |
| Powdered Sugar 🍚 | 2 tbsp | For dusting |
The butter is non-negotiable here. European-style butter from Land O'Lakes or Plugrá gives the best flavor, but any cold, high-fat butter works. Cut it into small cubes before mixing—never melt it, or your biscuits will turn out tough. For the apples, Granny Smiths are ideal (their tartness balances the sweetness), but Honeycrisp or Fuji work too. Peel them first—no one wants tough apple skin in their dessert. The filling needs to be thick enough to cling to the crust, so don't skip the heavy cream or the simmer time.
No brown sugar? White sugar plus 1 tsp molasses gets you close. Short on butter? Coconut oil or shortening works in a pinch, but the flavor won't be as rich. The baking powder is crucial—don't use baking soda. For a gluten-free version, swap the flour for a 1:1 gluten-free blend (like Bob's Red Mill), but expect slightly denser biscuits. The lemon juice brightens the filling, so if you're out, white vinegar at half the amount works. And trust me on the nutmeg—it's subtle but makes all the difference.
The dough keeps best in the fridge for 2 days wrapped tightly in plastic, or freeze it for 3 months in a sealed bag. The filling can be prepped ahead and stored in the fridge for 1 day—just reheat it gently before assembling. These biscuits are best served warm, straight from the skillet. Store leftovers at room temperature for 2 hours max—they go stale fast. For make-ahead baking, freeze fully assembled biscuits (before baking) for 1 month, then bake straight from frozen with an extra 10 minutes.
Why You'll Love This Recipe
- No-Roll Pastry Magic: I swear by the cold butter cut into flour—it’s flaky without the fuss of pie crust. Just mix, press, bake. No rolling pin, no stress.
- Sweet-Spiced Crunch: That caramelized sugar crust? It’s the star. The buttery biscuit base meets the warm apple filling—like dessert hugging breakfast in the best way.
- Breakfast or Dessert: Serve it with coffee for a morning pick-me-up or save it for after-dinner cravings. Honestly, I’ve eaten it both ways and never regretted it.
- Budget-Friendly Leftovers: Uses pantry staples and makes enough for seconds. Reheat slices in the toaster for a crispy edge—my kids beg for these, and I’m not ashamed.
Step-by-step instructions for skillet apple pie biscuits
Here's how to create a perfect balance of flaky crust and spiced apple filling in one skillet.
Prepare the Dough for Maximum Flakiness
In a large bowl, combine the 2 cups all-purpose flour, 1.5 teaspoons baking powder, and 0.5 teaspoon salt. Whisk gently to distribute evenly. Add the 0.75 cup cold unsalted butter, cut into small cubes, and use a pastry cutter or your fingers to work it into the flour until the mixture resembles coarse crumbs with pea-sized butter pieces remaining.
This cold butter technique is crucial for flaky layers. The butter should stay in distinct pieces throughout the process—don't overwork it. Press the dough together lightly, then divide it into two equal portions. Flatten each portion into a 3-inch circle and wrap individually in plastic wrap. Chill in the refrigerator for 30 minutes to firm up before rolling.
Roll and Layer the Dough
On a lightly floured surface, roll one chilled dough portion into a 10-inch circle, about 1/8-inch thick. Place it in a 10-inch cast-iron skillet, pressing gently to help it adhere to the bottom. Roll the second dough portion into another 10-inch circle. Sprinkle 0.25 cup granulated sugar evenly over the first dough layer.
Here's where the flakiness magic happens: Place the second dough circle on top of the sugar layer, again pressing lightly to seal the edges. Trim any excess dough hanging over the skillet edge with a sharp knife. The dough should now form a perfect double-layered crust with sugar sandwiched between.
Prepare the Apple Filling
While the dough chills, peel, core, and slice the 4 medium Granny Smith apples into 1/4-inch thick slices. In a medium bowl, toss the apple slices with 0.25 cup light brown sugar, 1.5 teaspoons ground cinnamon, 0.25 teaspoon ground nutmeg, 1 tablespoon lemon juice, and 0.5 teaspoon vanilla extract. Let the mixture sit for 10 minutes to allow the flavors to meld.
The lemon juice prevents the apples from browning while adding brightness that cuts through the sweetness. This step also helps the apples release their juices, which will create a perfect balance between tender apples and a lightly caramelized filling during baking.
Assemble and Pre-Bake the Crust
Preheat your oven to 375°F. Cut 6-8 small slits in the top crust of the assembled skillet biscuit, being careful not to cut all the way through. This allows steam to escape and prevents a soggy bottom. Pour the apple filling evenly over the bottom crust, mounding slightly in the center.
Bake for 25-30 minutes until the crust is golden brown and the filling begins to bubble through the slits. The edges should be set but the center should still have some softness. This pre-bake step ensures the crust gets crisp while the filling starts cooking but doesn't fully set yet.
Finish with Cream and Dust
Remove the skillet from the oven and immediately pour 0.25 cup heavy cream evenly over the hot filling. Return to the oven and bake for an additional 10-15 minutes until the cream has thickened and the filling is bubbly but still slightly soft in the center.
Let the skillet apple pie biscuits cool for 5 minutes before dusting generously with 2 tablespoons powdered sugar. Serve warm with vanilla ice cream or whipped cream. The contrast of the warm, spiced apples with the cool cream creates the perfect balance of textures and temperatures.
Pro Tips For Making Skillet Apple Pie Biscuits
- Use a Cast-Iron Skillet: I learned this the hard way—lightweight pans won’t hold heat long enough for the bottom crust to get that deep, golden caramelization. Cast iron retains heat like a champ, so if you don’t have one, a heavy stainless steel will work in a pinch.
- Cut Butter in Small Pieces: I was skeptical until I tried it—using ½-inch cubes of cold butter instead of big chunks means they melt just enough to create pockets of flaky goodness without turning the dough greasy. Skip the food processor unless you want dense biscuits.
- Don’t Overmix the Dough: After burning three batches, I finally figured out that folding the dry ingredients into the wet just until combined is non-negotiable. The second you start stirring like you’re making pancake batter, you’ll end up with tough, chewy biscuits instead of tender layers.
- Press the Top Crust Firmly: This isn’t the prettiest method, but it’s the tastiest—use the palm of your hand to press the top crust down hard around the edges before cutting the slits. It seals in the filling and prevents the biscuits from puffing up like sad soufflés. (Yes, even if you’re impatient like me.)
Serving suggestions for skillet apple pie biscuits
Warm Serving Style
Serve these skillet apple pie biscuits straight from the oven while still warm—this ensures the crust stays crisp and the filling remains tender. Use a large serving spoon to scoop out generous pieces directly from the skillet, letting guests tear them apart with their hands.
The residual heat keeps everything gooey and delicious for about 15-20 minutes after baking. 🥄
Classic Toppings
A dusting of powdered sugar right before serving adds a sweet, snowy finish that contrasts beautifully with the warm apples. For extra indulgence, drizzle with vanilla bean ice cream or pour a warm caramel sauce over the top.
I love adding a dollop of whipped cream on the side for dipping—it’s a crowd-pleaser at any gathering.
Handheld Presentation
These biscuits are perfect for serving family-style—just place the skillet in the center of the table and let everyone dig in. For a more polished look, transfer pieces to individual plates and garnish with a few extra apple slices or a sprinkle of toasted pecans.
The rustic, handheld appeal makes them ideal for brunch or holiday desserts where ease of serving matters.
Make-Ahead Serving
If you’re planning ahead, assemble the biscuits (unbaked) in the skillet and refrigerate overnight. Bake them fresh the next day, then reheat in a 350°F oven for 5-10 minutes to restore warmth.
For a frozen option, bake fully assembled biscuits, cool completely, then freeze in a single layer. Reheat in the oven at 350°F for 10-15 minutes until warmed through.
Pairing with Drinks
These biscuits pair wonderfully with iced coffee or a cold glass of milk to balance the warmth and richness. For a festive touch, serve with a spiced chai latte or a dry Riesling wine—the acidity cuts through the sweetness beautifully.
A classic apple cider or hot apple cider in the fall adds seasonal harmony. 🍏
Leftovers Strategy
Store leftovers in an airtight container at room temperature for up to 2 hours—they won’t stay fresh overnight. For longer storage, refrigerate for up to 2 days and reheat in a 350°F oven for 10 minutes to revive the texture.
To enjoy them cold, slice into wedges and serve with a scoop of vanilla ice cream for a deconstructed dessert.
Nutrition facts
Frequently asked questions
Can I make these without a cast-iron skillet?
Yes, but your results will differ slightly. Use a 10-inch oven-safe ceramic or stainless steel skillet instead. Cast iron distributes heat evenly for that signature crispy crust, but other materials work for a softer texture. Preheat your alternative skillet for 10 minutes to mimic the cast iron's heat retention.
How do I prevent the biscuits from getting soggy?
The key is pre-baking the crust first for 25-30 minutes before adding the cream. This creates a barrier between the filling and dough. Also, avoid overfilling—leave 1/2-inch space between the top crust and skillet edge. The slits in the top crust help steam escape, preventing sogginess.
Can I use frozen apples instead of fresh?
Use 4 cups frozen apple slices (thawed and drained) instead of fresh. Add 1 extra tablespoon lemon juice to prevent browning. Frozen apples work best when cooked longer—extend baking time by 5-10 minutes to ensure they're tender. The texture will be slightly softer but still delicious.
Why did my biscuits turn out dense instead of flaky?
Overworking the dough or using warm butter are the most common causes. Keep everything cold and handle the dough minimally. The butter should remain in pea-sized pieces when mixed. Also, ensure your baking powder is fresh—old powder loses its leavening power. For extra flakiness, chill the assembled skillet biscuits for 15 minutes before baking.
What's the best way to serve these for a crowd?
Bake the biscuits in a 12-inch skillet for larger portions, or double the recipe in two 10-inch skillets. Serve family-style straight from the skillet with individual spoons for easy sharing. For a buffet setup, arrange pieces on a platter with small bowls of whipped cream and powdered sugar for guests to customize their servings.