
Desserts
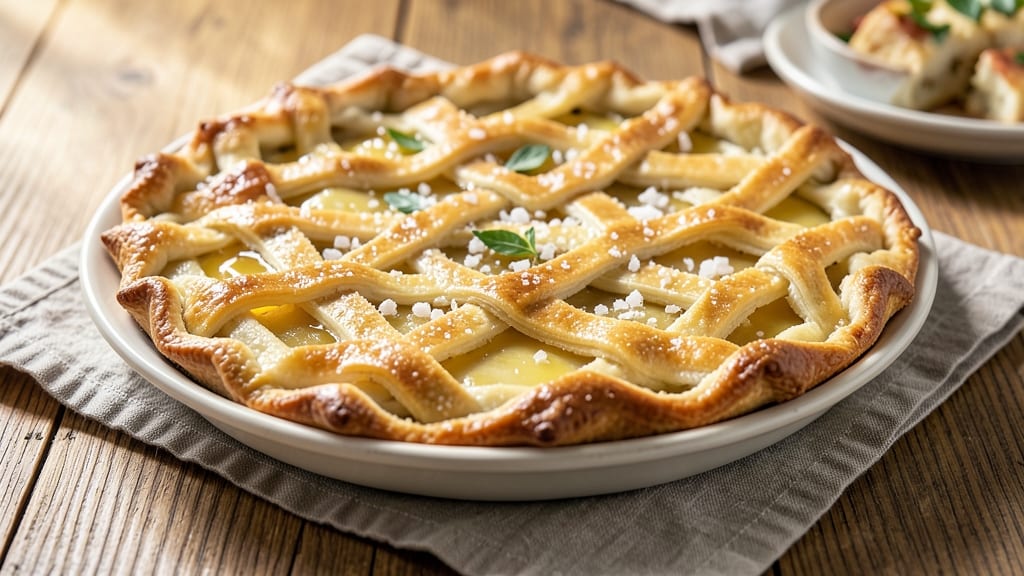
This amazing pie crust recipe delivers the kind of flaky, buttery layers that make every bite feel like a celebration. 💛 After years of trial and error (and a few burned attempts), I've perfected a method that creates that signature shatter-with-the-first-bite texture without requiring fancy techniques or expensive ingredients.
The secret lies in cold ingredients and minimal handling—cold butter cut into flour creates steam pockets that turn into those delicate, crisp layers. I use a mix of all-purpose and pastry flour for extra tenderness, and the key is keeping everything cold until it goes into the oven.
This isn't just any crust; it's the foundation for pies that taste like they came from a bakery.
What you'll end up with is a crust so light and crisp it practically dissolves on your tongue, with edges that stay golden and flaky even after baking. It's sturdy enough to hold your favorite fillings without sogginess, yet delicate enough to make every slice feel special.
Perfect for classic apple pie, savory quiche, or even hand pies—this crust does it all.
Once you try this, store-bought crusts will never be an option again. The best part? You can make the dough ahead and refrigerate it for up to 48 hours, so it's always ready when inspiration (or dessert cravings) strikes. Let's get started on creating your new favorite crust!
Ingredients for amazing pie crust
Cold butter, two flours, and a splash of vinegar—these simple ingredients create bakery-style crusts at home.
| Ingredient | Amount | Notes |
|---|---|---|
| All-Purpose Flour 🌾 | 2 ½ cups | Plus 2 tbsp for dusting |
| Pastry Flour 🍞 | ½ cup | For extra tenderness |
| Unsalted Butter 🧈 | 1 cup | Cold, cubed, not softened |
| Ice Water 💧 | ½ cup | Keep cold for crispness |
| Diamond Crystal Kosher Salt 🧂 | ½ tsp | Adjust to taste |
| Granulated Sugar 🍚 | 2 tbsp | Prevents browning |
| Large Egg Yolk 🥚 | 1 whole | For binding |
| White Vinegar 🍶 | 1 tsp | Adds stability |
The butter is non-negotiable—use unsalted sticks and keep them frozen until cutting into the flour. Store-brand butter works just as well as name brands if it's cold. For the flours, King Arthur all-purpose or Bob's Red Mill pastry flour are my go-tos, but any high-quality brands will do. The pastry flour adds tenderness, but if you're in a pinch, just use all all-purpose. Cut the butter into the flour mixture using a pastry cutter or your fingers—this creates those crucial steam pockets for flakiness.
No vinegar? Lemon juice works too. The egg yolk is optional but adds a slight richness—skip it if you're making a vegan version. For a richer crust, add 1 tbsp sour cream to the dough. If your kitchen gets warm, chill the dough between handling. The sugar prevents browning, but if you prefer a darker crust, reduce it to 1 tbsp. Don't overwork the dough—just mix until it comes together. Overmixing = tough crust.
Wrap the dough tightly in plastic and refrigerate for at least 1 hour before rolling. It keeps up to 48 hours in the fridge or 3 months frozen between parchment paper. For best results, let it sit at room temperature for 10-15 minutes before rolling. Roll it gently—don't press down. If it cracks, just patch it up. The crust tastes even better the next day after flavors meld, so make extra if you can.
Why You'll Love This Recipe
- No-Fuss Mixing: I swear by the ice water trick—just tossing cold cubes into the flour-butter blend keeps everything from turning into a greasy mess. No food processor? No problem. A fork and your hands do the job in minutes.
- Buttery Crisp Magic: That cold butter, cut into tiny pea-sized pieces, melts into flaky layers while staying crisp at the edges. Honestly, the first bite of a hot pie with that shatteringly thin crust? It’s the little things, right?
- Double-Duty Crust: Make two crusts at once and freeze one for later—no thawing needed. Works for pot pies (hello, weeknight dinners), hand pies (perfect for picnics), or even a quick galette when you’re in a rush.
- Pantry-Friendly Perfection: Pastry flour makes it lighter, but all-purpose works in a pinch. Salt is the only seasoning you need, and butter? You’re probably already using it. Budget-wise, this crust costs pennies but tastes like a bakery showstopper.
Step-by-step instructions for buttery pie crust layers
Here's how to create a crust so delicate it practically dissolves in your mouth.
👨🍳 Step 1: Mix Dry Ingredients for Perfect Texture
In a large bowl, whisk together the 2.5 cups all-purpose flour and 0.5 cup pastry flour until evenly combined. This blend gives you the perfect balance of structure and tenderness. Sift the mixture if you have any lumps, but don't worry if a few remain—we'll work them out later.
Add the 2 tbsp granulated sugar and 0.5 tsp Diamond Crystal kosher salt to the flour mixture. The sugar prevents excessive browning while adding just enough sweetness to complement savory fillings. Stir gently to distribute evenly. Here's the thing—this dry mix should look like fine powder with no visible flour clumps. If you see any, press them down with your fingers or pulse briefly in a food processor.
🍳 Step 2: Cut in Cold Butter Until Pea-Sized
Add the 1 cup cold, cubed unsalted butter to the flour mixture. Using a pastry cutter or your fingers, work the butter into the flour until you achieve pea-sized crumbs. This is crucial—you want the butter evenly distributed but still visible as small, distinct pieces. If the mixture starts to look like wet sand, you've gone too far and need to chill it for 10 minutes before continuing.
I press down gently on the butter pieces during this process—this prevents them from melting and ensures even distribution. The goal is to create a texture that resembles coarse cornmeal. If you see any large butter clumps, break them apart with your fingers. Remember, cold butter creates flaky layers, while warm butter makes a tough crust.
👨🍳 Step 3: Combine Wet Ingredients for Stability
In a small bowl, whisk together the 0.5 cup ice water, 1 whole large egg yolk, and 1 tsp white vinegar. The vinegar might seem odd, but it helps stabilize the crust by slightly acidifying the mixture. Keep this bowl in the freezer for 5 minutes to keep the water as cold as possible—this is key for maintaining crispness.
With a fork or rubber spatula, gradually add the cold water mixture to the flour-butter mixture. Start by sprinkling 1 tablespoon at a time and gently mixing with the fork until just combined. You'll know you've added enough when the dough begins to come together but isn't sticky. If it feels too dry, add another ½ teaspoon of water. If it's too wet, sprinkle in 1 teaspoon of flour. The dough should hold together when pressed but not be sticky to the touch.
⏰ Step 4: Chill and Rest for Maximum Flakiness
Shape the dough into a disk, wrap it tightly in plastic wrap, and refrigerate for at least 2 hours (or up to 48 hours). This chilling time is non-negotiable—it allows the gluten to relax and the butter to solidify further, which is what creates those beautiful flaky layers. I like to press the dough flat before wrapping to make rolling it out later easier.
Here's the moment that matters: when you're ready to roll, the dough should be cold and firm to the touch. If it feels soft or sticky, return it to the fridge for another 30 minutes. The longer you can chill it, the better the final result will be. Pro tip: place a tray of ice beneath the dough while it chills to ensure even cooling throughout.
🔪 Step 5: Roll and Transfer with Confidence
On a lightly floured surface, roll the chilled dough into a 12-inch circle about 1/8-inch thick. I always use the 2 tbsp all-purpose flour reserved for dusting here—it prevents sticking and makes rolling much easier. Rotate the dough a quarter turn after every few rolls to maintain even thickness.
Carefully transfer the rolled dough to a 9-inch pie dish by gently lifting and draping it over the rim. Here's where it gets fun—use your fingers to carefully press the dough into the pie dish, making sure it fits snugly in the corners. Trim any excess dough hanging over the edge with a sharp knife. The crust should look smooth and even, ready for your filling. If you see any cracks, gently press them closed with your fingers.
Pro Tips For Making Amazing Pie Crust
- Chill the Butter Hard: Take your unsalted butter out of the fridge and let it sit for 30 minutes before cutting—it should be cool but still pliable. I learned this the hard way when my crust turned greasy and fell apart; butter that’s too soft melts into flour instead of cutting cleanly.
- Mix with Ice Water: Use water straight from the freezer (or crushed ice) to keep the dough cold and prevent gluten from overdeveloping. Yes, it’s a pain to melt later, but the result is a flakier crust—no more tough, chewy bites.
- Skip the Overworking: Handle the dough as little as possible—just until it holds together. Every extra fold or stretch tightens the gluten, and suddenly your perfect flaky layers turn into a sad, dense brick. Less is more here.
- Use Pastry Flour for Crispness: Swap half the all-purpose flour for pastry flour if you’re feeling fancy—it’s lower in protein, so the crust stays crisp instead of tough. I was skeptical until I tried it; the difference is noticeable, especially in apple or custard pies.
Pro cooking tips for perfect results
Cold Butter Technique
Keep your butter cold—I mean freezer-cold—before cutting it into the flour. Pop those cubes in the freezer for 10 minutes before starting to ensure they stay firm. This prevents the butter from melting too quickly during mixing, which is what creates those signature flaky layers.
I've learned the hard way that room-temperature butter leads to tough crusts. 🧈
Use a pastry cutter or your fingers to work the butter into the flour until you get pea-sized crumbs. Press down gently with your fingertips to break up any large pieces—this ensures even distribution.
If the mixture starts looking like wet sand, stop immediately and chill it for 10 minutes before continuing. The goal is to maintain those cold butter pockets that will steam and create flaky layers when baked.
Minimal Handling Rule
Handle the dough as little as possible—every time you touch it, you risk warming it up and developing gluten, which makes the crust tough. When combining the wet ingredients, add them gradually (just 1 tablespoon at a time) and mix with a fork until just combined.
Overmixing is the enemy of flaky crusts. I promise you, the dough will feel underworked, but trust the process—it's designed this way for maximum tenderness. 💪
If the dough feels too dry, add ½ teaspoon of ice water at a time. Too wet? Sprinkle in 1 teaspoon of flour. The dough should hold together when pressed but not stick to your fingers.
If it cracks while rolling, just patch it up—no need to start over. Remember, imperfections often make homemade crusts even more charming.
Chilling is Non-Negotiable
Never skip the 2-hour chill—this is where the magic happens. The cold dough relaxes the gluten and allows the butter to solidify further, creating those perfect steam pockets. I like to press the dough into a flat disk before wrapping it in plastic to make rolling easier later.
Place it on a tray and refrigerate it flat—this prevents it from forming a ball that's hard to roll out later. ❄️
For best results, let the dough sit at room temperature for just 10-15 minutes before rolling. This makes it more pliable without losing its cold properties. If it feels too firm, return it to the fridge for another 15 minutes.
Pro tip: Place a tray of ice beneath the dough while it chills to ensure even cooling throughout—this is especially helpful in warm kitchens.
Rolling Without Tears
Use the 2 tablespoons of reserved flour to dust your rolling surface generously—this prevents sticking and makes rolling much easier. Roll the dough from the center outward, rotating it a quarter turn after every few rolls to maintain even thickness.
Aim for about 1/8-inch thickness—any thicker and you'll get a dense crust, any thinner and it might shrink during baking. 🔄
When transferring to your pie dish, gently lift and drape the dough over the rim. Use your fingers to press it into the corners—this prevents air pockets that could cause the crust to puff up unevenly.
Trim any excess dough with a sharp knife, leaving about ½-inch overhang before crimping. If it cracks, just press the edges together gently. The crust will hold together during baking, I promise!
Nutrition facts
Frequently asked questions
Can I substitute all-purpose flour for pastry flour?
Yes, you can! If you don't have pastry flour, use all all-purpose flour, but expect the crust to be slightly less tender. The pastry flour adds extra tenderness, but the recipe will still work beautifully. For best results, use a high-quality all-purpose flour like King Arthur or Bob's Red Mill. The key is keeping everything cold—this makes up for any slight texture differences.
How do I prevent the crust from shrinking during baking?
Shrinking happens when the dough isn't cold enough or is handled too much. Always chill the dough for at least 2 hours before rolling, and keep it as cold as possible while working. When transferring to the pie dish, make sure the dough fits snugly in the corners—this prevents it from pulling away. A light egg wash before baking also helps set the edges. If it shrinks slightly, don't worry—it's normal for homemade crusts!
What's the best way to blind-bake this crust?
For a perfect blind-bake, preheat your oven to 375°F and place the crust in a 9-inch pie dish. Line it with parchment paper, fill with pie weights or dried beans, and bake for 15 minutes. Remove the weights, prick the bottom with a fork, then bake for another 5-7 minutes until lightly golden. The key is even heat—rotate the dish halfway through if needed.
Can I use this crust for savory dishes like quiche?
This crust works perfectly for savory dishes. For quiche, brush the pre-baked crust with a thin layer of egg wash before adding your filling. The buttery flavor pairs beautifully with cheese and veggies. Just be sure to bake it fully before adding the filling—this prevents a soggy bottom. A fully baked crust holds up well to rich custards and hearty toppings.
Why did my crust turn out tough instead of flaky?
Tough crusts usually happen from overworking the dough or using warm butter. Keep everything cold, handle the dough minimally, and avoid overmixing. If the butter melts during mixing, chill the dough for 10 minutes before continuing. Also,